Adding text over an image in Microsoft Word is a skill that seems complicated at first. However, it becomes very simple once you understand how Word handles images and text.
Whether you’re creating worksheets, posters, classroom resources, or revision guides, newsletters, or displays, you’ll use this formatting skill repeatedly.
In this guide, I’ll walk you through two reliable methods for placing text over an image in Word. I will explain why Word behaves the way it does. I will also show you how to avoid the most common mistakes that frustrate users.
Watch the Video Tutorial
If you prefer to see this in action, the full video walkthrough is below, showing each method step by step.
How to Add Text Over an Image in Microsoft Word
Step 1: Insert Your Image Properly
Before adding text, you need your image placed correctly.
Steps:
- Open a new Word document
- Click Insert
- Select Pictures
- Choose the location of your image (or paste an image if copied)
- Find your image and click Insert

Resize the image using the corner handles (not the side handles, which distort it).

At this stage, you’ll notice you can’t move it freely. That’s normal.
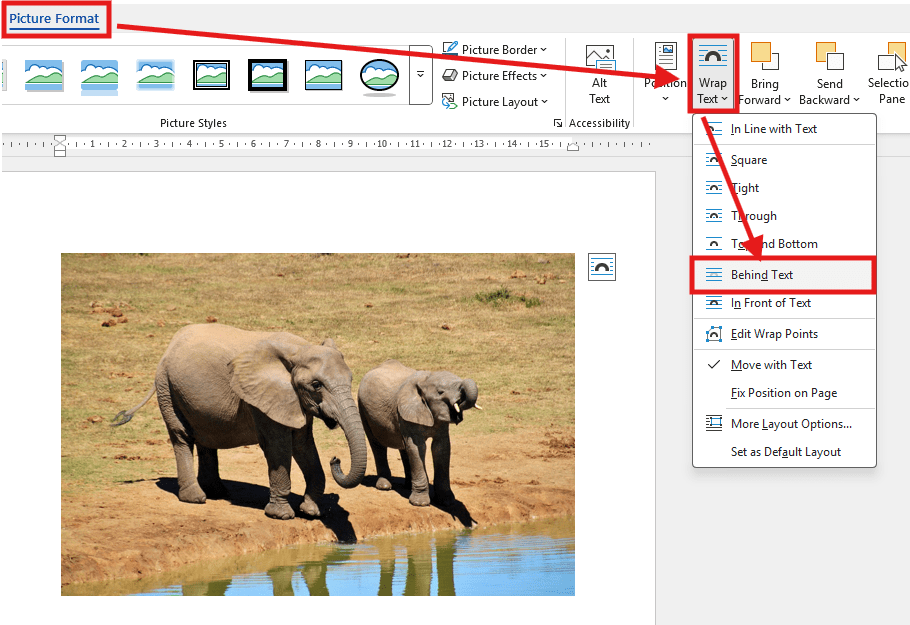
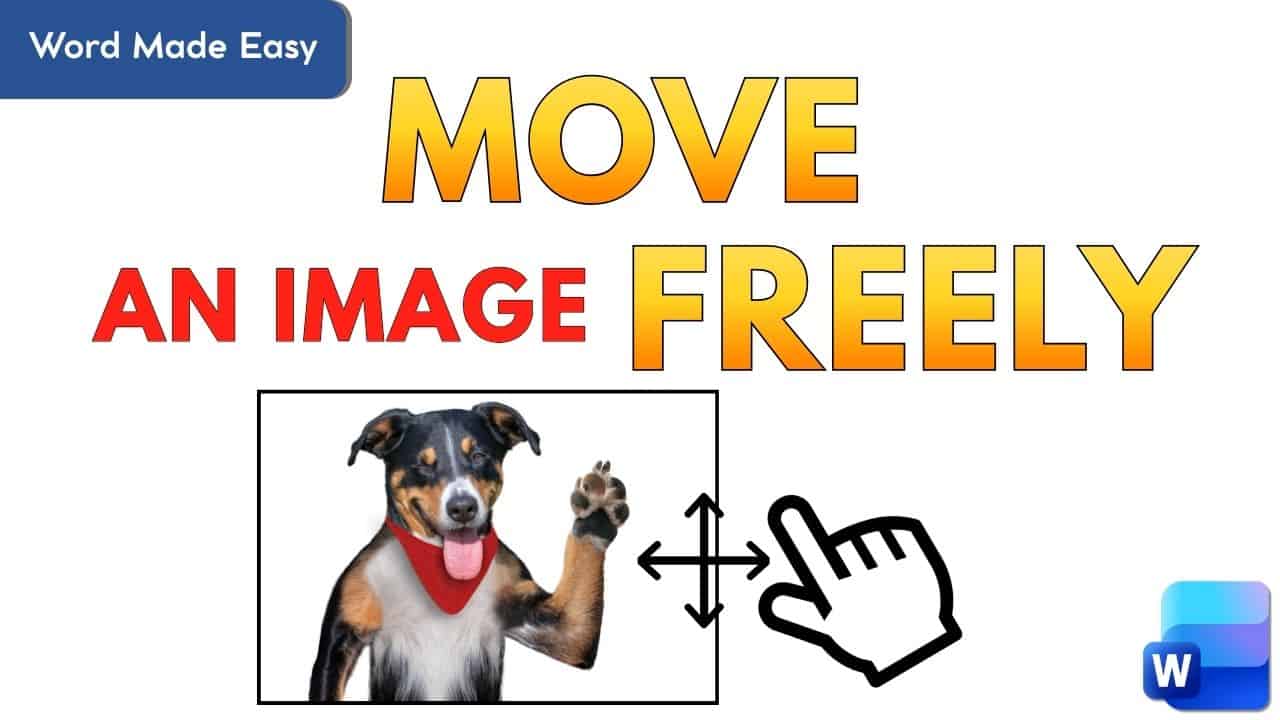
Step 2: Change Text Wrapping (This Is the Key Step)
If you skip this, nothing else will behave properly.
Steps:
- Click the image
- Go to Picture Format
- Select Wrap Text
- Choose In Front of Text or Behind Text
Now the image can be:
- Dragged anywhere
- Layered with text
- Used as a background
Re-centering the Image
If your image ends up off-centre:
- Click Picture Format → Align → Align Center
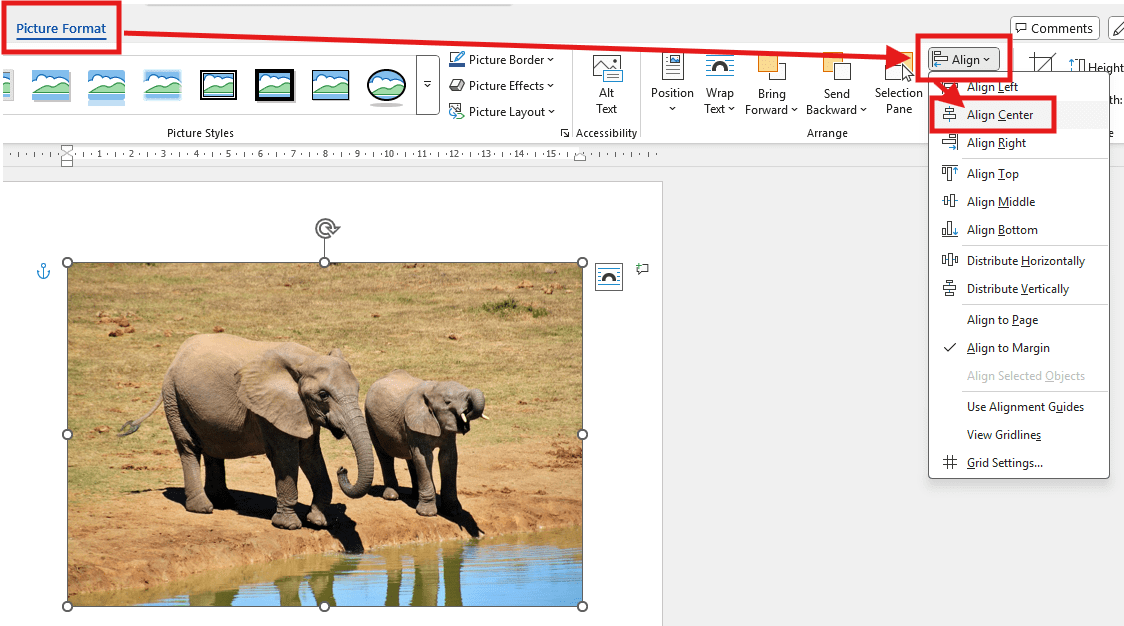
This resets it neatly on the page.
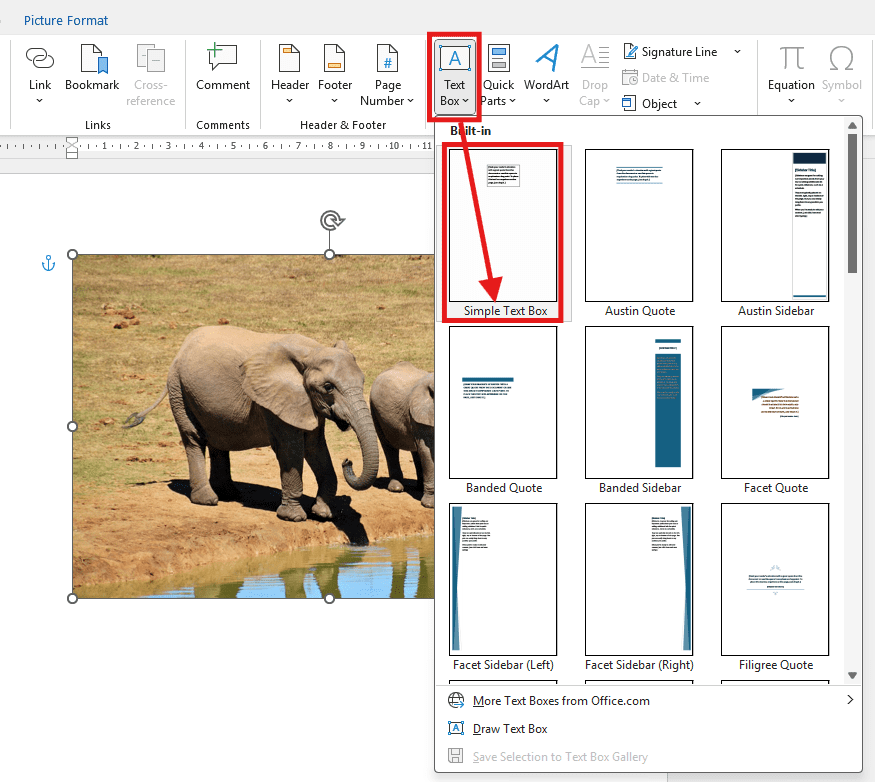
Method 1: Add Text Using a Text Box (Best for Paragraphs)
Insert a Text Box
- Go to Insert
- Click Text Box
- Choose Simple Text Box
- Type your text
- Resize the box to fit the content
Format the Text
- Change font and size from the Home tab
- Drag the corners if text spills outside the box
If the text doesn’t fit:
- The box is too small
- Drag the corner handles until everything sits on one line or block
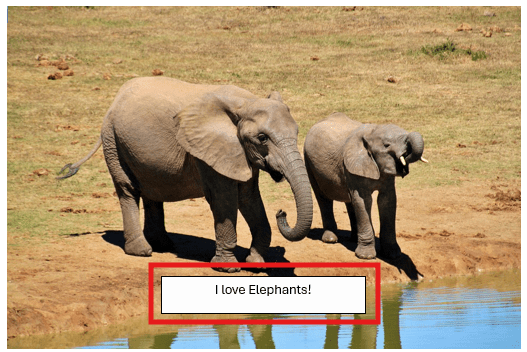
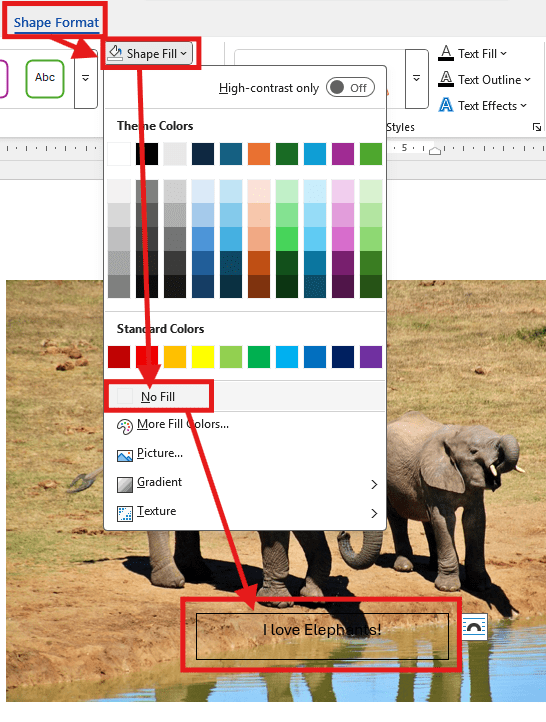
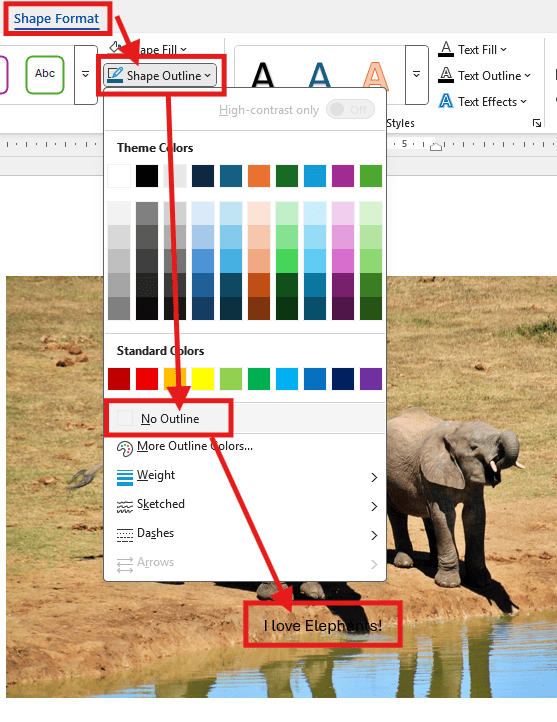
Make the Text Box Transparent (Essential)
At this point, the image is hidden behind a white box. Here’s how to fix that.
Steps:
- Click the text box
- Go to Shape Format
- Select Shape Fill → No Fill
- Select Shape Outline → No Outline
Now:
- The image shows through
- Only the text remains visible
You can still move the box freely over the image.
Method 2: Add Text Using WordArt (Best for Titles & Headings)
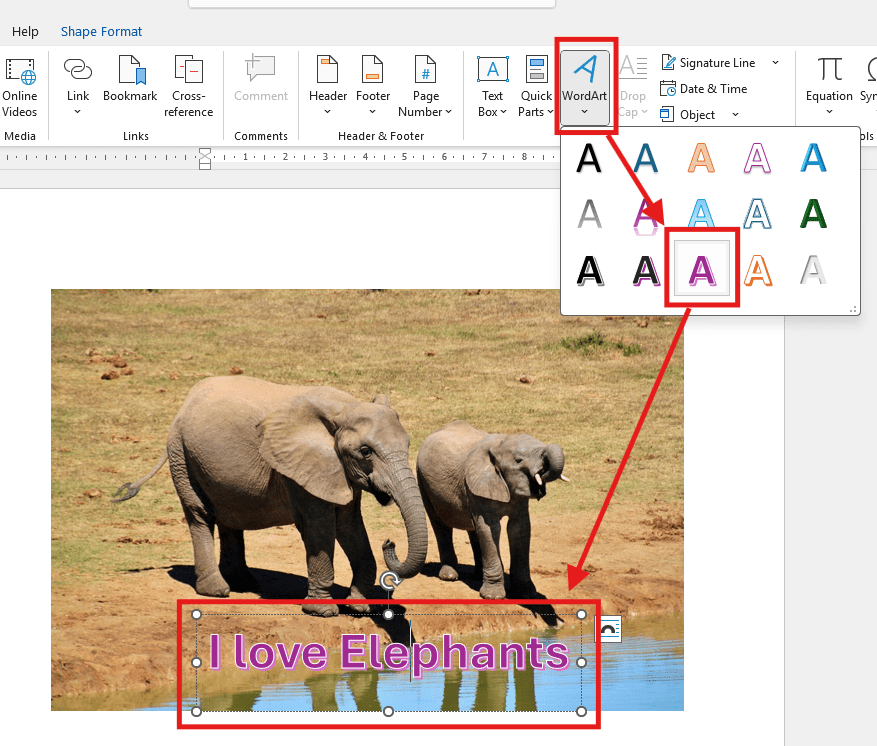
Insert WordArt
- Go to Insert
- Click WordArt
- Choose a style (the first option is transparent)
- Type your text
- Resize the WordArt box
Align and Position
- Click Align → Center to centre it
- Drag corners to increase text size before increasing font size
Avoid these and save yourself frustration:
- Forgetting to change text wrapping
- Leaving text box fill turned on
- Stretching images from side handles
- Not checking contrast between text and image
Final Thoughts
Once you understand how text wrapping works in Microsoft Word, adding text over an image stops being a headache. It becomes a quick, repeatable skill. You might use a text box for longer information. Alternatively, use WordArt for bold titles. The process is the same every time. Free the image, place the text, and format it properly. Master this once and your documents, worksheets, and posters instantly look more polished and intentional.

More Microsoft Word Tutorials

Looking for more help with Microsoft Word? Browse all step-by-step Word tutorials covering formatting, layout, pages, and document setup.
👉 View all Microsoft Word tutorials: https://wordmadeeasy.org/microsoft-word/

Prefer watching instead of reading? Many Word tutorials are also available as short, step-by-step videos on the Word Made Easy YouTube channel.


Leave a Reply