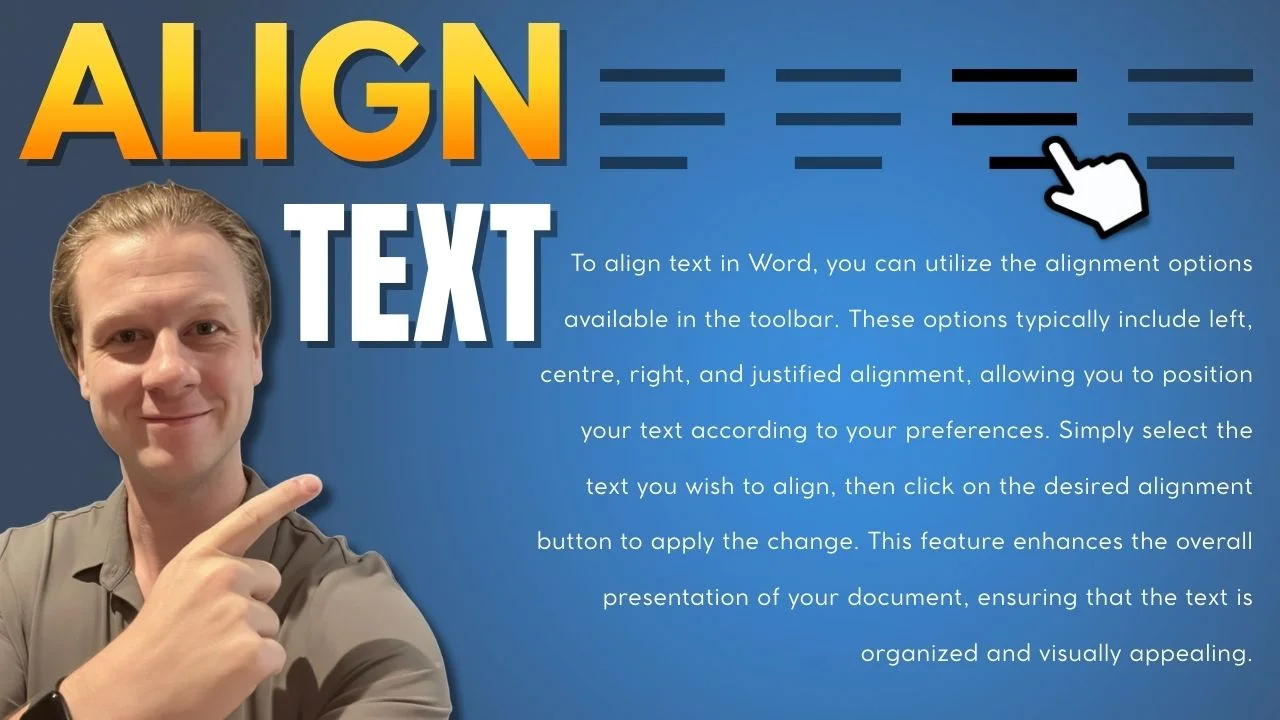
In this guide, you’ll learn how to align text in Word. This includes left, center, right, and justified alignment. You will also learn how to adjust indentation and line spacing using advanced paragraph settings.
Why Text Alignment Matters in Word
Text alignment controls how your content sits on the page. Poor alignment can make documents look messy, while correct alignment improves readability and presentation—especially for reports, letters, and formal documents.
Microsoft Word gives you both quick alignment tools and advanced paragraph controls, which we’ll cover step by step.
Watch the Video Tutorial
If you prefer to see this in action, the full video walkthrough is below, showing each method step by step.
Step 1: Select the Text You Want to Align
Before changing alignment, you must select your text.
You can do this in two ways:
- Press Ctrl + A to select the entire document
- Click and drag with your left mouse button to highlight specific text

Step 2: Use the Alignment Buttons
- Go to the Home tab
- Locate the Paragraph section on the toolbar
You’ll see four alignment options:

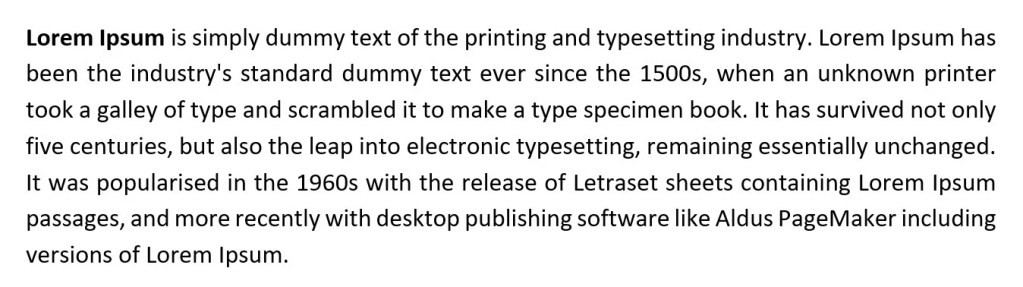
Align Left – Text aligns to the left margin


Center – Text is centered on the page


Align Right – Text aligns to the right margin

Justify – Text is evenly spaced across both margins

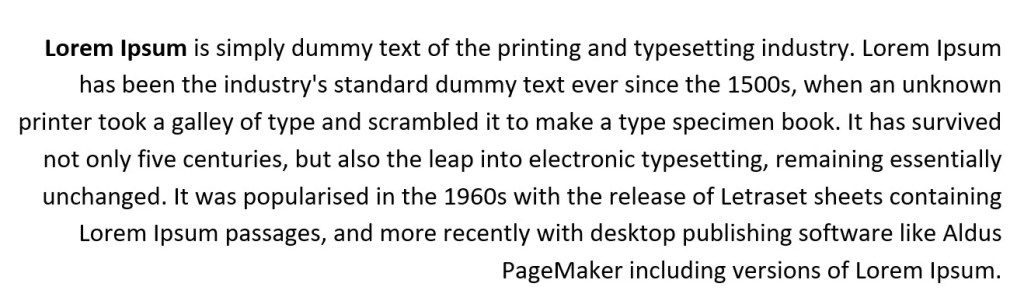
Tip: Most users prefer Justify, as it creates clean, evenly aligned paragraphs that look neat and professional.
Simply click the option you want.
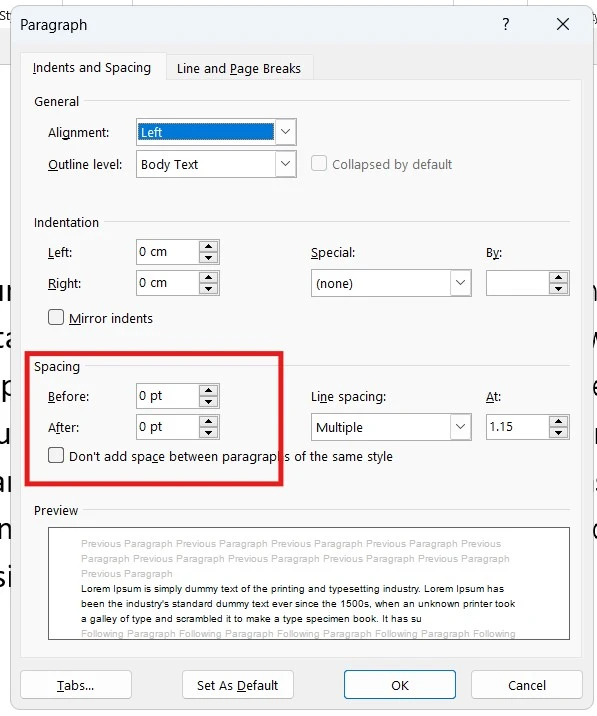
Step 3: Open Advanced Paragraph Settings
To access more detailed alignment options:
- In the Paragraph section, click the small arrow in the bottom-right corner
- The Paragraph dialog box will open
- Select Indents and Spacing

This gives you full control over layout and spacing.
Step 4: Adjust Text Indentation
Indentation controls how far text sits from the margins.
From the Indentation section, you can:
- Increase the Left indent
- Increase the Right indent

Word shows a live preview at the bottom as you make changes. You can see the result before applying it.
Step 5: Change Paragraph Spacing
Paragraph spacing controls the space before and after paragraphs.
You can adjust:
- Before – space above the paragraph
- After – space below the paragraph
This is far better than pressing Enter multiple times and keeps formatting consistent.
Step 6: Adjust Line Spacing
Line spacing controls the distance between lines of text.
Common options include:
- Single
- 1.5 lines
- Double (commonly required for academic work)
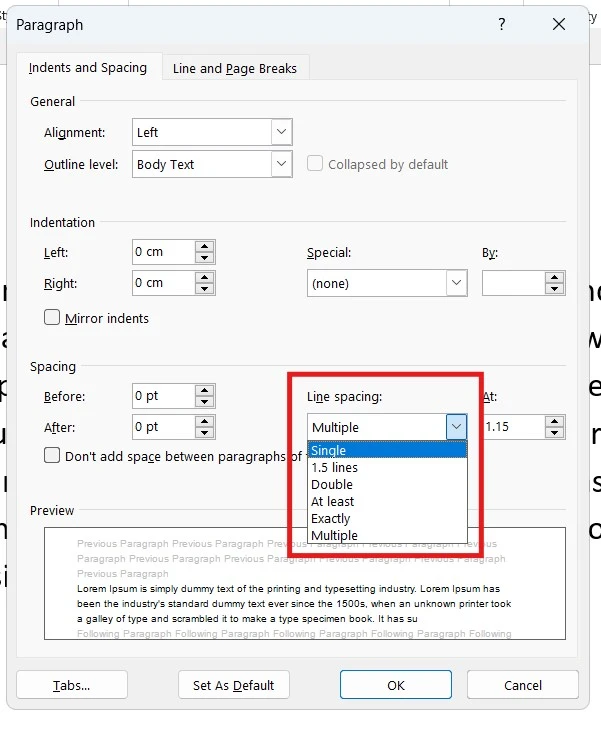
Choose your preferred option and check the preview to ensure it looks right.
Step 7: Apply or Set as Default
Once you’re happy:
- Click OK to apply the settings to the selected text
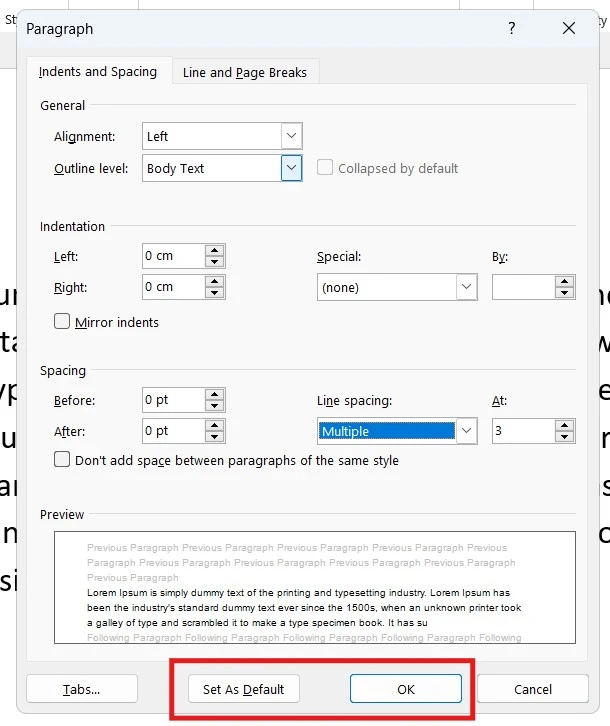
Important: Clicking Set as Default will apply these settings to:
- The rest of the current document
- Potentially all future Word documents
Only use this if you’re sure.
FAQs
How do I justify text in Word?
Select your text, go to the Home tab, and click the Justify alignment button in the Paragraph section.
What does justified text mean in Word?
Justified text aligns evenly along both the left and right margins.
Why does my justified text look uneven?
Uneven spacing usually happens when lines contain long words or manual line breaks.
How do I change line spacing in Word?
Select your text, open the Paragraph settings, and choose your preferred line spacing option, such as single, 1.5, or double spacing.
How do I indent text in Word?
Open the Paragraph dialog box and adjust the Left or Right indentation values.
Can I make alignment settings the default in Word?
Yes. In the Paragraph dialog box, click Set as Default. Be careful, as this will apply the settings to future documents as well.
Conclusion
Aligning text in Microsoft Word is a simple skill. It makes a big difference in how professional your documents look. You can use left, centre, right, or justified alignment. Word provides quick tools for controlling text alignment on the page.
By using the advanced Paragraph settings, you can adjust indentation to your preference. You can also modify spacing and line spacing for different types of documents. These documents range from letters and reports to academic work. Taking a moment to adjust these settings helps keep your documents neat, readable, and consistent.

More Microsoft Word Tutorials

Looking for more help with Microsoft Word? Browse all step-by-step Word tutorials covering formatting, layout, pages, and document setup.
👉 View all Microsoft Word tutorials: https://wordmadeeasy.org/microsoft-word/

Prefer watching instead of reading? Many Word tutorials are also available as short, step-by-step videos on the Word Made Easy YouTube channel.


Leave a Reply