How to Change the Default Font in Microsoft Word
Changing the default font in Microsoft Word is one of the easiest ways to personalize your documents and improve readability. If you often open Word and immediately change the font from Aptos to something else, you’re not alone. Many users prefer fonts like Century Gothic, Times New Roman, or Arial for professional or academic work.
In this complete guide, you’ll learn how to change the default font in Microsoft Word. This will ensure every new document opens with your preferred font style and size. It happens automatically. This guide is beginner-friendly, works for most Word versions, and includes troubleshooting tips.
What Is the Default Font in Microsoft Word?
The default font is the font Word uses automatically when you create a new blank document. For many recent versions of Microsoft Word, the default font is:
- Font: Aptos
- Style: Regular
- Size: 12
This font is applied through Word’s Normal template, which controls formatting for all new documents unless you change it.
Why Change the Default Font in Microsoft Word?
There are many reasons users want to learn how to change the default font in Microsoft Word, including:
- Save time by avoiding manual font changes
- Meet school or workplace formatting rules
- Improve readability and eye comfort
- Maintain consistency across documents
- Use a brand or personal writing style
If you write frequently, changing the default font can save hours over time.
Before You Start: Things to Know
Before changing your default font, keep these points in mind:
- Changes affect new documents only
- Existing documents won’t update automatically
- The change is stored in the Normal template
- You can choose to apply it to one document only or all future documents
Now let’s move on to the main steps.
Watch the Video Tutorial
If you prefer to see this in action, the full video walkthrough is below, showing each method step by step.
How to Change the Default Font in Microsoft Word (Step-by-Step Guide)
Method 1: Using the Font Dialog Box
Step 1: Open the Font Dialog
You have two options:
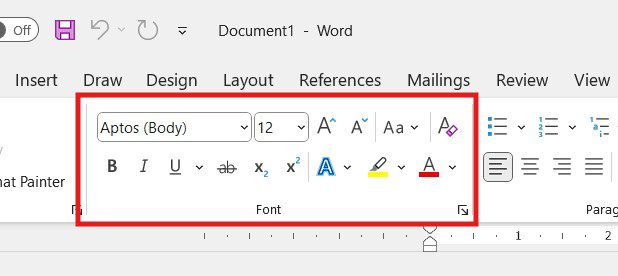
- Click the small arrow in the bottom-right corner of the Font group on the Home tab
- OR press Ctrl + D on your keyboard
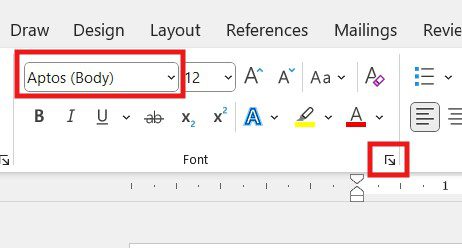
This opens the Font dialog box.
Step 2: Choose Font Style and Size
Inside the Font dialog box:
- Select your preferred Font (e.g., Century Gothic)
- Choose Font Style (Regular, Bold, Italic)
- Select Font Size (e.g., 12)

You’ll see a live preview of how the text looks.
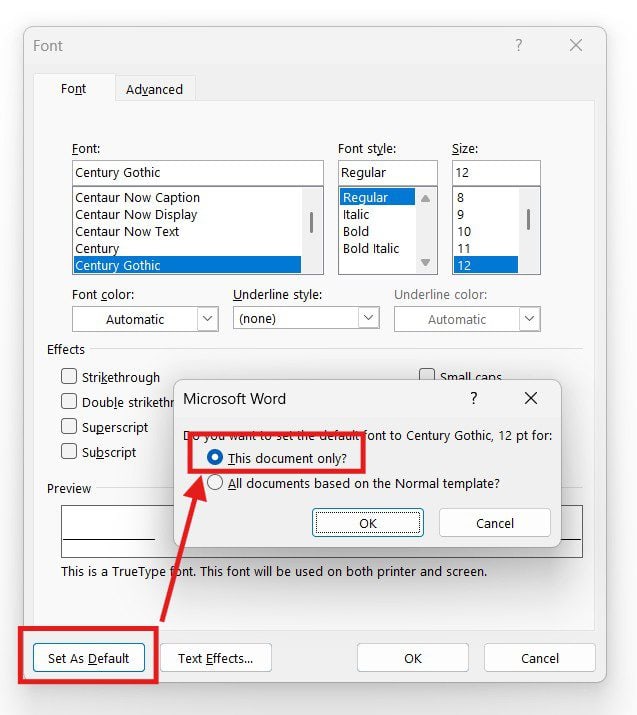
Step 3: Set as Default for All Documents
At the bottom of the dialog box, click Set As Default.
You’ll see two options:
- This document only
- All documents based on the Normal template
Select All documents based on the Normal template, then click OK.
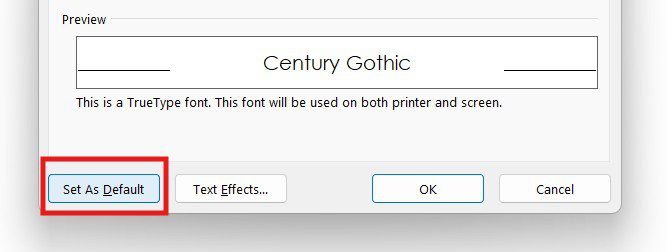
A confirmation message will appear. Click Yes.
Method 2: Using Keyboard Shortcut (Ctrl + D)
This method uses the same steps but is faster:
- Press Ctrl + D
- Choose your font, style, and size
- Click Set As Default
- Select All documents based on the Normal template
- Click OK
That’s it!
Understanding the Normal Template in Microsoft Word
The Normal template (Normal.dotm) controls:
- Default font
- Paragraph spacing
- Styles
- Formatting for new documents
When you change the default font, you are modifying this template. That’s why the font applies to all future Word documents.
How to Change the Default Font for One Document Only
If you only want to change the font for the current file:
- Open the Font dialog box
- Choose your font settings
- Click Set As Default
- Select This document only
- Click OK
This keeps your global default font unchanged.
How to Test If the Default Font Has Changed
To confirm your changes worked:
- Close Microsoft Word
- Choose Don’t Save if prompted
- Reopen Word
- Click Blank Document
If the new document opens with your selected font and size, the default font has been successfully changed.
Common Problems When Changing Default Font (And Fixes)
Font Didn’t Change
Make sure you selected All documents based on the Normal template.
Font Reverts After Restart
Word may be in Read-only mode.
Run Word as administrator once and reapply settings.
Font Missing
Ensure the font is installed on your system.
Advanced Customization: Fonts, Styles & Templates
You can go beyond just changing the default font:
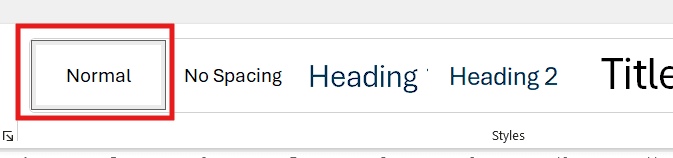
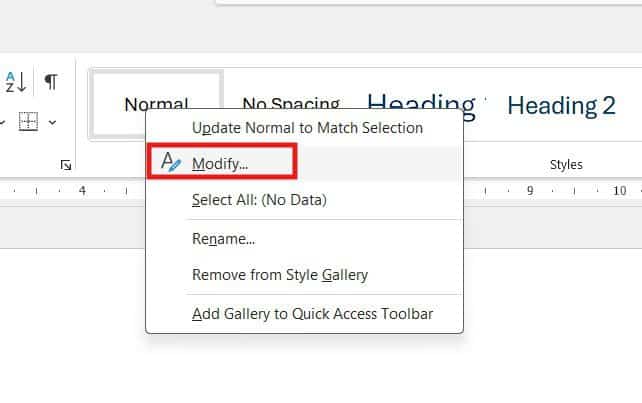
- Modify Normal style
- Customize Heading styles
- Save custom Word templates
- Set default line spacing
These options are found under Styles → Modify.
Default Font Differences Across Word Versions
| Word Version | Default Font | Size |
|---|---|---|
| Word 2007–2013 | Calibri | 11 |
| Word 2016–2021 | Calibri | 11 |
| Word 365 (New) | Aptos | 11 |
Steps to change the default font remain nearly identical across versions.
Best Fonts to Use as Default in Microsoft Word
Here are some popular choices:
- Century Gothic – Clean and modern
- Times New Roman – Academic and formal
- Arial – Simple and professional
- Georgia – Easy to read on screens
- Calibri – Balanced and versatile
Choose based on your purpose and audience.
FAQs: Changing the Default Font in Microsoft Word
Can I change the default font permanently in Microsoft Word?
Yes, by selecting All documents based on the Normal template.
Will this affect old documents?
No, only new documents are affected.
Can I set different defaults for different templates?
Yes, custom templates can have their own defaults.
Why didn’t my default font change?
You may not have saved the Normal template correctly.
Does this work on Mac?
Yes, the steps are similar on macOS.
What is the fastest way to open font settings?
Press Ctrl + D.
Conclusion
Learning how to change the default font in Microsoft Word is a small adjustment that makes a big difference. It saves time, improves consistency, and allows you to work more comfortably.
Whether you’re a student, professional, or casual writer, setting a default font that suits your needs is a smart move. Follow the steps carefully. Then test your changes. Enjoy documents that are ready to go from the moment you open Word.
Updated Helpful Resource (Official Microsoft Guide)
For Microsoft’s official, step-by-step instructions, you can also refer to this guide:
Change the default font in Word
https://support.microsoft.com/en-au/office/change-the-default-font-in-word-2f50603b-9886-47e4-a483-48ac5ab80163

More Microsoft Word Tutorials

Looking for more help with Microsoft Word? Browse all step-by-step Word tutorials covering formatting, layout, pages, and document setup.
👉 View all Microsoft Word tutorials: https://wordmadeeasy.org/microsoft-word/

Prefer watching instead of reading? Many Word tutorials are also available as short, step-by-step videos on the Word Made Easy YouTube channel.


Leave a Reply