If you want to learn how to insert a check box in Word, this guide covers the 5 easiest steps. Knowing how to insert a check box in Word lets you create interactive checklists, forms, surveys, and task tracking documents that users can tick on and off with a single click. You’ll learn how to insert a check box in Word using the Developer tab, plus how to customise it so it shows a tick instead of the default cross.
Many people try inserting symbols or using bullet points, but those aren’t interactive. A proper clickable check box in Word allows users to click once to check it and click again to uncheck it.
Why Use a Clickable Check Box in Word?
Before you learn how to insert a check box in Word, it helps to understand what they’re used for. A clickable check box in Word is useful for:
- Creating printable checklists
- Designing interactive forms
- Building surveys or questionnaires
- Creating task tracking documents
- Producing classroom worksheets
Unlike typed symbols or tick boxes drawn manually, a real check box in Word can be toggled on and off directly within the document.
Watch the Video Tutorial
If you prefer to see this in action, the full video walkthrough is below, showing each method step by step.
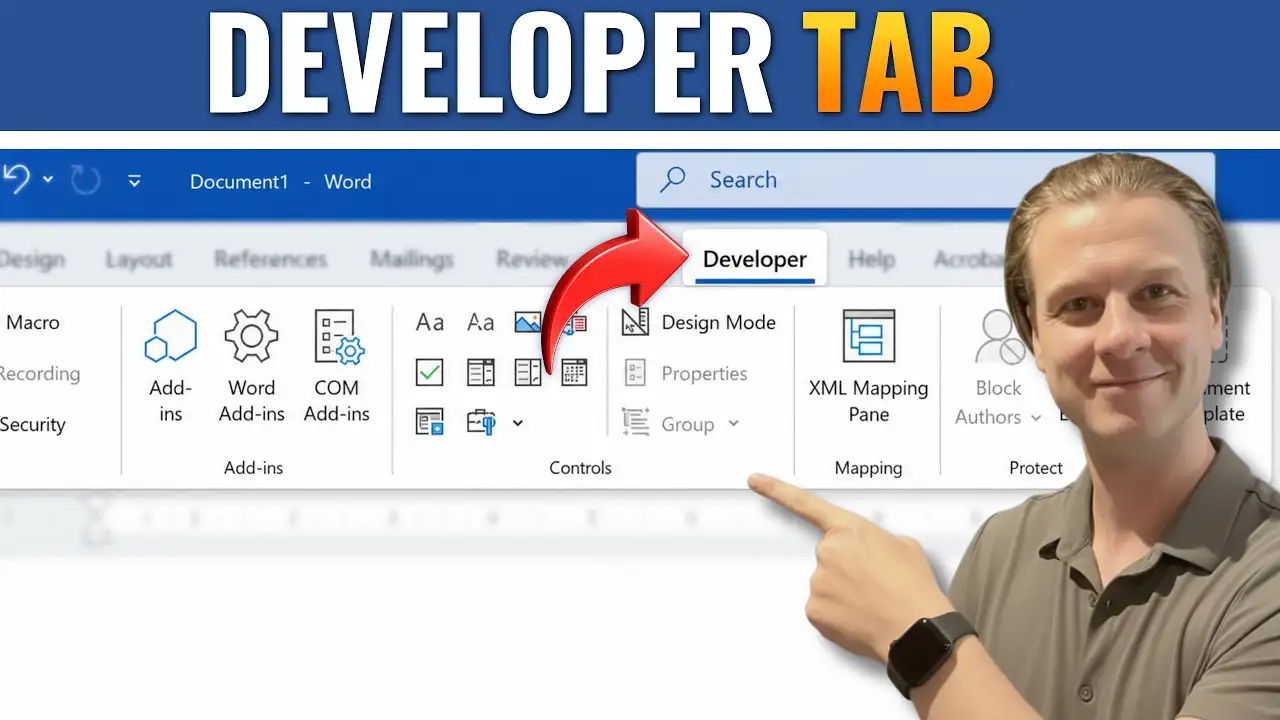
Step 1: Enable the Developer Tab to Insert a Check Box in Word
The check box tool is located inside the Developer tab. By default, this tab is hidden in most versions of Word, so you’ll need to enable it before you can insert a check box in Word.

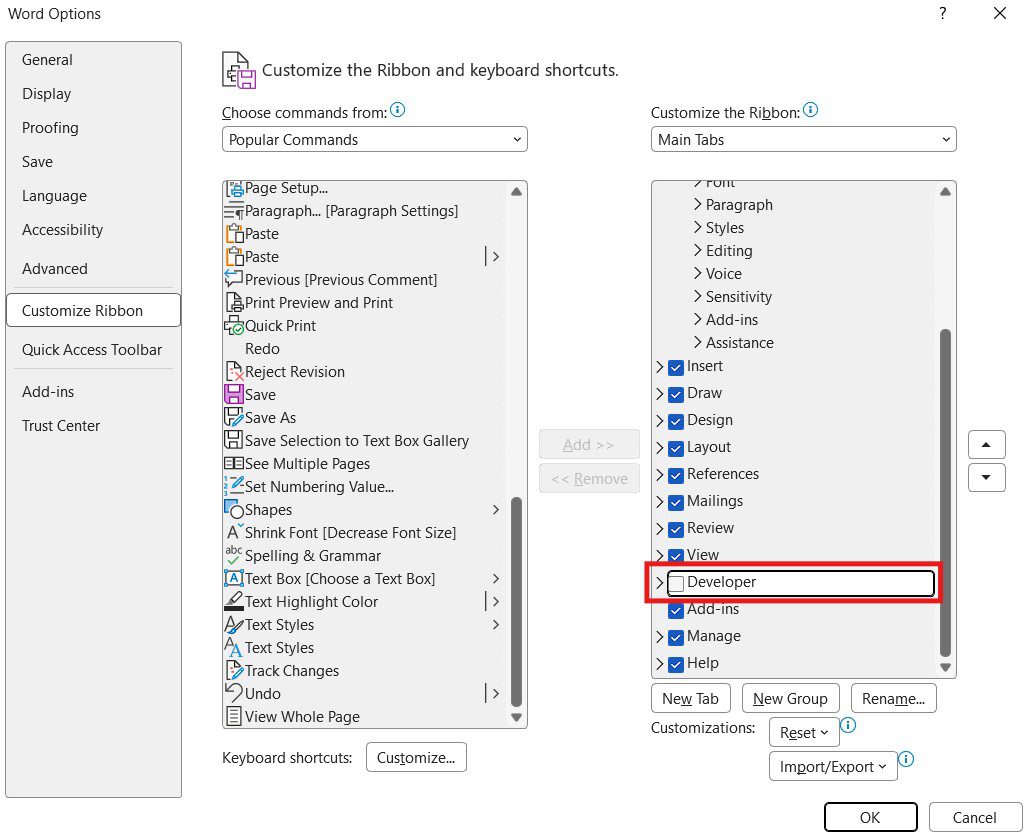
If you don’t see “Developer” at the top of your ribbon, follow these steps:
- Click File.
- Select Options.
- Click Customize Ribbon.
- In the right-hand column, scroll down until you find Developer.
- Tick the check box next to Developer.
- Click OK.
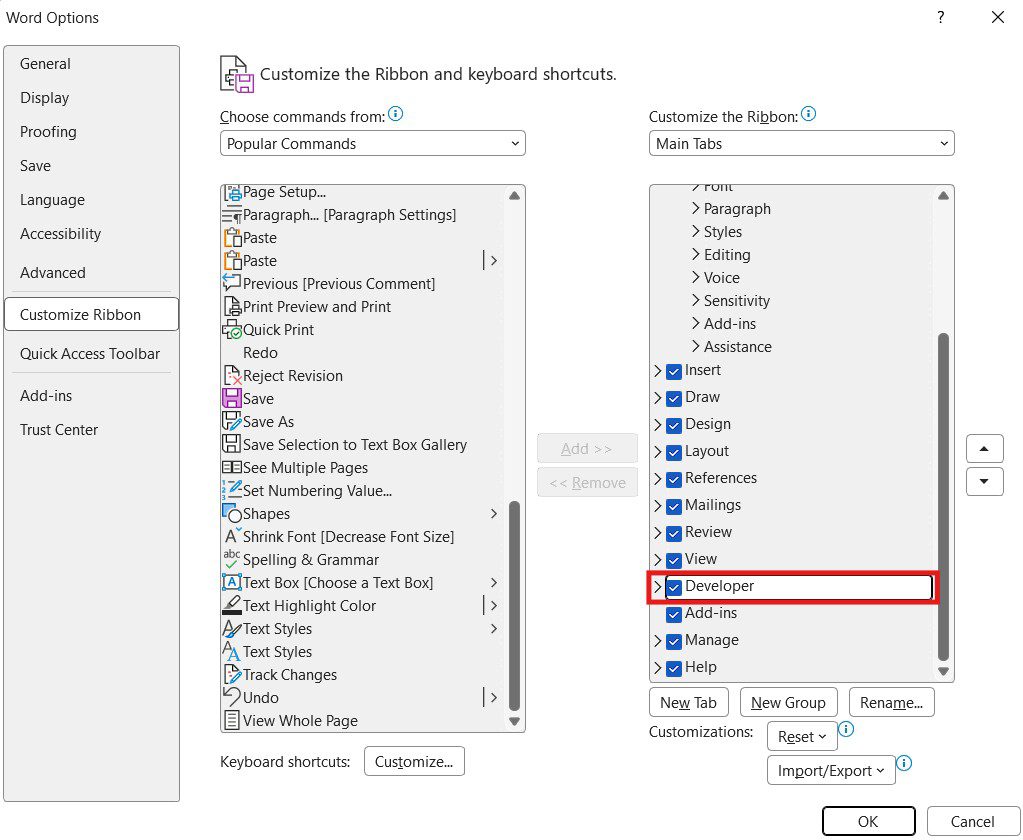
You should now see the Developer tab appear at the top of your ribbon.
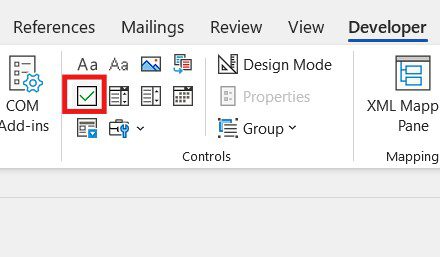
Step 2: Insert a Clickable Check Box in Word
Now that the Developer tab is enabled, here is how to insert a check box in Word:
- Click the Developer tab.
- In the Controls group, select Check Box Content Control.
A clickable check box will appear in your document.
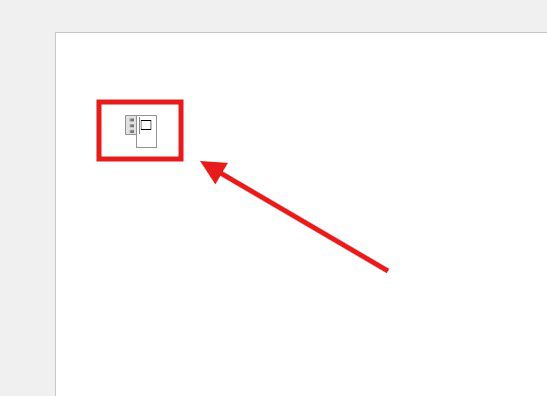
You can now click it to toggle between checked and unchecked states.
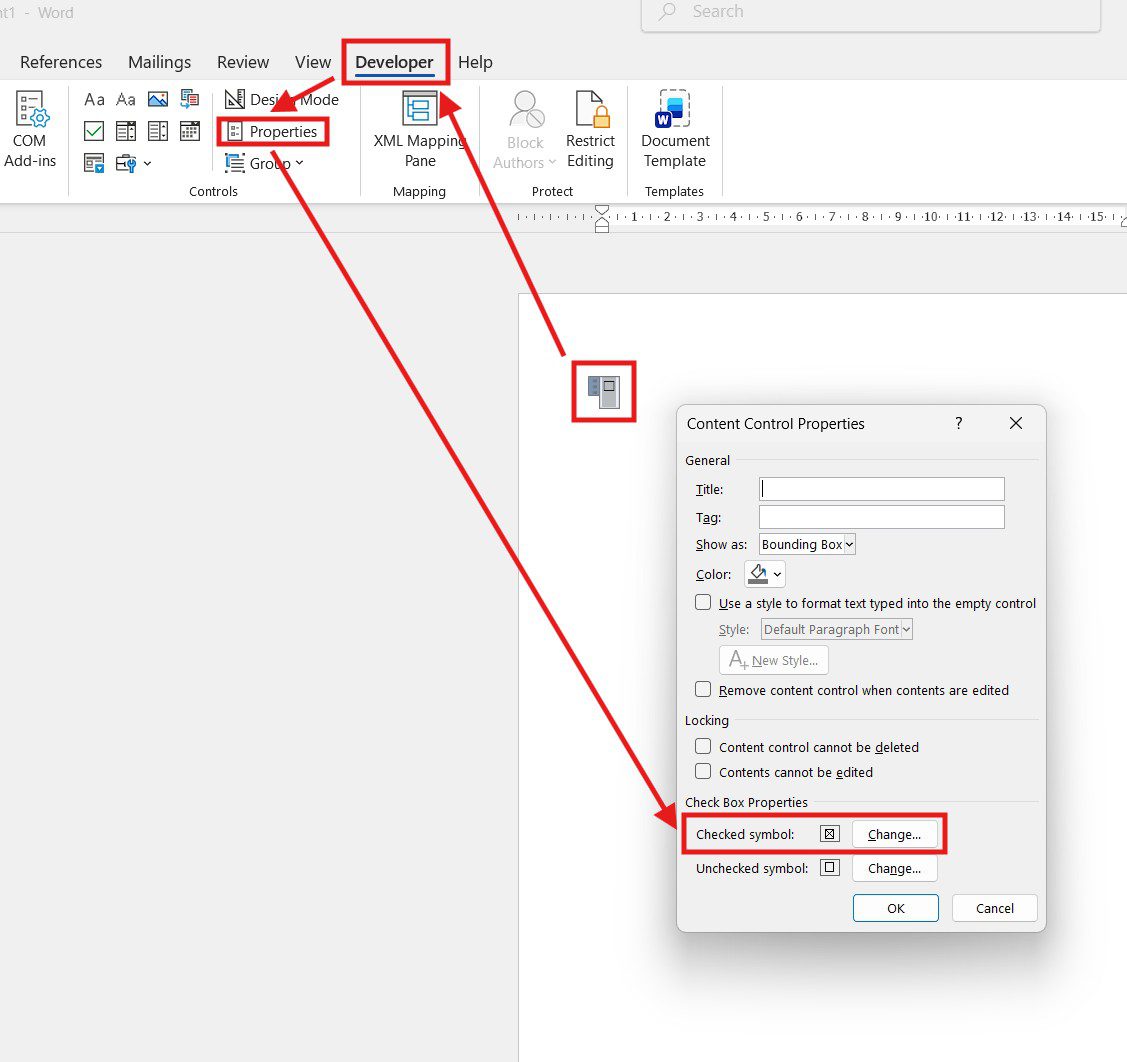
Step 3: Change the Default Cross to a Tick
By default, Word displays a cross (✖) instead of a traditional tick (✔) when your check box is selected. You can change this easily so your check box in Word shows a proper tick mark.
- Click on the check box so the grey border appears.
- Go to the Developer tab.
- Click Properties.
- Under “Content Control Properties,” locate Checked symbol.
- Click Change.
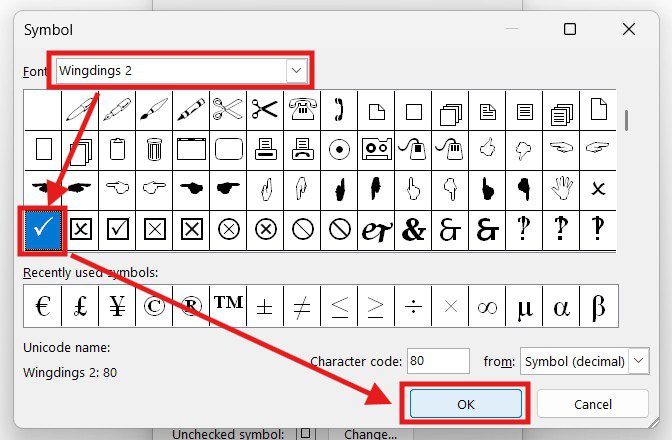
- At the top, change the font to Wingdings 2.
- Scroll until you find the tick symbol.
- Select it and click OK.
- Click OK again to close the Properties window.
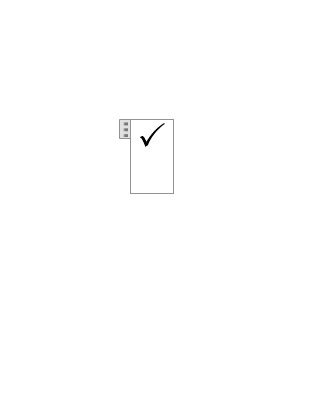
Now, when you click the check box, it will display a tick instead of a cross.
Step 4: Remove the Bounding Box (Optional)
If you don’t want your check box in Word to show a visible border when selected:
- Click the check box.
- Go to Developer → Properties.
- Under “Show as,” select None instead of Bounding Box.
- Click OK.
This gives your check box a cleaner appearance.
Step 5: Customise Your Check Box for Forms
Once you know how to insert a check box in Word, you can add multiple check boxes to create:
- To-do lists
- Attendance registers
- Agreement forms
- Feedback forms
If you are creating a structured form, you may also want to:
- Remove table borders for cleaner layout
- Adjust margins for printable forms
- Lock the document to prevent editing
For a complete walkthrough of building interactive forms, see the guide on how to create a fillable form in Microsoft Word.
Common Mistakes When Inserting a Check Box in Word
Avoid these common mistakes when learning how to insert a check box in Word:
- Trying to insert a check box using bullet points or symbols
- Forgetting to enable the Developer tab first
- Not changing the symbol from cross to tick
- Confusing content controls with regular Wingdings symbols
- Using “Legacy Form” check boxes instead of Content Controls (legacy versions don’t work in newer Word)
Always use the Check Box Content Control for interactive documents.
FAQs
How do I insert a check box in Word?
To insert a check box in Word, enable the Developer tab via File > Options > Customize Ribbon. Then click the Developer tab and select Check Box Content Control from the Controls group.
How do I change a check box from cross to tick in Word?
Click the check box, go to Developer > Properties, click Change next to “Checked symbol,” set the font to Wingdings 2, select the tick symbol, and click OK.
What is the difference between a tick box and a check box in Word?
They’re the same thing — “tick box” is the British English term and “check box” is the American English term. Both refer to a clickable Content Control in the Developer tab.
Can I insert a check box in Word Online?
Full Developer tab features are best supported in the desktop version of Word. Some check box features may be limited in Word Online.
Can I change the size of a check box in Word?
Yes. Highlight the check box and adjust the font size on the Home tab to make it appear larger or smaller.
Can I copy and paste check boxes in Word?
Yes. Once you’ve inserted and customised one check box in Word, you can copy and paste it throughout your document to save time.
Can I protect the form so only check boxes can be clicked?
Yes. You can restrict editing from the Developer tab to allow only form controls to be used — and for stronger document security, you can also learn how to password protect a Word document so only authorised users can open it.
Conclusion
Now that you know how to insert a check box in Word in 5 easy steps — enabling the Developer tab, inserting the Check Box Content Control, changing the cross to a tick, removing the bounding box, and customising for forms — you can transform any standard Word document into a functional and professional form.
Once set up correctly, a clickable check box in Word lets you create interactive checklists, surveys, agreement forms, and structured documents that users can complete with a single click.
With just a few steps, you’ll never need to rely on bullet points or symbols for checklists again.
Related Tutorials
- How to Create a Fillable Form in Microsoft Word
- How to Password Protect a Word Document
- How to Adjust Margins in Word

Recent Microsoft Word Tutorials

Looking for more help with Microsoft Word? Browse all step-by-step Word tutorials covering formatting, layout, pages, and document setup.
👉 View all Microsoft Word tutorials: https://wordmadeeasy.org/microsoft-word/
👉 Need more support – check out the official guidance: https://support.microsoft.com/en-au

Prefer watching instead of reading? Many Word tutorials are also available as short, step-by-step videos on the Word Made Easy YouTube channel.


Leave a Reply