Scrolling through a long document in Microsoft Word can quickly become frustrating—especially when trying to find specific chapters or sections.
The good news is that Word allows you to create automatic chapters that:
- Start on a new page instantly
- Appear in a clickable navigation pane
- Automatically update in your table of contents — if you haven’t set one up yet, see the guide on how to create a table of contents in Microsoft Word before following the steps below.
In this guide, you’ll learn how to turn basic headings into a dynamic chapter system.
Why Use Automatic Chapters in Word
Instead of manually formatting each chapter, using styles gives you:
- 📑 A structured, professional document layout
- 🔍 A clickable navigation pane for quick access
- 📚 An auto-updating table of contents
- ⚡ Faster workflow with less manual formatting
This is especially useful for:
- Reports
- Books or eBooks
- Assignments
- Business documents
If you are combining content from multiple files, you may also want to learn how to merge multiple Word documents into one file before applying chapter formatting.
Watch the Video Tutorial
If you prefer to see this in action, the full video walkthrough is below, showing each method step by step.
How Chapters Work in Word
Word uses Heading styles (like Heading 1, Heading 2) to define document structure.
When you apply Heading 1:
- It becomes a main chapter
- It appears in the navigation pane
- It can be included in your table of contents

By modifying this style, you can control how every chapter behaves.
Modify Heading 1 to Create Automatic Chapters
To make chapters start on a new page automatically, you need to edit the Heading 1 style.
Step-by-step:
- Go to the Home tab
- In the Styles section, right-click “Heading 1”
- Select Modify

Now customize your chapter style:
- Choose your preferred font (e.g., Times New Roman)
- Increase font size (e.g., 36 or 48)
- Click Center alignment
- Apply Bold if needed
- Change color if desired
Make Every Chapter Start on a New Page
This is the key step that automates your workflow.
Steps:
- In the Modify Style window, click Format
- Select Paragraph
- Check Page break before
- Click OK, then OK again

👉 Now, every time you apply Heading 1, Word will:
- Automatically create a new page
- Position your chapter title at the top
Create a New Chapter Instantly
Once Heading 1 is set up:
- Place your cursor anywhere
- Click Heading 1
- Type your chapter title (e.g., Chapter 1, Chapter 2)
Word will:
- Start a new page
- Apply your formatting
- Add it to the navigation pane
The navigation pane gives you a clickable overview of your document.
To open it:
- Go to the View tab
- Check Navigation Panel
You’ll now see all chapters listed.
Click any chapter to jump to it instantly.
Update Your Table of Contents
Your table of contents won’t update automatically—you’ll need to refresh it.
Steps:
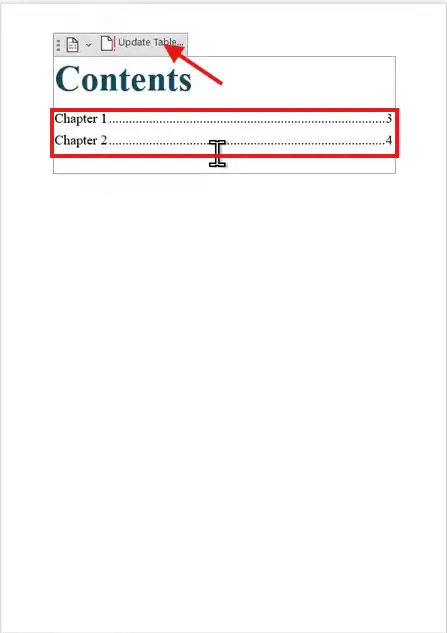
- Click on your table of contents
- Select Update Table
- Choose Update entire table
👉 Your new chapters will now appear.
Why This Method Is So Powerful
With just one style change, you can:
- Create chapters in seconds
- Keep formatting consistent
- Navigate large documents easily
- Maintain a professional structure
This eliminates the need to:
- Manually insert page breaks
- Reformat each chapter
- Rebuild your table of contents
Pro Tips for Better Document Structure
- Use Heading 2 and Heading 3 for sub-sections
- Keep naming consistent (e.g., Chapter 1, Chapter 2)
- Update your table of contents regularly — and if your document uses different numbering formats across sections, see the guide on how to insert different page numbers in Microsoft Word.
- Use the navigation pane when editing large files
FAQs
Why isn’t my chapter starting on a new page?
Make sure “Page break before” is enabled in the Heading 1 paragraph settings.
Why doesn’t my table of contents update automatically?
You must manually click “Update Table” and select “Update entire table.”
Can I customize the look of my chapters?
Yes. You can modify font, size, color, spacing, and alignment in the Heading 1 style settings.
What’s the difference between Heading 1 and Heading 2?
Heading 1 is typically used for main chapters, while Heading 2 is used for sub-sections.
Does the navigation pane update automatically?
Yes. As soon as you apply a heading style, it appears instantly in the navigation pane.
Conclusion
Using styles in Microsoft Word allows you to transform a simple document into a fully structured, easy-to-navigate file.
By modifying Heading 1 and enabling automatic page breaks, you can create chapters that:
- Start on new pages
- Appear in navigation instantly
- Integrate seamlessly with your table of contents
Once set up, this system saves time and makes working with long documents far more efficient.
Related Tutorials
- How to Create a Table of Contents in Microsoft Word
- How to Insert Different Page Numbers in Microsoft Word
- How to Merge Multiple Word Documents into One File

Recent Microsoft Word Tutorials

Looking for more help with Microsoft Word? Browse all step-by-step Word tutorials covering formatting, layout, pages, and document setup.
👉 View all Microsoft Word tutorials: https://wordmadeeasy.org/microsoft-word/
👉 Need more support – check out the official guidance: https://support.microsoft.com/en-au

Prefer watching instead of reading? Many Word tutorials are also available as short, step-by-step videos on the Word Made Easy YouTube channel.


Leave a Reply