When working in Microsoft Word, adding a watermark is a simple way to label your document as confidential, draft, or branded with your company identity.
In this guide, you’ll learn how to insert a watermark in Word, customize it, and remove or edit it whenever needed.
Why Use a Watermark in Word
Watermarks help communicate important information about your document. They are commonly used to:
- Mark documents as Confidential, Draft, or Urgent
- Add branding such as a company logo
- Protect sensitive or internal documents — often paired with password-protecting a Word document
- Improve document presentation
Watch the Video Tutorial
If you prefer to see this in action, the full video walkthrough is below, showing each method step by step.
Method 1: Add a Built-In Watermark
Word includes several pre-designed watermark options you can use instantly.
Steps:
- Go to the Design tab
- Click Watermark in the Page Background section
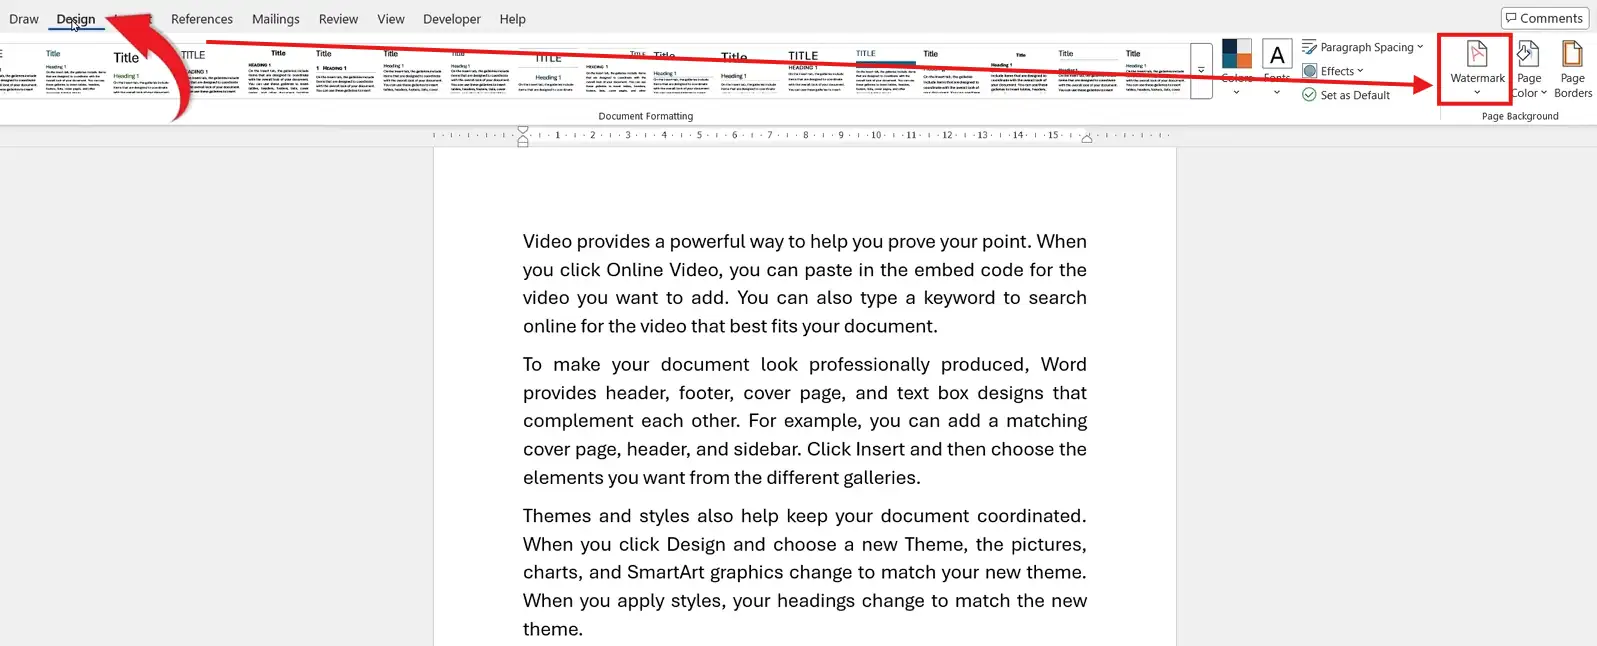
- Choose from built-in options like:
- Confidential
- Draft
- Do Not Copy
- Urgent
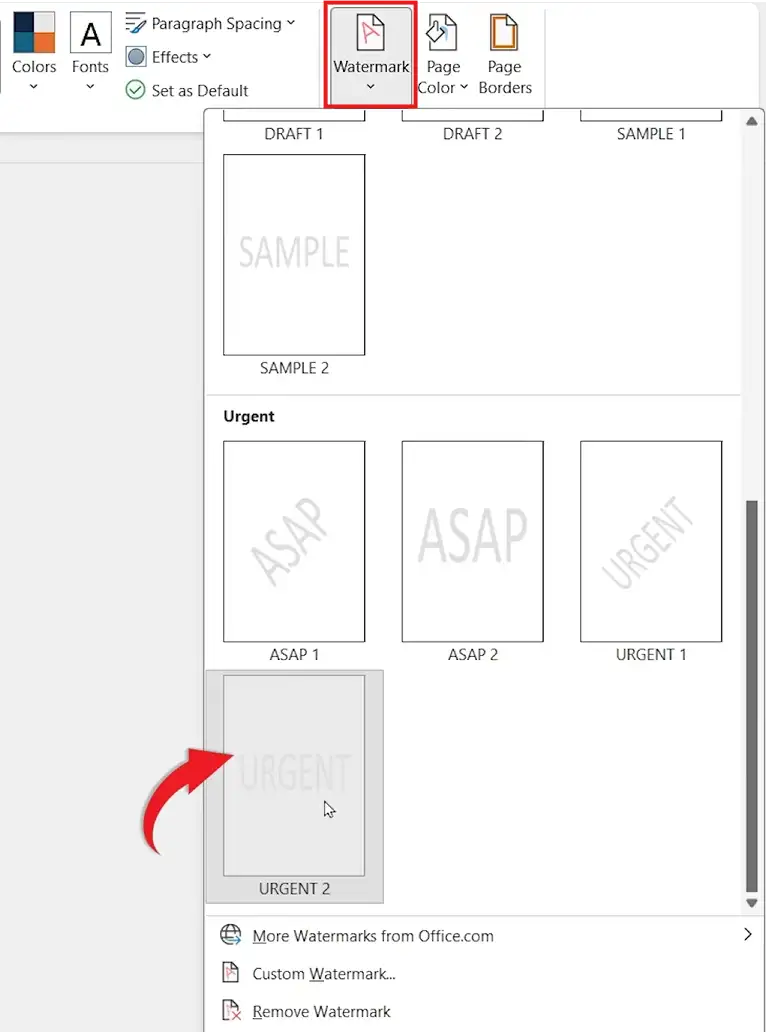
👉 The watermark will appear as faded text behind your document content.
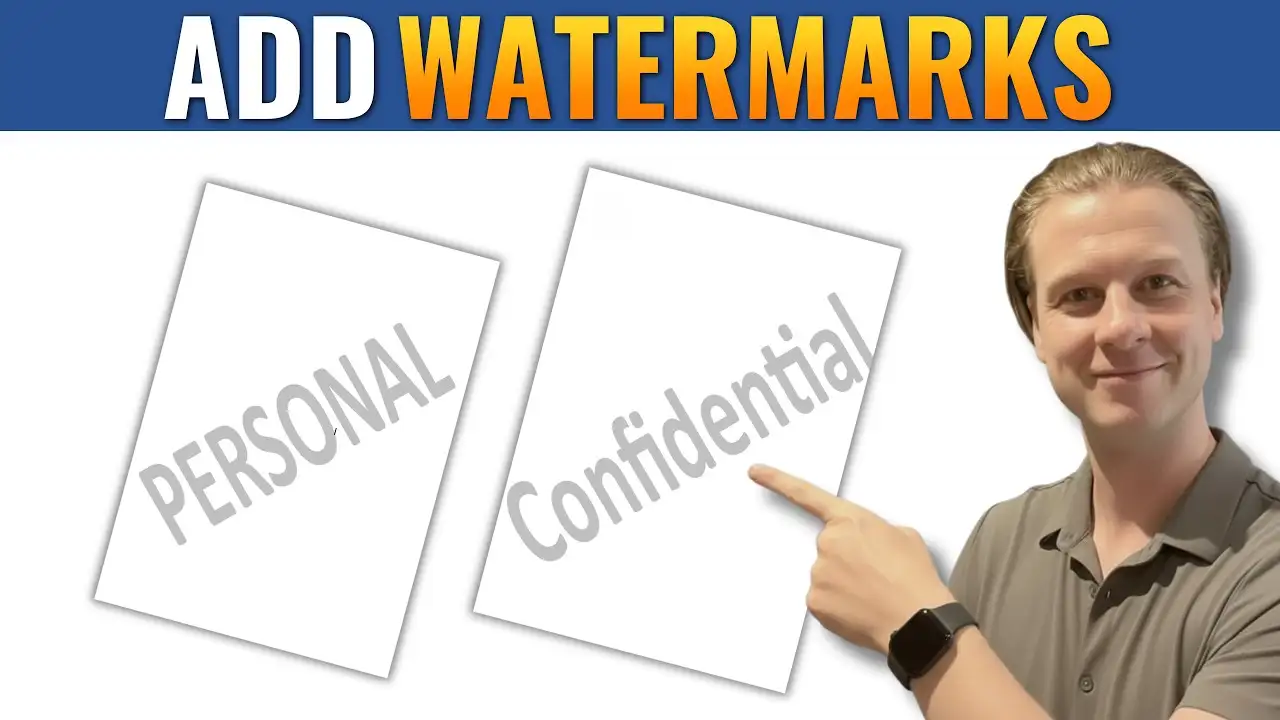
Method 2: Create a Custom Text Watermark
If you want more control, you can create your own watermark.
Steps:
- Go to Design → Watermark
- Click Custom Watermark
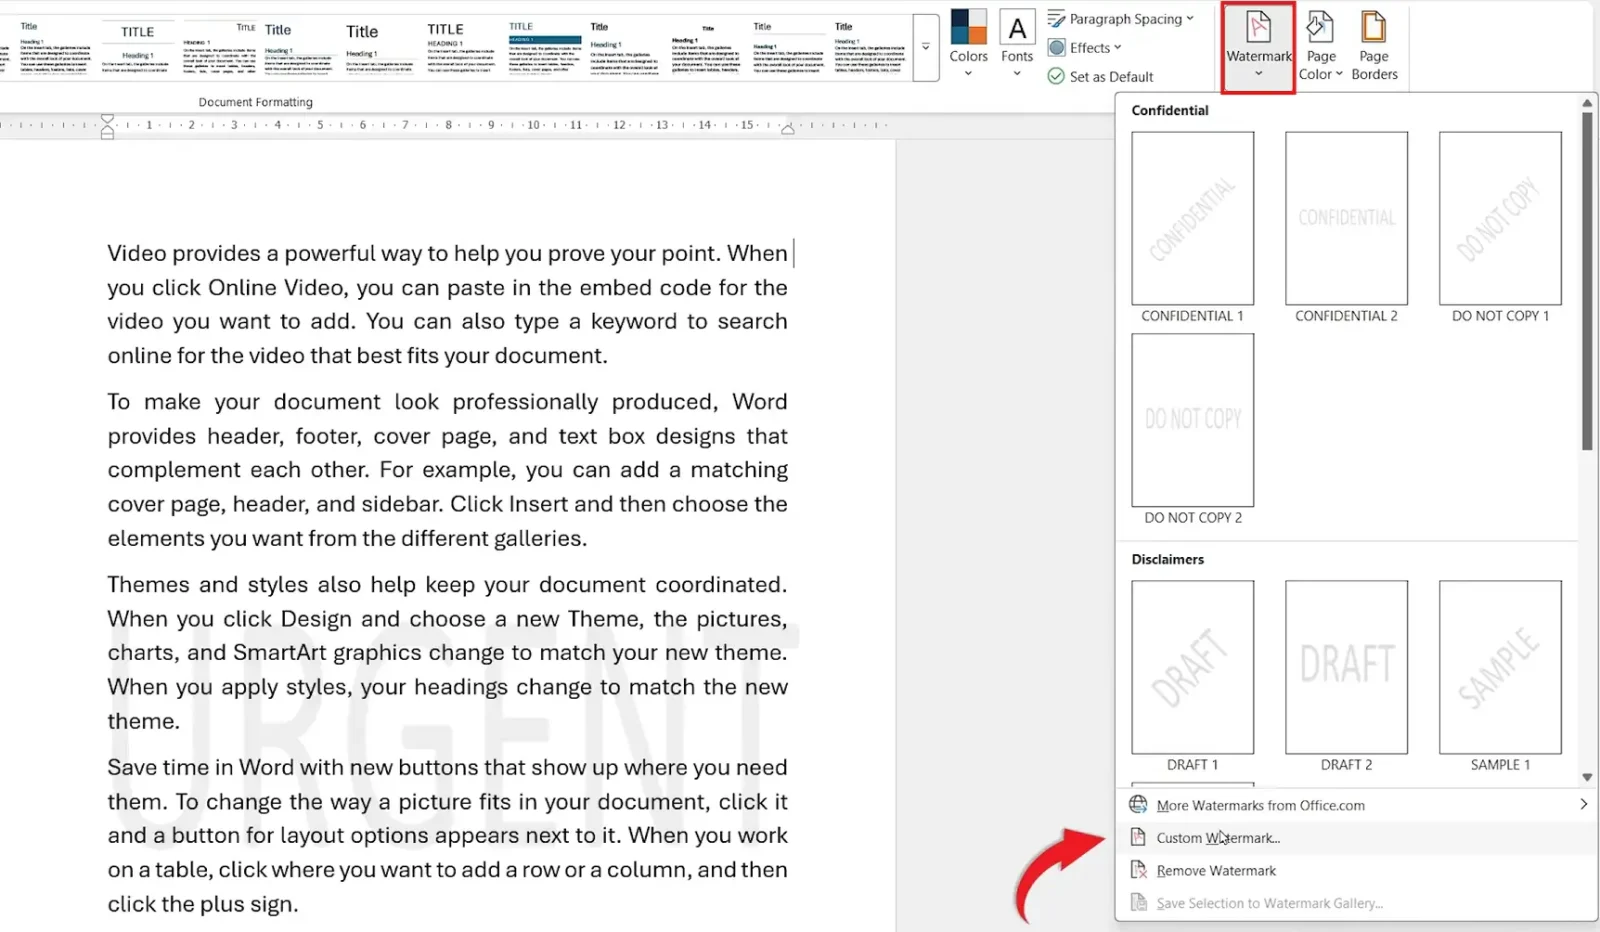
- Select Text watermark
- Customize your watermark:
- Enter your text (e.g., Version 1)
- Choose a font and size (e.g., 144)
- Select a color
- Enable Semi-transparent for readability
- Choose layout (Diagonal or Horizontal)
- Click Apply, then Close
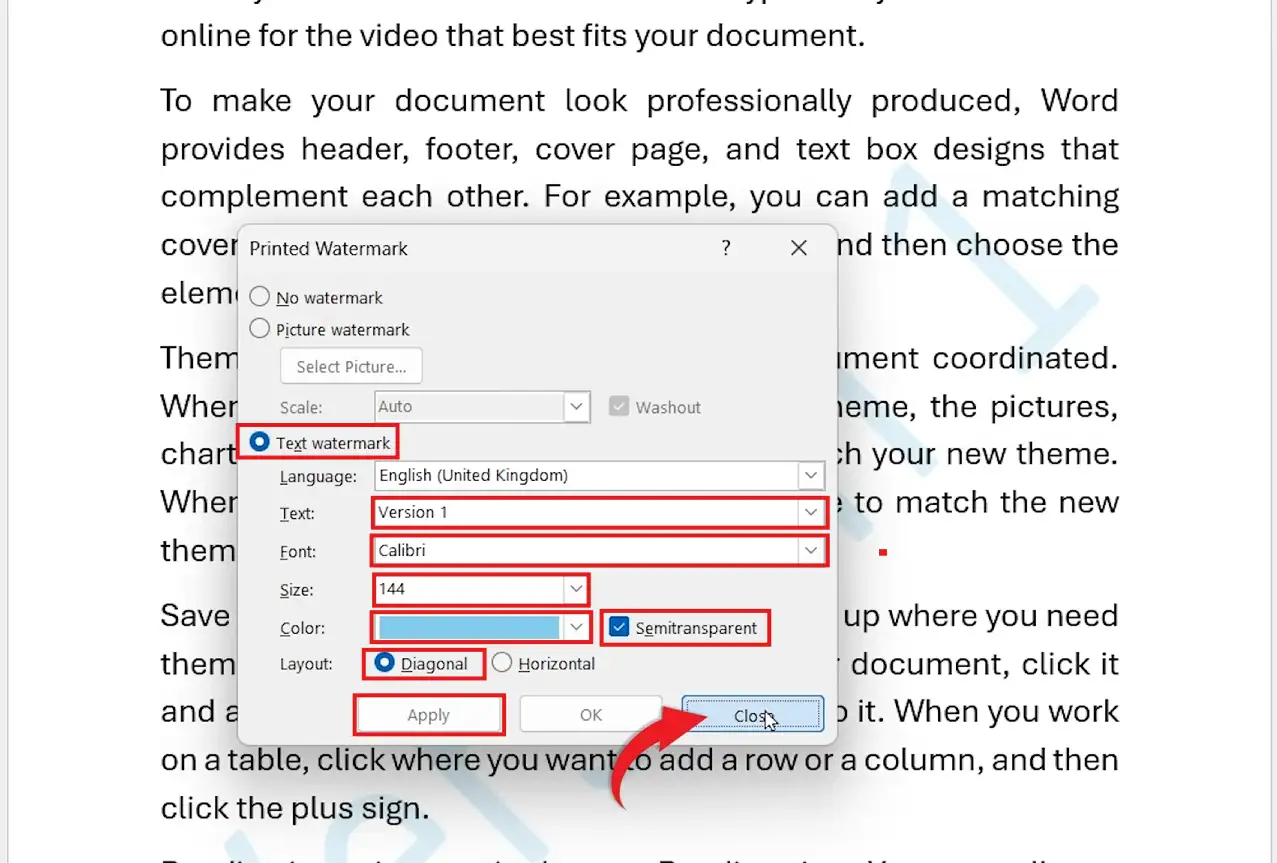
👉 Your custom watermark will appear behind your text.
Method 3: Add a Picture Watermark
You can also use an image, such as a logo — for related image controls, see how to make an image transparent in Word.
Steps:
- Go to Design → Watermark
- Click Custom Watermark
- Select Picture watermark
- Upload your image
- Adjust scaling and transparency
- Click Apply
👉 This is ideal for branding documents.
How to Preview Your Watermark Before Printing
Before finalizing your document:
Steps:
- Press Ctrl + P
- View the print preview
👉 This ensures your watermark looks correct when printed.
How to Edit or Remove a Watermark
You can easily update or remove a watermark — for the full step-by-step on stubborn watermarks, see how to remove a watermark in Word.
Steps:
- Go to Design → Watermark
- Choose one of the following:
- Custom Watermark → Edit your existing watermark
- Remove Watermark → Delete it completely
👉 Changes apply instantly.
When to Use Each Watermark Type
- Built-in watermarks → Quick labeling
- Text watermark → Custom messaging (e.g., versioning)
- Picture watermark → Branding with logos
Quick Summary (Key Takeaways)
- Use Design → Watermark to add watermarks
- Choose built-in or create a custom watermark
- Use semi-transparent settings for readability
- Preview before printing
- Easily edit or remove watermarks anytime
FAQs
What is a watermark in Word?
A watermark is faded text or an image that appears behind your document content.
Can I customize the watermark text?
Yes, you can fully customize text, font, size, color, and layout.
How do I remove a watermark in Word?
Go to Design → Watermark → Remove Watermark.
Do watermarks appear when printing?
Yes, watermarks are included in printed documents.
Can I use a logo as a watermark?
Yes, use the Picture Watermark option to insert an image.
Conclusion
Adding a watermark in Microsoft Word is an effective way to label, protect, and brand your documents.
With built-in options and full customization available, you can create professional-looking watermarks in just a few clicks.
Related Tutorials
- How to Remove a Watermark in Word
- How to Add a Background in Microsoft Word
- How to Password Protect a Word Document

Recent Microsoft Word Tutorials

Looking for more help with Microsoft Word? Browse all step-by-step Word tutorials covering formatting, layout, pages, and document setup.
👉 View all Microsoft Word tutorials: https://wordmadeeasy.org/microsoft-word/
👉 Need more support – check out the official guidance: https://support.microsoft.com/en-au

Prefer watching instead of reading? Many Word tutorials are also available as short, step-by-step videos on the Word Made Easy YouTube channel.


Leave a Reply