
To insert peso sign in Word, open Insert → Symbol → More Symbols and select ₱, or type 20B1 and press Alt + X. The Unicode method is fastest when you use the symbol regularly.
In this guide, you’ll learn both methods, how to find the Philippine peso sign in the Currency Symbols list and what to check when the Unicode conversion does not work. For another common special character, see how to insert a degree symbol in Word.
What Is the Peso Sign in Word?
The Philippine peso sign is ₱. Its Unicode value is U+20B1, which means you can either select the character from the Symbol window or convert the hexadecimal code directly in desktop Word for Windows.
If you frequently insert peso sign in Word, memorising 20B1 saves time. The same Unicode conversion technique is useful for other characters, while the Word keyboard shortcuts cheat sheet covers more everyday keyboard commands.
- Use the Symbol menu when you want to locate ₱ visually.
- Use 20B1 followed by Alt + X when speed matters.
- Copy and paste ₱ after inserting it when you need the symbol several times.
Watch the Video Tutorial
If you prefer to see this in action, the full video walkthrough is below, showing each method step by step.
How to Insert Peso Sign in Word: Step-by-Step
You can insert peso sign in Word in two ways. The Symbol menu is best when you do not know the character code, while the Unicode method is quicker once you remember 20B1.
Method 1: How to Insert Peso Sign in Word Using Symbol
Use the Symbol window when you want to browse currency characters and confirm that you have selected the correct peso sign.
Open the Symbol Menu
- Place the cursor where you want ₱ to appear.
- Open the Insert tab.
- Select Symbol.

👉 The Symbol menu opens with commonly used characters.
Open More Symbols
- Select More Symbols.

👉 The full Symbol window opens so you can browse additional characters.
Find the Philippine Peso Sign
- Open the Subset list.
- Select Currency Symbols.
- Find ₱ in the symbol grid. In the video, it appears as a P with two horizontal lines.
- Select ₱.
- Select Insert.
- Close the Symbol window.

👉 Done. Word inserts ₱ at the cursor position.
Method 2: How to Insert Peso Sign in Word with Unicode 20B1
This is the fastest way to insert peso sign in Word when you use ₱ regularly. You type the character code directly into the document and convert it with a keyboard command.
- Place the cursor where you want the peso sign.
- Type 20B1.
- Leave the cursor immediately after the code.
- Press Alt + X.
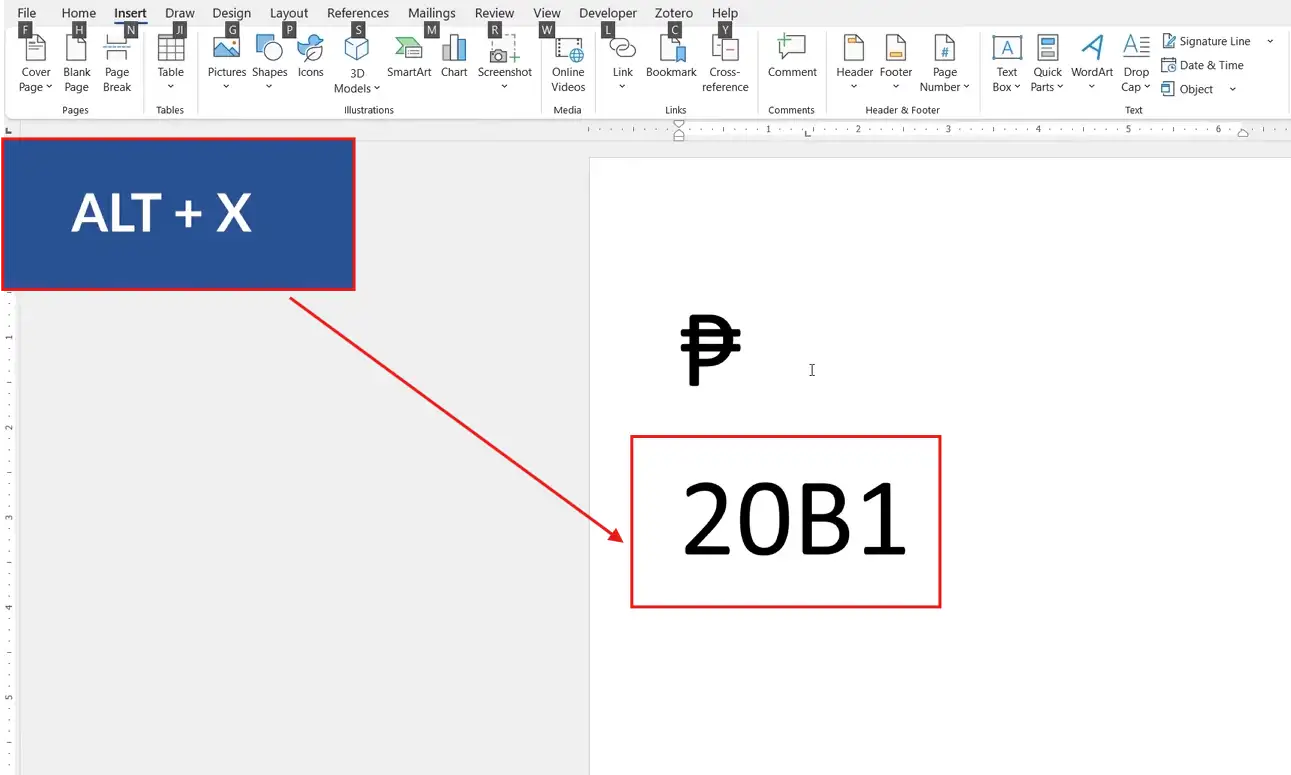
👉 20B1 changes to ₱ immediately. That’s it. No Symbol window and no searching through character lists.
After you insert peso sign in Word, copy and paste the symbol wherever else you need it in the document.
Which Method Should You Use?
| Method | Best For |
|---|---|
| Symbol menu | Finding ₱ visually when you do not know the code |
| Unicode 20B1 | Entering ₱ quickly when you use it regularly |
Best choice: Use 20B1 followed by Alt + X when you regularly insert peso sign in Word. Use the Symbol menu when you need to browse or verify the character first.
Common Problems When Inserting the Peso Sign
You Can’t Find the Peso Sign
Open Insert → Symbol → More Symbols, then choose Currency Symbols from the Subset list. This narrows the grid and makes ₱ easier to locate.
The Unicode Code Does Not Convert
Confirm that you typed 20B1 correctly, leave the cursor directly after the code and press Alt + X. Selecting only 20B1 before using the command can also prevent neighbouring characters from interfering.
You Need the Peso Sign Repeatedly
After you insert peso sign in Word once, copy and paste ₱ into the remaining locations instead of reopening the Symbol window each time.
You Need Another Currency Symbol
Return to Insert → Symbol → More Symbols and choose Currency Symbols. The same window contains other available currency characters.
Pro Tips for Inserting the Peso Sign
- Memorise 20B1 if you frequently insert peso sign in Word.
- Use the Currency Symbols subset instead of searching the entire character grid.
- Copy and paste ₱ after the first insertion when you need it several times.
- Use the same Symbol workflow for other characters — for another example, see how to insert arrows in Word.
FAQs
How do I insert peso sign in Word?
To insert peso sign in Word, open Insert → Symbol → More Symbols and choose ₱, or type 20B1 and press Alt + X.
What is the Unicode code for the Philippine peso sign?
The Unicode code used for the Philippine peso sign is U+20B1. In Word, type 20B1 and press Alt + X.
Where can I find the peso sign in Word?
Open Insert → Symbol → More Symbols and select Currency Symbols from the Subset list. Then select ₱ from the symbol grid.
What is the fastest way to type the peso sign in Word?
Type 20B1 and press Alt + X. Word converts the code directly to ₱.
Can I copy and paste the peso sign in Word?
Yes. After inserting ₱ once, copy and paste it anywhere else in the document.
Why can’t I find the peso sign in the Symbol menu?
Open More Symbols and choose Currency Symbols from the Subset list. This reduces the number of characters you need to search.
Can I insert other special characters using the Symbol menu?
Yes. The Symbol window contains many additional characters. For another walkthrough, see how to insert tick marks in Word.
Conclusion
To insert peso sign in Word, use the Symbol menu when you want to find ₱ visually or type 20B1 followed by Alt + X when you want the faster method.
If you use the character regularly, memorise the Unicode method. It avoids repeated menu navigation and converts the code in place.
For more character-entry techniques, continue with how to insert a degree symbol in Word and build a small set of codes you can use without opening the Symbol window.
Related Tutorials
Word Tutorials
Recent Microsoft Word Tutorials
Browse the complete collection for help with formatting, layout, pages, tables, images, and document setup.
For Microsoft support documentation, visit the official Microsoft guidance.
Leave a Reply