
To add rounded corners to picture in Word, select the picture and open Picture Format → Crop → Crop to Shape, then choose Rounded Rectangle. Word crops the image into the shape without changing the original picture file.
In this guide, you’ll learn how to apply rounded corners, reposition the picture if the crop hides an important area and restore the original shape afterwards. If you still need to add the image, start with how to insert a picture in Word.
Why Add Rounded Corners to a Picture in Word?
Rounded corners soften the edges of a rectangular picture and can help an image fit a cleaner document design. When you add rounded corners to picture in Word, the Crop to Shape feature handles the effect inside the document, so you do not need to edit the source image first.
The crop remains adjustable after you apply the rounded rectangle. If an important part of the picture disappears, reopen Crop and reposition the image inside the shape.
- Give rectangular pictures a softer appearance.
- Apply the effect without editing the original image externally.
- Reposition the visible picture after applying the shape.
- Restore the original picture shape when you no longer want the effect.
Watch the Video Tutorial
If you prefer to see this in action, the full video walkthrough is below, showing each method step by step.
How to Add Rounded Corners to Picture in Word: Step-by-Step
The process has three parts. First, add rounded corners to picture in Word with Crop to Shape. Next, adjust which part of the image remains visible. Finally, use Reset Picture if you want to return to the original shape.
Method 1: How to Add Rounded Corners to Picture in Word Using Crop to Shape
Crop to Shape is the main way to add rounded corners to picture in Word. Select the picture first so Word displays the picture-formatting controls.
Open Crop to Shape
- Select the picture.
- Open the Picture Format tab.
- Select the arrow underneath Crop.
- Point to Crop to Shape.
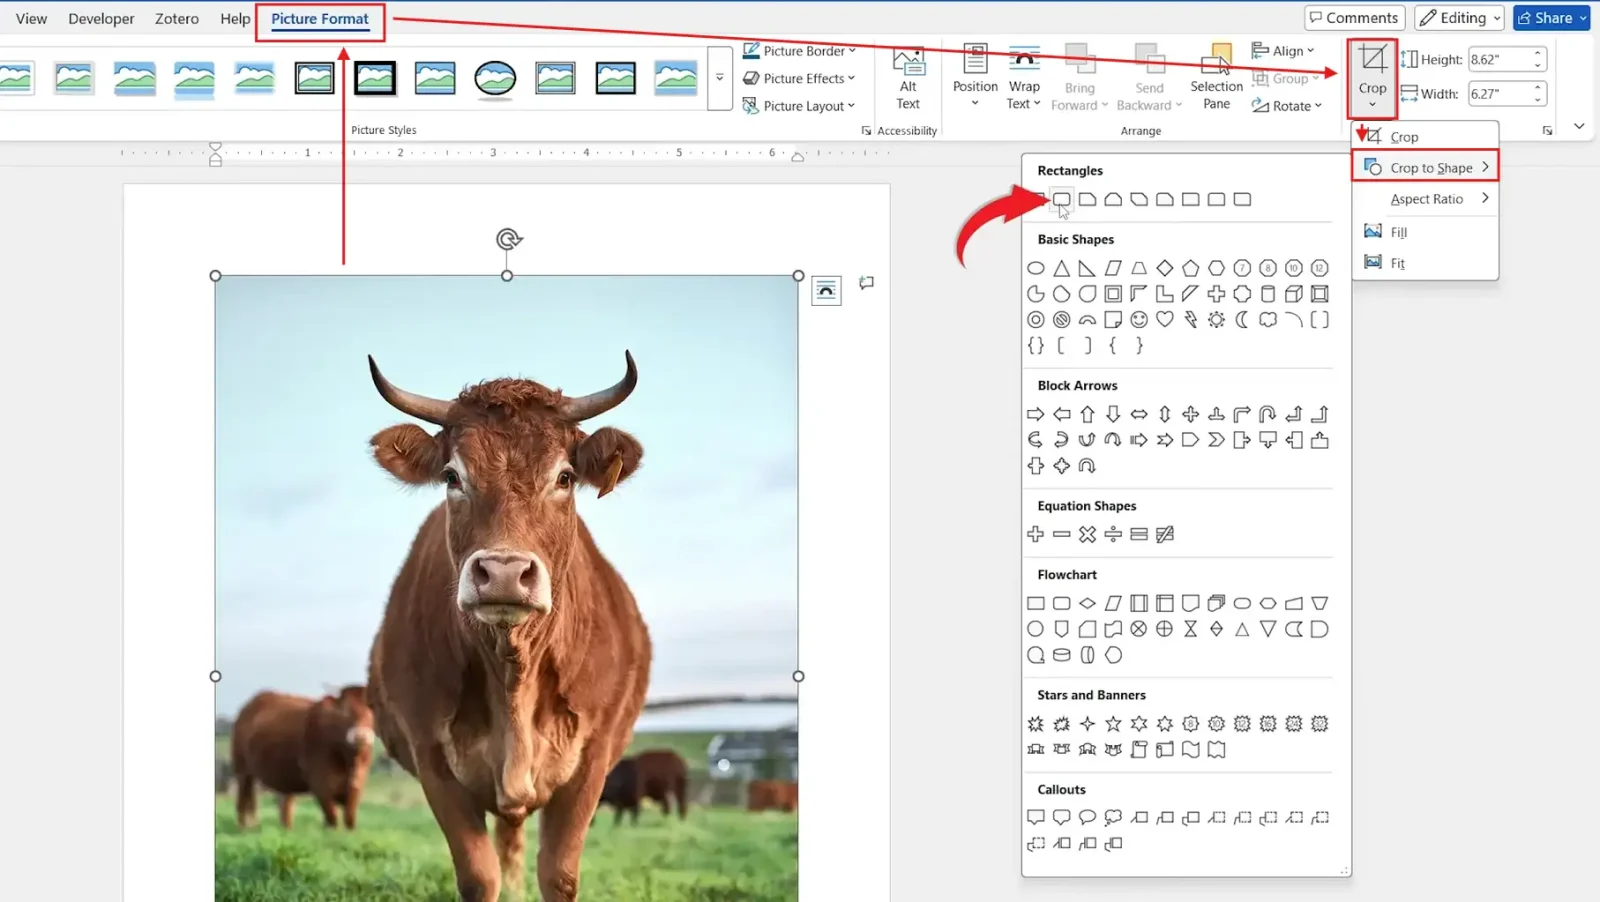
👉 The shape gallery opens so you can choose the rounded-corner style.
Select Rounded Rectangle
- Find Rounded Rectangle in the shape gallery.
- Hover over the shape if you want to confirm its name.
- Select Rounded Rectangle.
👉 Done. The picture immediately takes on rounded corners.
Method 2: How to Add Rounded Corners to Picture in Word by Adjusting the Crop
After you add rounded corners to picture in Word, the rounded shape may hide part of the image. You do not need to remove the effect. Reopen the crop controls and move the picture inside the shape instead.
Reopen the Crop Controls
- Select the rounded picture.
- Open Picture Format.
- Select Crop.
👉 Black crop handles appear around the image.
Move the Picture Inside the Crop Area
- Drag the picture until the important part sits inside the rounded shape.
- Check that the main subject is fully visible.
- Select outside the picture when you are happy with the position.
👉 The rounded shape stays in place while the visible area of the picture changes.
This adjustment changes the image inside the crop area. If you need to reposition the whole object on the page instead, see how to move a picture in Word.
Method 3: How to Add Rounded Corners to Picture in Word and Reset the Picture
If you no longer want the result after you add rounded corners to picture in Word, use Reset Picture. The video demonstrates this as the way to restore the original picture shape and style.
- Select the picture.
- Open Picture Format.
- Select Reset Picture.
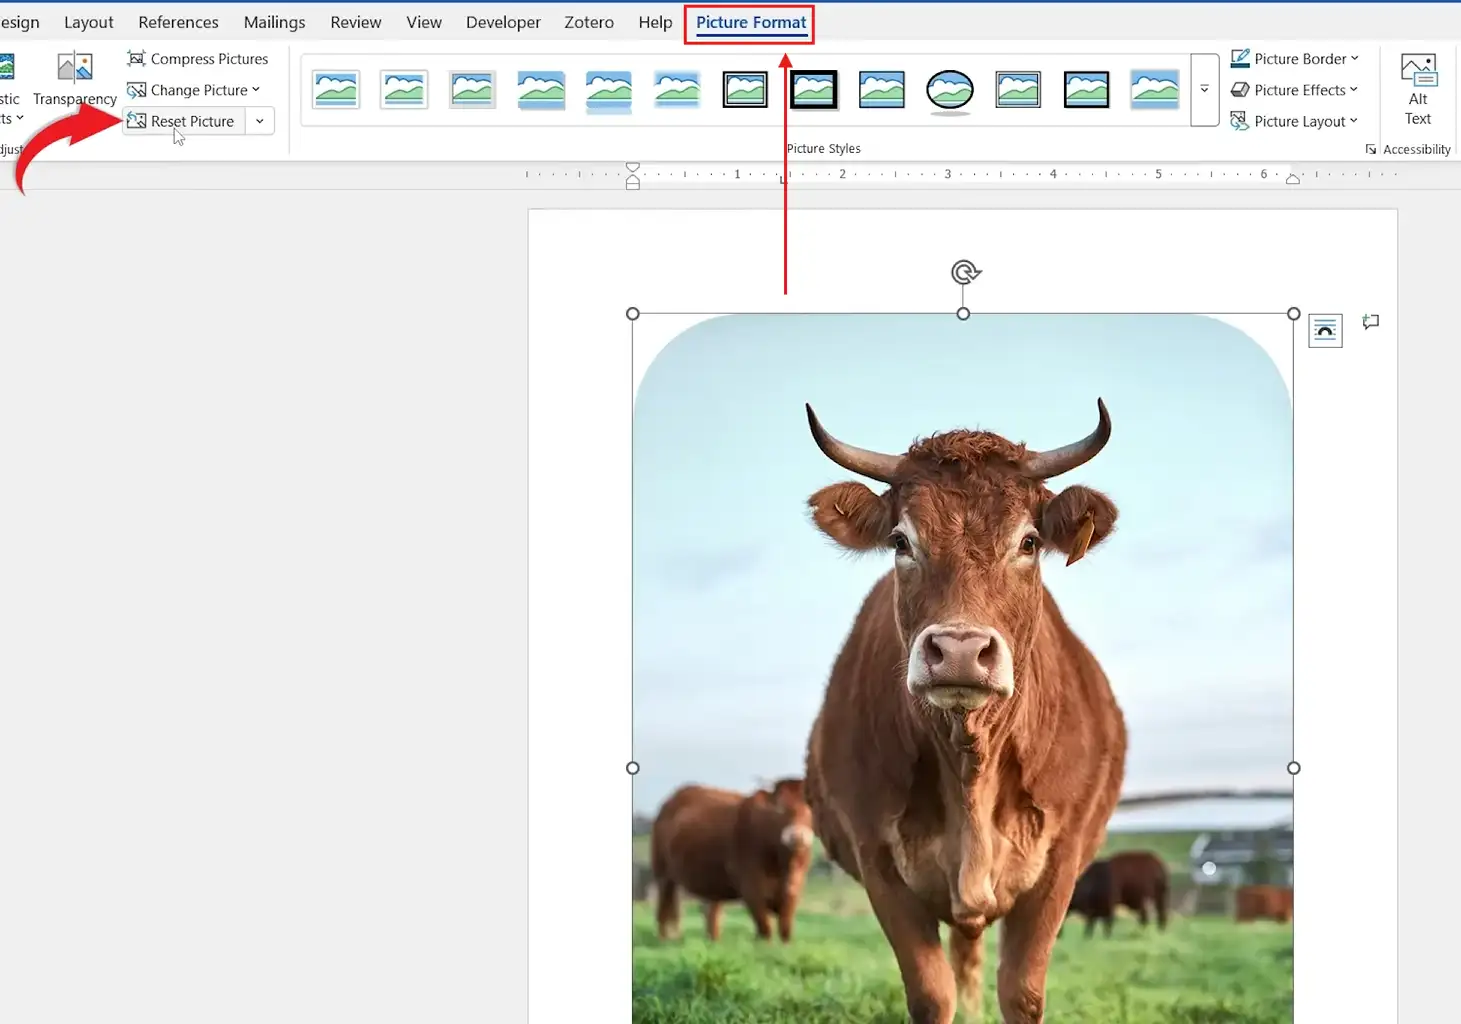
👉 The picture returns to its original shape and style.
If you want a completely different picture shape rather than rounded corners, see how to insert a picture into a shape in Word.
Which Method Should You Use?
| Method | Best For |
|---|---|
| Crop to Shape | Applying rounded corners to the picture |
| Adjust Crop | Changing which part of the picture remains visible |
| Reset Picture | Restoring the original picture shape and style |
Best approach: Use Crop to Shape → Rounded Rectangle to add rounded corners to picture in Word. Only reopen Crop if the subject is cut off, and use Reset Picture when you want to undo the shape.
Common Problems with Rounded Picture Corners
Part of the Picture Is Cut Off
Select the picture and open Picture Format → Crop. Move the picture inside the crop area until the important content becomes visible again.
Crop to Shape Is Missing
Select the picture before looking for the command. Then open Picture Format and select the arrow beneath Crop to find Crop to Shape.
The Rounded Shape Does Not Look Right
Reopen Crop first and check the image position. If you want to abandon the effect completely, select Reset Picture.
The Whole Picture Needs Moving
Crop controls change which part of the image appears inside the shape; they do not control page placement. For page positioning, see how to move an image freely in Word.
Pro Tips for Rounded Picture Corners
- Apply Rounded Rectangle first, then inspect the subject before doing anything else.
- If you add rounded corners to picture in Word and the subject is cropped, reposition the picture rather than starting again.
- Use the same picture shape on similar images when you want a consistent document design.
- Use Reset Picture when you want the original shape and style back.
- For another picture-formatting effect, learn how to make an image transparent in Word.
FAQs
How do I add rounded corners to picture in Word?
To add rounded corners to picture in Word, select the picture, open Picture Format, select the arrow under Crop, choose Crop to Shape and select Rounded Rectangle.
Why is part of my picture cut off after adding rounded corners?
The shape crops the picture to fit its boundaries. Reopen Crop and move the picture until the important area is visible.
Can I reposition a picture after applying rounded corners?
Yes. Select the picture, open Picture Format → Crop and move the picture inside the crop area.
How do I remove rounded corners from a picture in Word?
Select the picture, open Picture Format and choose Reset Picture. The video shows this restoring the original shape and style.
Where is Crop to Shape in Word?
Select the picture, open Picture Format and select the arrow underneath Crop. Then choose Crop to Shape.
Which shape gives a picture rounded corners?
Choose Rounded Rectangle from the Crop to Shape gallery. It applies the rounded-corner effect demonstrated in the video.
Can I put a picture into other shapes in Word?
Yes. For a separate walkthrough, see how to insert a picture into a shape in Word.
Conclusion
To add rounded corners to picture in Word, select the image and choose Picture Format → Crop → Crop to Shape → Rounded Rectangle. Word applies the effect immediately.
If the crop hides part of the subject, reopen Crop and reposition the picture. Use Reset Picture whenever you want to return to the original shape and style.
For more control over picture shapes, continue with how to insert a picture into a shape in Word.
Related Tutorials
- How to Insert a Picture in Word
- How to Move a Picture in Word
- How to Make an Image Transparent in Word
Word Tutorials
Recently Added on Word Made Easy
Browse the complete collection for help with formatting, layout, pages, tables, images, and document setup.
For Microsoft support documentation, visit the official Microsoft guidance.
Leave a Reply