
What Does It Mean to Insert a Picture Into a Shape in Word?
People often discuss How to Insert a Picture into a Shape in Word. They usually mean placing a photo inside a predefined shape. This includes shapes such as a circle, oval, star, arrow, or any other design available in Microsoft Word. Instead of the image remaining a standard rectangle or square, it takes on the outline of the selected shape.
This feature is especially useful for:
- Making documents visually appealing
- Creating posters, flyers, or worksheets
- Designing resumes or school projects
- Adding creative touches to presentations
The best part? You don’t need any graphic design software. Microsoft Word already has everything you need.
Why Use Shapes for Pictures in Microsoft Word?
Using shaped images can instantly improve the look of your document. Here’s why many users prefer this method:
- Visual appeal: Shapes make images stand out
- Better organisation: Helps separate sections clearly
- Creative freedom: Choose from stars, arrows, circles, and more
- Professional finish: Documents look polished and modern
Whether you’re inserting a cute kitten photo, a logo, or a profile picture, this skill is worth having. Learning How to Insert a Picture into a Shape in Word can be very useful.
Things You Need Before You Start
Before following the steps, make sure you have:
- Microsoft Word installed (any recent version works)
- An image saved on your device
- A Word document open and ready
Once you have these, you’re good to go.
Watch the Video Tutorial
If you prefer to see this in action, the full video walkthrough is below, showing each method step by step.
How to Insert a Picture into a Shape in Word (Step-by-Step)
This is the most important section of the article. Follow these steps carefully, and you’ll master How to Insert a Picture into a Shape in Word in minutes.
Step 1: Insert an Image into Your Document
- Open your Word document
- Click on the Insert tab at the top
- Select Pictures
- Choose the location of your image, either from your device or one from online
- Click Insert

Your image will now appear in the document.
Step 2: Select the Image
- Left-click on the image once
- You’ll see small circles or squares appear around it
- This means the image is selected and ready for editing
This step is crucial. If the image isn’t selected, the formatting options won’t appear – and if you find the image is stuck in place after inserting it, see the guide on how to move an image freely in Word to unlock full positioning control.
Step 3: Open the Picture Format Tab
Once the image is selected:
- Look at the ribbon at the top
- Click on Picture Format
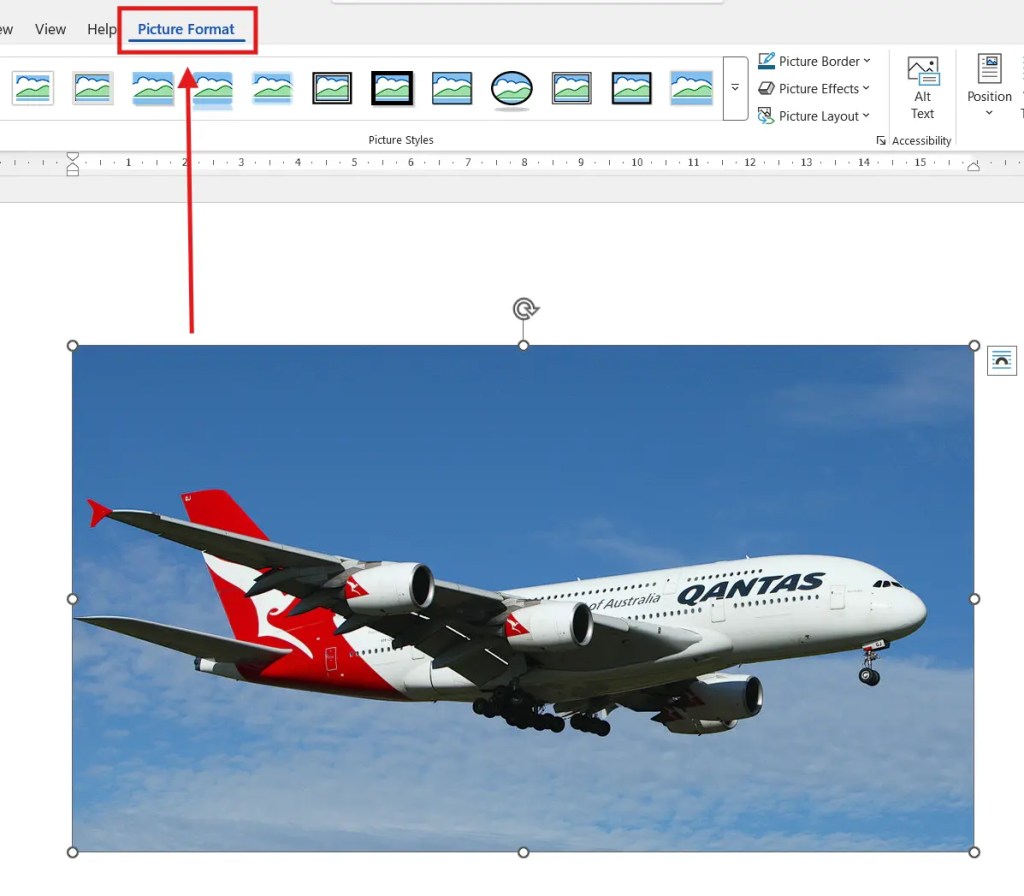
This tab gives you access to powerful image editing tools, including cropping and shaping options.
Step 4: Crop the Image to a Shape
Now comes the fun part:
- In the Picture Format tab, find Crop
- Click the small downward arrow under Crop
- Select Crop to Shape
- Choose any shape you like
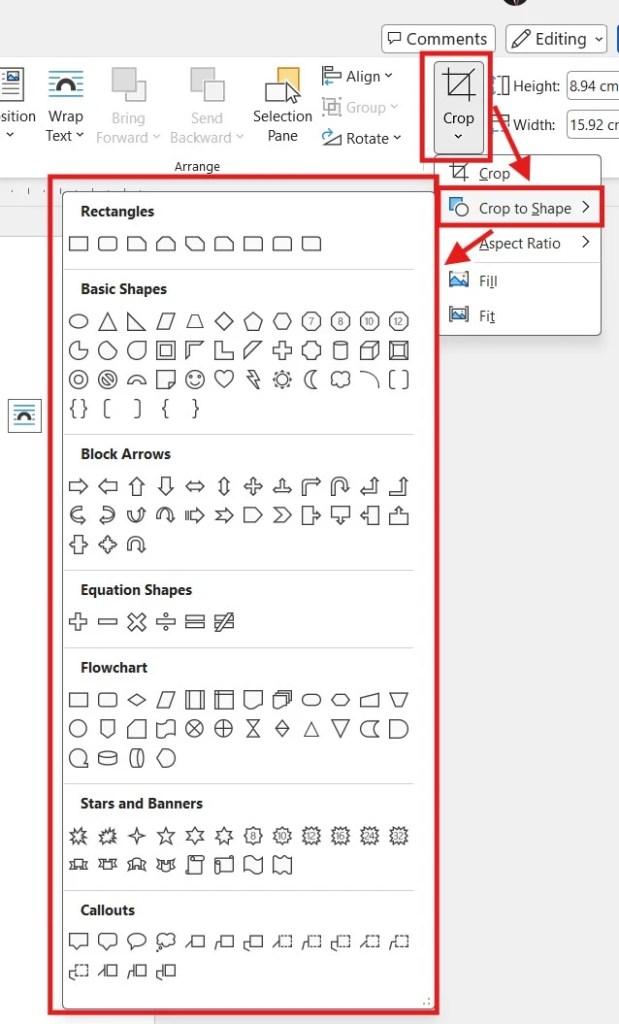
Examples:
- Oval
- Circle
- Star
- Arrow
- Rectangle with rounded corners
As soon as you click a shape, Word will automatically place the image inside it.
Step 5: Adjust the Image Inside the Shape
Sometimes the image may not align perfectly inside the shape. To fix this:
- Click Crop again
- Drag the image inside the shape
- Resize or reposition until it looks right
- Press Enter or click outside the image
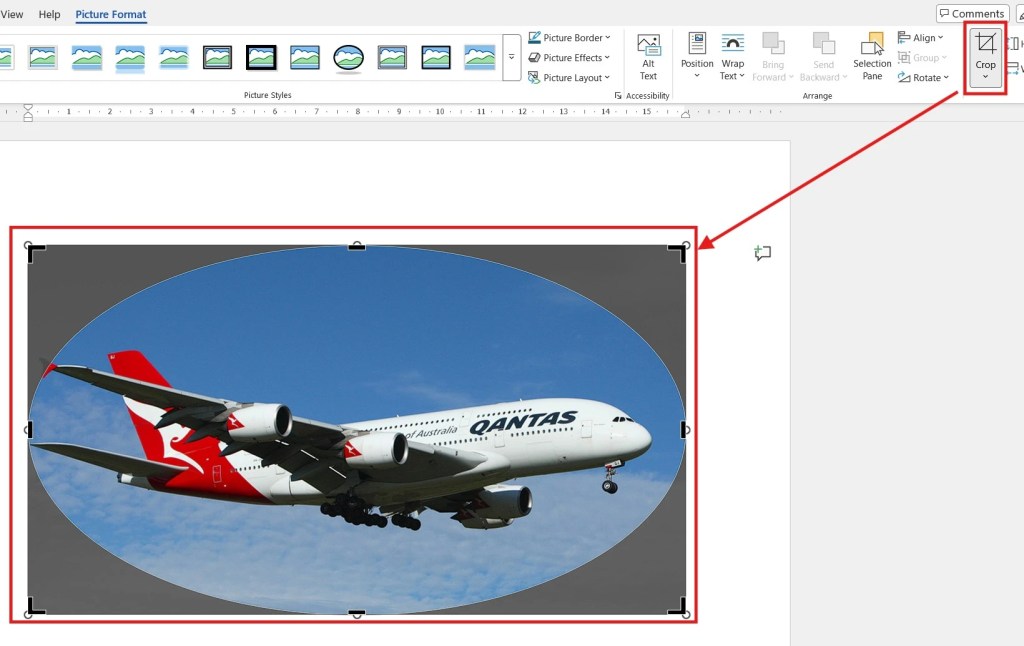
Now your image fits neatly inside the selected shape.
How to Change the Shape After Cropping
Already cropped your image but want a different shape? No problem.
- Select the image
- Go to Picture Format
- Click Crop
- Choose Crop to Shape
- Select a new shape
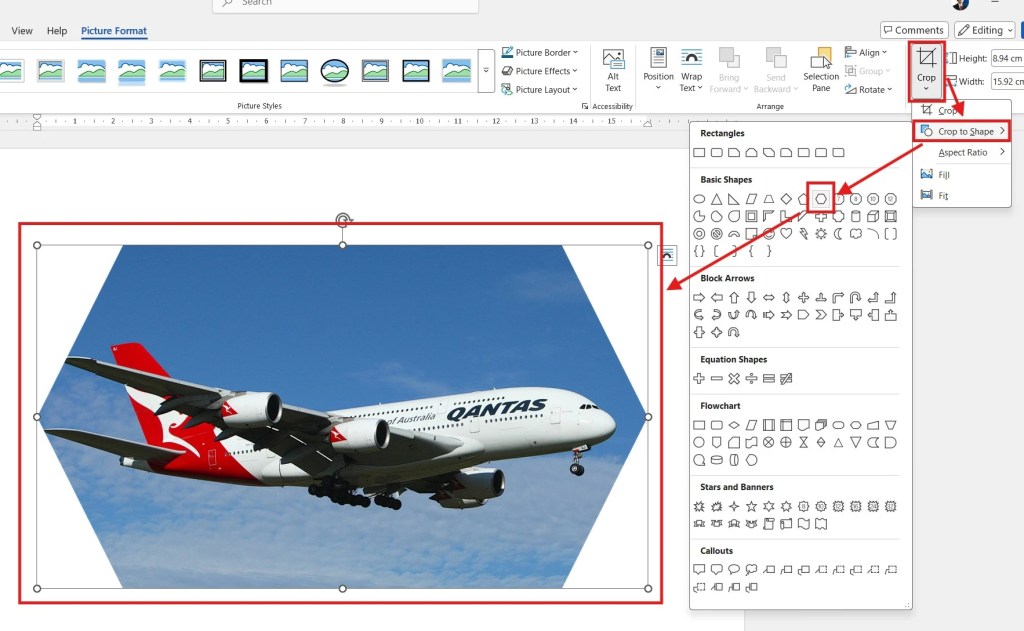
The image will instantly change to the new shape without needing to reinsert it.
Popular Shapes You Can Use for Pictures
Word offers dozens of shapes. Below are the most commonly used ones.
Oval and Circle Shapes
These are perfect for:
- Profile pictures
- Student photos
- Team member images
Circles give a clean and professional look.
Stars and Decorative Shapes
Stars are great for:
- Certificates
- Awards
- Fun worksheets
- Kids’ projects
They add personality and creativity to your document.
Arrows and Directional Shapes
Arrow shapes work well for:
- Tutorials
- Instructions
- Flowcharts
They guide the reader’s attention exactly where you want it.
Tips for Making Your Shaped Images Look Professional
To make your document look polished:
- Use high-quality images
- Avoid stretching images too much
- Add Picture Borders for emphasis – and if you want to layer an image behind text or create a subtle background effect, you can also learn how to make an image transparent in Word.
- Keep shape styles consistent throughout the document
- Align images properly with text
Small details make a big difference.
How to Insert Multiple Pictures into Different Shapes?
Want to use more than one image?
- Insert all images first
- Select each image one by one
- Crop each image to a different shape
- Arrange them using Align tools
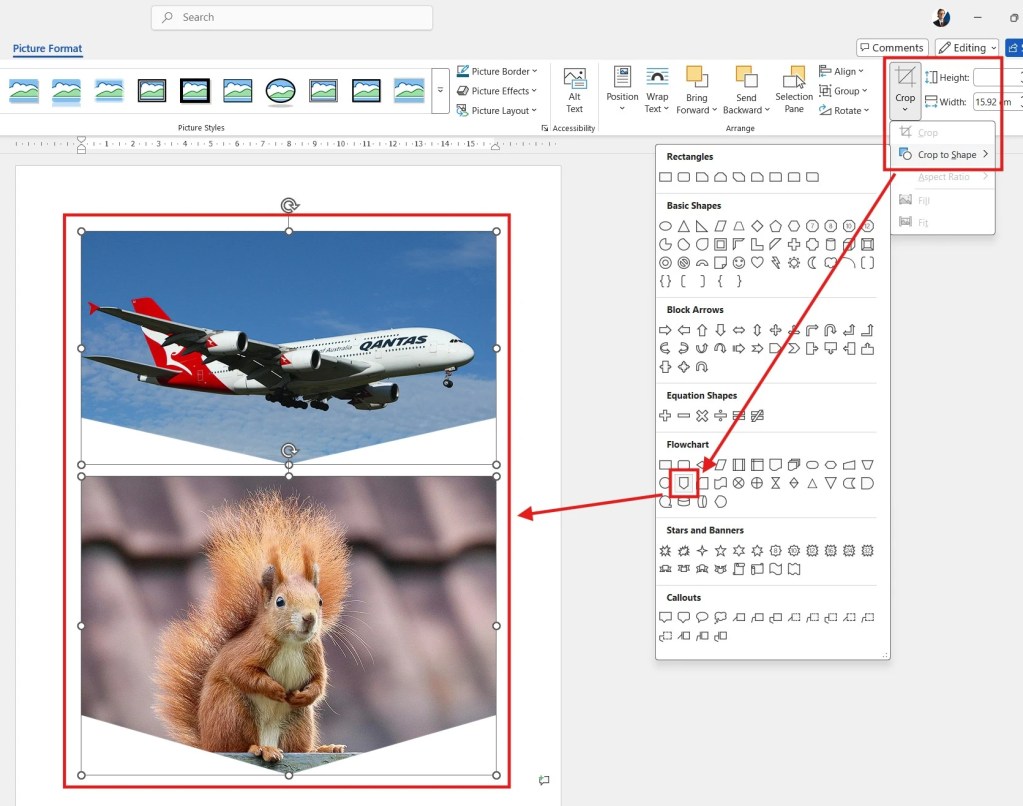
This is perfect for collages, comparisons, or creative layouts.
FAQs
Can I insert a picture into any shape in Word?
Yes, Word allows you to insert pictures into almost any available shape.
Does this work in all versions of Word?
Most modern versions support this feature, including Word 2016 and newer.
Can I resize the shape after inserting the picture?
Yes, simply drag the corners of the image.
Will cropping affect my original image file?
No, the original image remains unchanged on your device.
Can I add borders to shaped images?
Yes, use Picture Border under the Picture Format tab.
Is this feature available on Word Online?
Some features are limited, but basic cropping to shape is available.
Conclusion
Learning How to Insert a Picture into a Shape in Word is a simple skill. It is powerful and can dramatically improve the look of your documents. Whether you’re working on a school assignment, business report, or creative project, shaped images add clarity, style, and professionalism – and if you want to go further, you can also learn how to add text over an image in Microsoft Word to create posters, covers, and styled layouts.
With just a few clicks-Insert, Select, Crop, and Shape-you can transform ordinary pictures into eye-catching visuals. Best of all, it works with any image and nearly any shape Word offers.
Practice with different shapes, experiment with layouts, and soon this technique will feel second nature.
Helpful Resource
For Microsoft’s official, step-by-step instructions, you can also refer to this guide: https://support.microsoft.com/en-us/office/insert-a-picture-into-an-autoshape-7bb2abbb-561f-4f40-9762-d86df823d305
Related Tutorials
- How to Move an Image Freely in Word
- How to Make an Image Transparent in Word
- How to Add Text Over an Image in Microsoft Word
Word Tutorials
Recent Microsoft Word Tutorials
Browse the complete collection for help with formatting, layout, pages, tables, images, and document setup.
For Microsoft support documentation, visit the official Microsoft guidance.
Leave a Reply