Open Word, start a new page and learn the names of the parts you will use every day.
In this chapter
Open Word and start a blank document
Name the main parts of the Word window
Use the ribbon: Tabs, groups and buttons
Zoom in and out and change the view
Find a command with Search and get help
Before you start: The first task shows you how to open Word. After that, open wme-guide-chapter-01-start.docx. The rest of the chapter uses it. To open it, double-click the file after you download it. If you see Enable Editing at the top of the page, click it.
Using your own document? The steps use the practice newsletter, but they work the same on any document. Wherever a step names part of the newsletter, such as the title or the date, use the matching text in your own document.
Which Word do I have?
There is more than one kind of Word. This guide shows the Microsoft 365 app for Windows, but most steps also work in the others.
Microsoft 365 on Windows. This is an app you install on your computer. It comes with a paid Microsoft 365 plan, such as Personal or Family. You open it from the Windows Start menu.
Word for the web. This is a free version that runs inside a web browser. You sign in with a Microsoft account at microsoft365.com. It has fewer features, and it saves your work to OneDrive, Microsoft’s online storage.
Word for Mac. This is the Microsoft 365 app for Apple computers. It looks very similar, but its shortcuts use Cmd instead of Ctrl.
To check the Windows app, click File, then click Account. Look under Product Information. It names the product you have.
What’s the Copilot button? Copilot is Microsoft’s AI helper. Depending on your plan, you may see a Copilot button on the ribbon or near the edge of the page. Copilot is optional. Nothing in this guide needs it. With a personal Microsoft account, you can switch it off in File > Options > Copilot.
Open Word and start a blank document
Every new letter, list or newsletter starts here. A blank document is an empty page, ready for your words.
Click the Start button on the Windows taskbar.The Start menu opens.
Type Word.Word appears at the top of the list.
Click Word.Word opens on its Home screen.
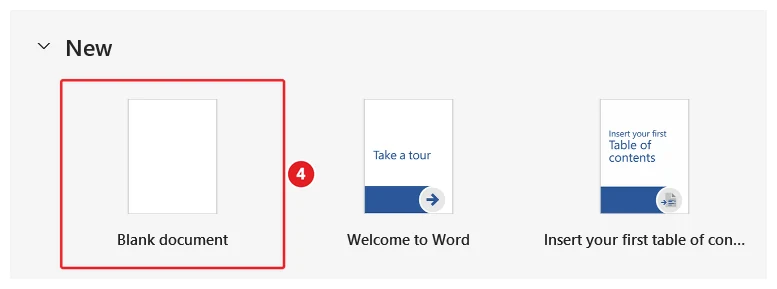
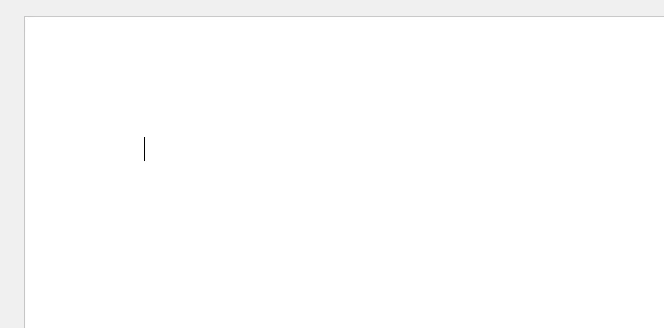
Click Blank document.On the Home screen, click Blank document (4).A new, empty page opens with a blinking line at the top.You should see: A blank document. The blinking line shows where your typing will go.
Mac and Word for the web: On a Mac, open Word from the Dock or the Applications folder. For Word for the web, sign in at microsoft365.com and choose Word, then Blank document.
Find your way around the Word window
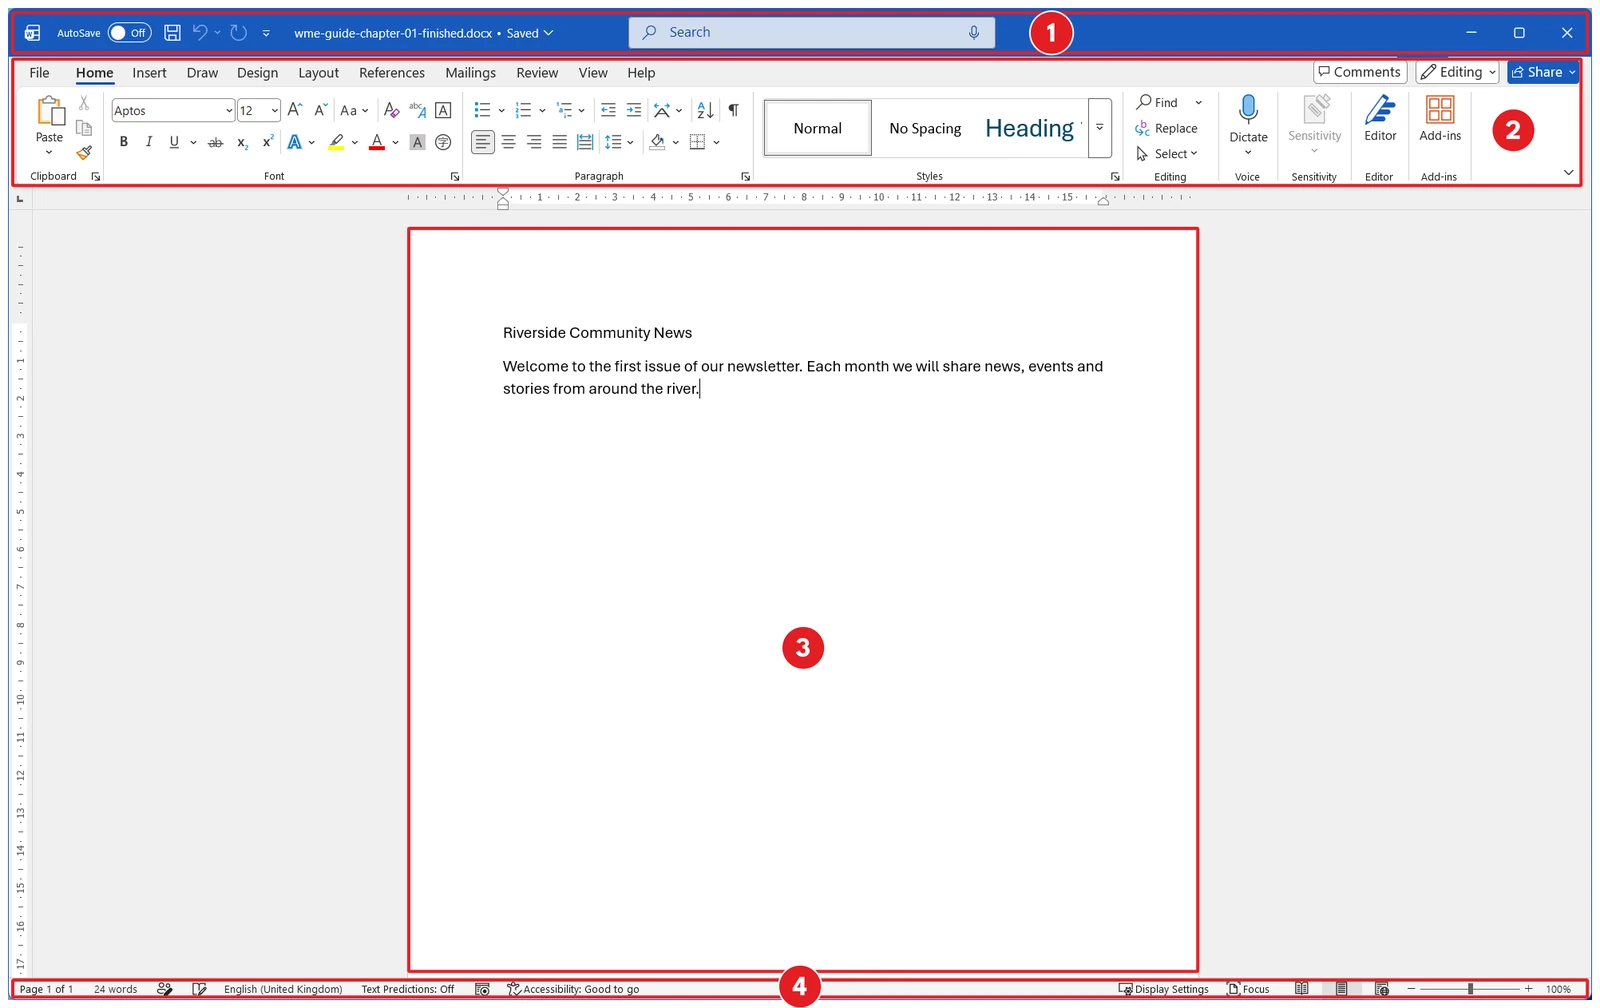
Knowing the names of the parts helps you follow any instructions. The numbers below match the picture.
The title bar runs along the very top. It shows the name of your document and the AutoSave switch.The Word window: Title bar (1), ribbon (2), page (3) and status bar (4).
The ribbon is the wide strip of buttons below it. It holds most of Word’s commands.
The page is the large white area in the middle. This is where you type.
The status bar runs along the bottom. It shows the page number, the word count and the zoom controls.
Find your way around the title bar
The title bar holds three things you will use often. The numbers below match the picture.
The AutoSave switch shows whether Word is saving your changes for you. Chapter 2 explains it.In the title bar: The AutoSave switch (1), the file name (2) and the Search box (3).
The file name sits to the left of the Search box. Click it to see where your document is saved.
The Search box lets you type what you want to do. You will use it later in this chapter.
Use the ribbon
The ribbon is split into tabs, such as Home and Insert. Each tab is split into groups of related buttons.
Click the Insert tab.The ribbon changes to show buttons for adding things, such as pictures and tables.
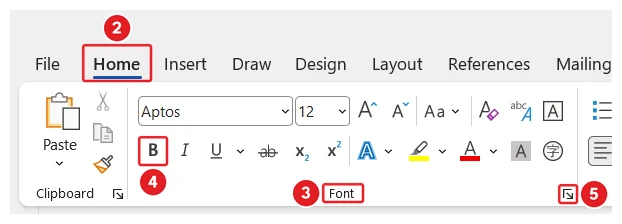
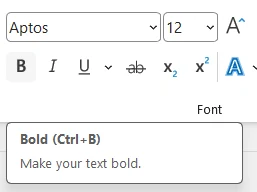
Click the Home tab.The Home tab (2), the Font group name (3), the Bold button (4) and the dialog box launcher (5).The ribbon shows the everyday buttons again.
Find the word Font along the bottom edge of the ribbon. This is the name of the Font group.
Point at the Bold button (the B button) and wait. Do not click.A small box called a ScreenTip explains what the button does.You should see: The ScreenTip for Bold.
Click the tiny arrow in the bottom-right corner of the Font group. This is a dialog box launcher.The Font window opens with more choices.
Click Cancel to close the window without changing anything.
Zoom in and out
Zooming makes the page look bigger or smaller on your screen. It does not change the size of the printed text.
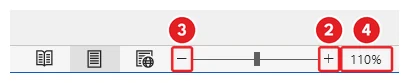
Find the zoom slider at the bottom right of the status bar.
Click the + button at the right end of the slider.Zoom in with + (2), zoom out with − (3), or click the percentage (4).The page looks bigger, and the percentage goes up.
Click the – button at the left end of the slider.The page looks smaller again.
Click the percentage number at the right end of the slider, such as 100%.The Zoom window opens.
Click 100%.The page goes back to its normal size.
Change the view
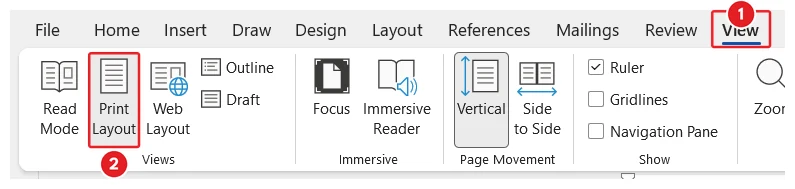
A view changes how Word shows your document. Print Layout shows the page as it will print. Use it for this guide.
Click the View tab.Open the View tab (1), then click Print Layout (2).
In the Views group, click Print Layout.You see the page as it will print, with grey space around it. If you were already in Print Layout, nothing changes.
Find a command with Search
You do not need to remember where every button lives. Word can find it for you.
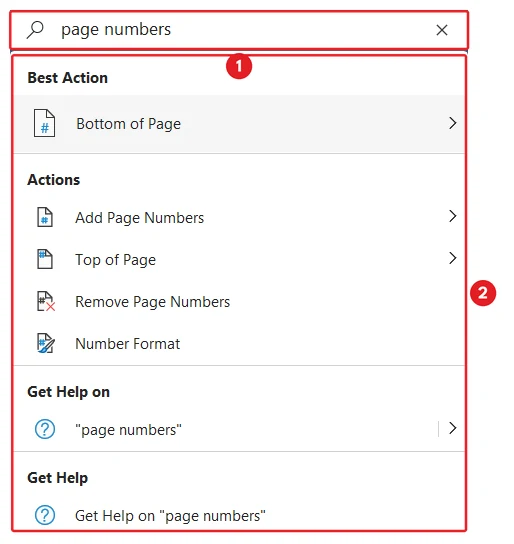
Click the Search box in the title bar.Click the Search box (1) and type what you want. Results appear below (2).
Type page numbers.A list of matching commands and help appears.
Press Esc to close the list without choosing anything.
Get help
Help explains Word’s features in short articles. Open it when you get stuck.
Click the Help tab, then click Help.The Help pane opens on the right.
See it done in Word: How to Show or Hide the Ribbon in MS Word.
Your privacy choices
We use cookies and similar technologies to make this site work, understand how it is used, and show relevant content and advertising. You can accept all cookies, deny non-essential cookies, or manage your preferences. You can change your choice at any time.
Functional
Always active
The technical storage or access is strictly necessary for the legitimate purpose of enabling the use of a specific service explicitly requested by the subscriber or user, or for the sole purpose of carrying out the transmission of a communication over an electronic communications network.
Preferences
The technical storage or access is necessary for the legitimate purpose of storing preferences that are not requested by the subscriber or user.
Statistics
The technical storage or access that is used exclusively for statistical purposes.The technical storage or access that is used exclusively for anonymous statistical purposes. Without a subpoena, voluntary compliance on the part of your Internet Service Provider, or additional records from a third party, information stored or retrieved for this purpose alone cannot usually be used to identify you.
Marketing
The technical storage or access is required to create user profiles to send advertising, or to track the user on a website or across several websites for similar marketing purposes.


 1:25
1:25