When working in Microsoft Word, adding page numbers is essential for keeping your document organized and easy to navigate especially for reports, assignments, or professional documents.
In this guide, you’ll learn how to quickly insert page numbers in Word, customize their position, and verify that everything is set up correctly.
Why Page Numbers Are Important
Page numbers help:
- Improve document structure
- Make navigation easier
- Keep multi-page documents organized
- Create a more professional appearance
Whether you’re working on a report or a simple document, page numbers are a must-have feature — and if you’re building a longer document, pairing them with a table of contents will make navigation even easier.
Watch the Video Tutorial
If you prefer to see this in action, the full video walkthrough is below, showing each method step by step.
How to Insert Page Numbers in Word
Adding page numbers in Word only takes a few clicks.
Step-by-step instructions:
- Go to the Insert tab in the ribbon
- Click Page Number in the Header & Footer section

- Choose where you want the numbers to appear:
- Select a style (e.g., Plain Number 2 for centered bottom numbering)
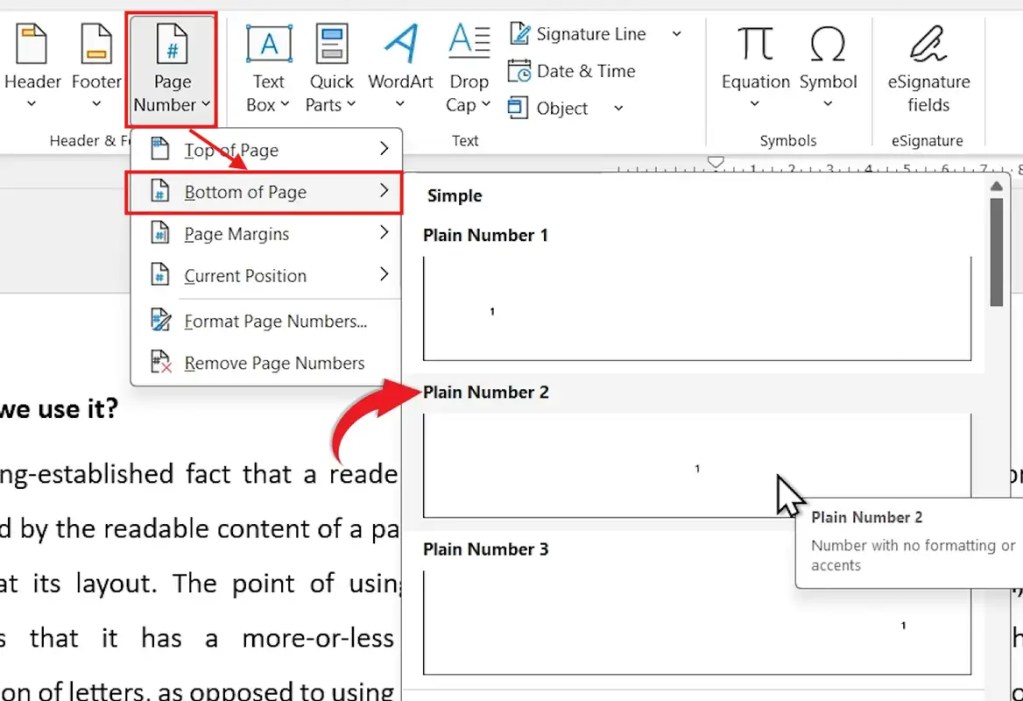
Once selected, Word will automatically add numbers to all pages in your document.
After inserting page numbers:
- Click Close Header and Footer
- Or double-click anywhere outside the header/footer area
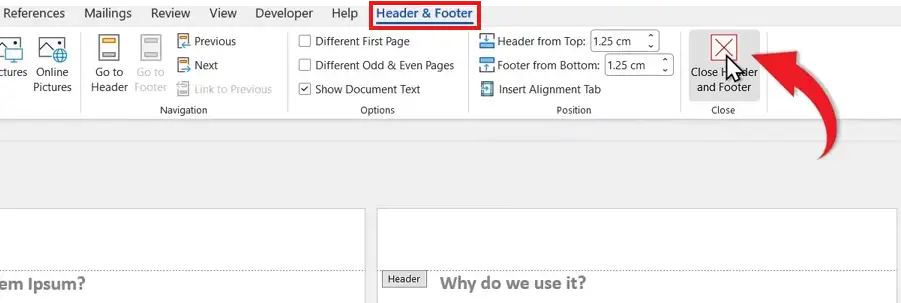
Your page numbers will remain visible at the top or bottom of each page.
How to Check Your Page Numbers
To confirm everything is working correctly:
- Go to the View tab
- Click Navigation Pane
- Select Pages
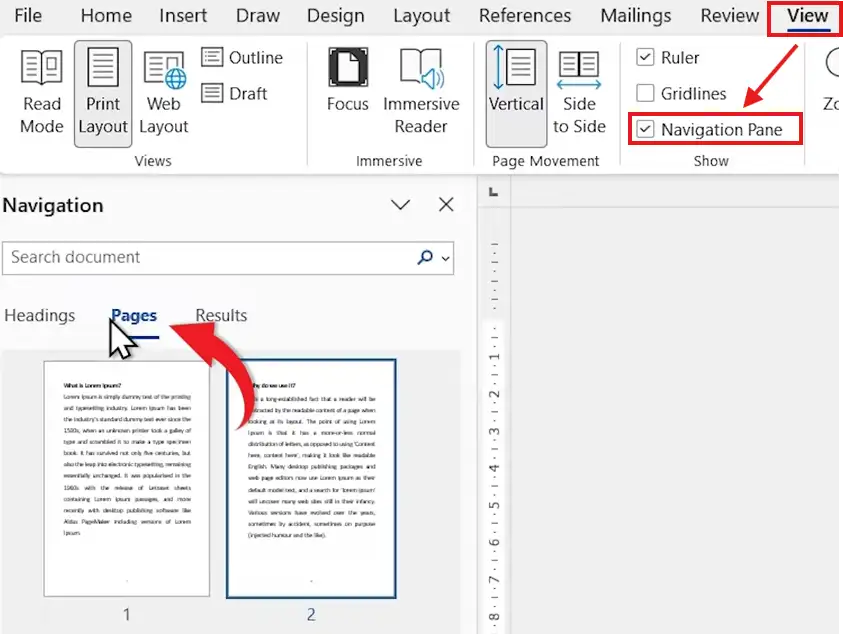
You’ll see all pages listed (Page 1, Page 2, Page 3, etc.), and you can click any page to jump directly to it.
Common Page Number Positions
Here are the most popular placements:
- Bottom Center (most commonly used)
- Top Right
- Bottom Right
- Margins (for more advanced layouts)
Choose a position that matches the style of your document.
Pro Tips for Page Numbering
- Use bottom center for clean, professional formatting
- Keep numbering consistent throughout the document
- Use different formats for headers and footers if needed — the guide on different footers on different pages covers this in detail
- Preview your document before sharing or printing
FAQs
How do I start page numbers from page 2?
Go to Header & Footer → Different First Page, or use section breaks to control numbering — for more advanced setups, see the full guide on inserting different page numbers in Microsoft Word.
Can I customize page number styles?
Yes, you can change formats (e.g., Roman numerals, 1, 2, 3) from the Page Number settings.
Why aren’t my page numbers showing?
Make sure you inserted them correctly and that you’re not still in editing mode inside the header/footer.
Can I remove page numbers later?
Yes. Go back to Insert → Page Number → Remove Page Numbers.
Conclusion
Adding page numbers in Microsoft Word is a quick and essential step to improve your document’s clarity and professionalism.
With just a few clicks, you can insert, position, and verify page numbers making your document easier to read and navigate.
Related Tutorials
- How to Insert Different Page Numbers in Microsoft Word
- Different Footers on Different Pages
- How to Create a Table of Contents in Microsoft Word

Recent Microsoft Word Tutorials

Looking for more help with Microsoft Word? Browse all step-by-step Word tutorials covering formatting, layout, pages, and document setup.
👉 View all Microsoft Word tutorials: https://wordmadeeasy.org/microsoft-word/
👉 Need more support – check out the official guidance: https://support.microsoft.com/en-au

Prefer watching instead of reading? Many Word tutorials are also available as short, step-by-step videos on the Word Made Easy YouTube channel.


Leave a Reply