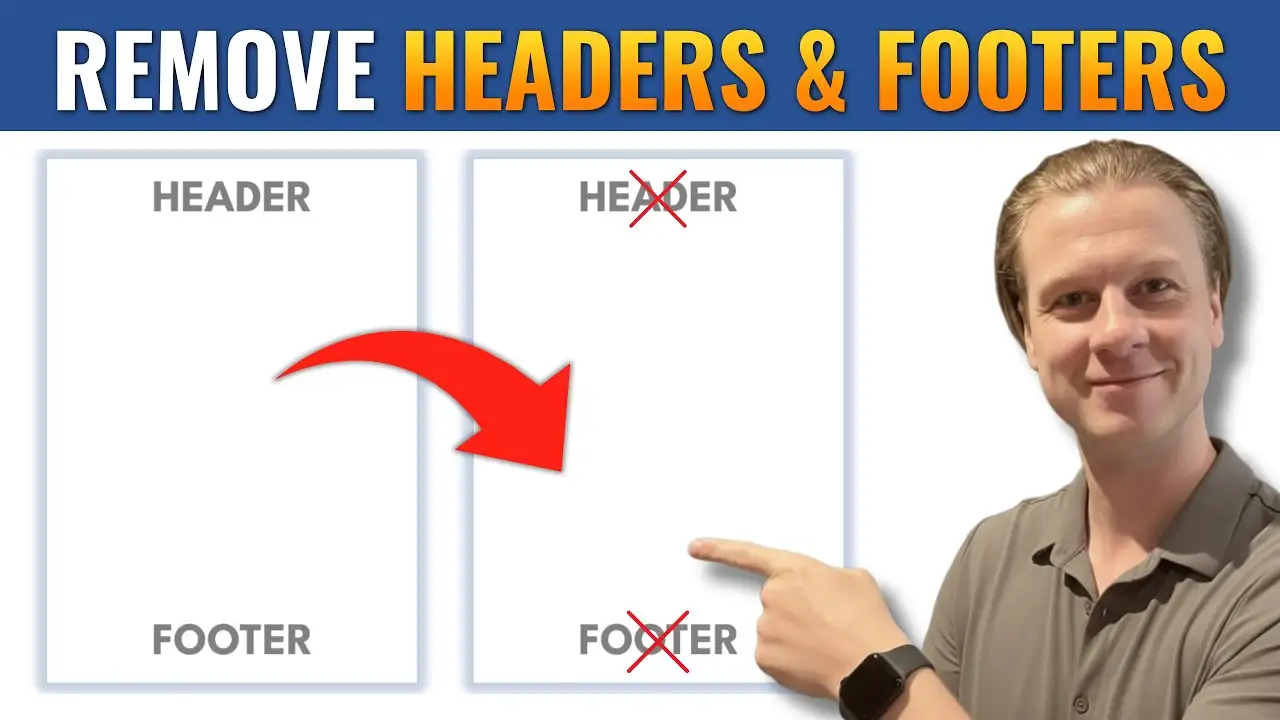
When working in Microsoft Word, headers and footers are useful for adding page numbers, titles, or dates. However, there are times when you may want to remove them completely or only from specific pages.
In this guide, you’ll learn how to remove headers and footers in Word using simple methods, including how to remove them from the entire document or just the first page.
Headers and footers are sections that appear at the top and bottom of your document pages.
They are commonly used for:
- Page numbers
- Document titles
- Author names
- Dates
These elements repeat across pages unless you customize them.
If you need to add page numbers before removing them, see the guide on how to insert page numbers in Microsoft Word.
Watch the Video Tutorial
If you prefer to see this in action, the full video walkthrough is below, showing each method step by step.
If you want to completely remove headers and footers from your document, this is the quickest method.
Steps to remove both:
- Go to the Insert tab
- Click Header
- Select Remove Header
- Then click Footer
- Select Remove Footer
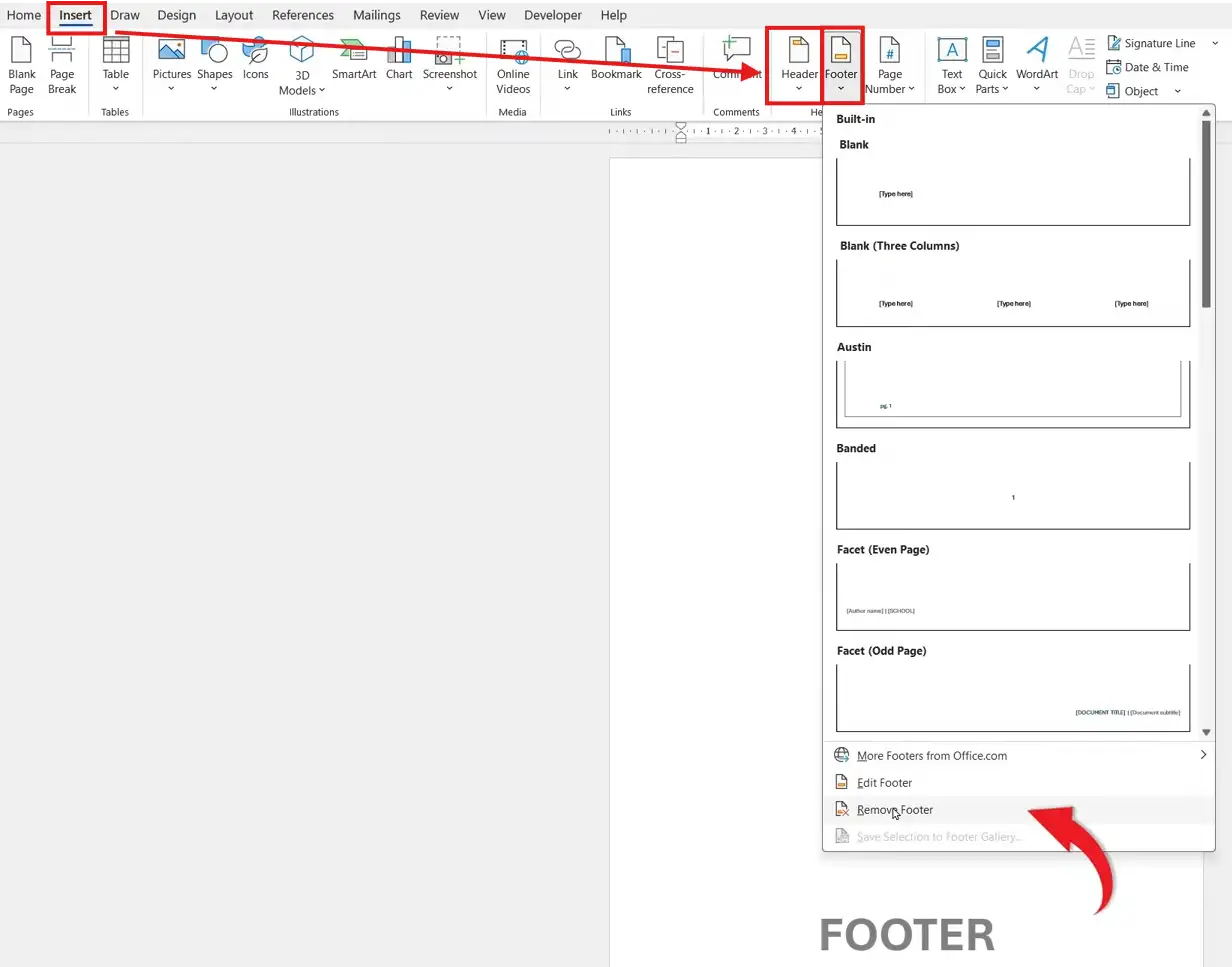
Once completed, both the header and footer will be fully removed from all pages.
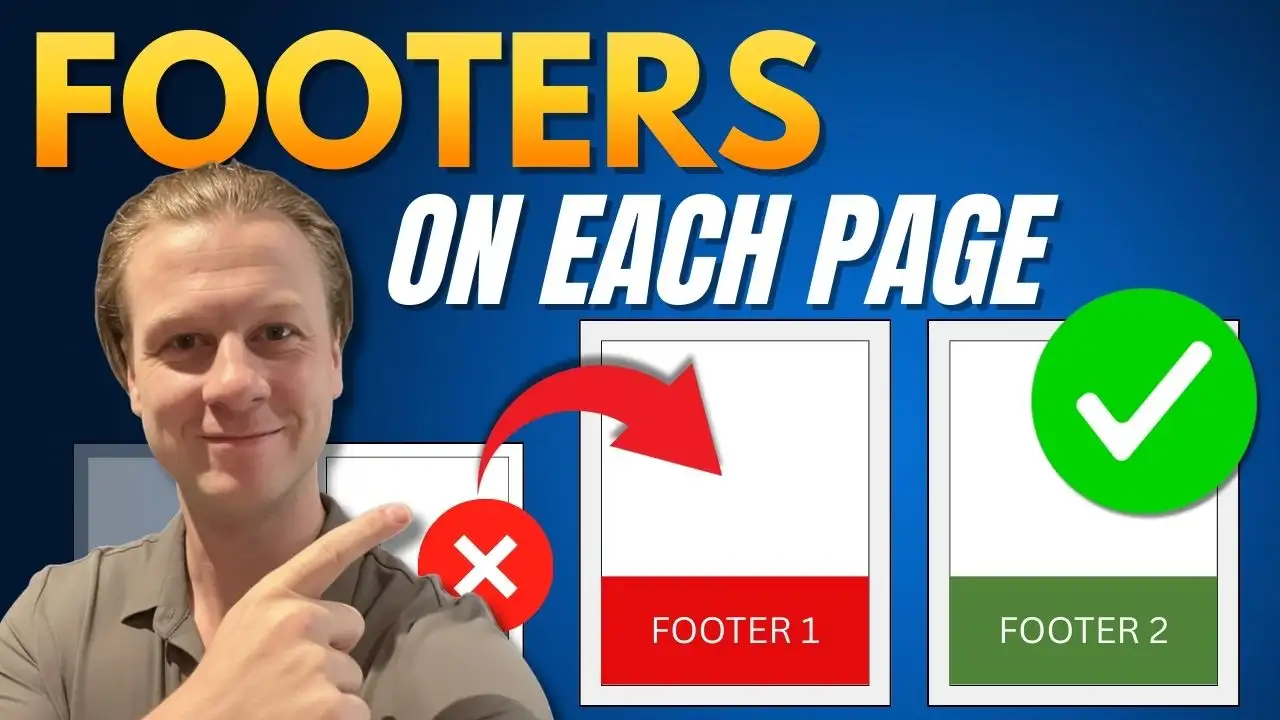
If you only want to remove the header and footer from the first page (for example, in a report or assignment), you’ll need a different approach.
Steps:
- Double-click the header area on the first page
- In the menu, check Different First Page
- Click Close Header and Footer

This removes the header and footer from the first page only, while keeping them on the rest of the document.
Why Use “Different First Page”?
This feature is especially useful when creating:
- Academic assignments
- Professional reports
- Cover pages
- Business documents
It allows your first page to look clean and separate from the rest of your content.
Common Mistakes to Avoid
- Using “Remove Header” when you only want to remove it from one page
- Forgetting to enable Different First Page
- Editing the wrong section of the document
Understanding the difference between full removal and partial removal is key.
- Double-click the header/footer area for quick access
- Use section breaks for more advanced control — for a full walkthrough of how sections work with footers, see the guide on different footers on different pages.
- Combine headers with page numbering for professional layouts
- Preview your document before printing
FAQs
How do I remove a header and footer from all pages?
Go to Insert → Header → Remove Header, and repeat for Footer.
How do I remove a header only from the first page?
Enable “Different First Page” in the header editing view.
Why is my header still appearing on other pages?
Because Word applies headers to all pages unless you use special settings like “Different First Page” or section breaks.
Can I have different headers on each page?
Yes, but you’ll need to use section breaks to customize each page — the same technique is used when you need to insert different page numbers in Microsoft Word.
Is removing a header permanent?
No. You can always reinsert a header or footer at any time.
Conclusion
Removing headers and footers in Microsoft Word is quick once you know the right method.
Whether you want to remove them from the entire document or just the first page, Word gives you flexible options to control your layout and create clean, professional documents.
Related Tutorials
- How to Insert Page Numbers in Microsoft Word
- Different Footers on Different Pages
- How to Insert Different Page Numbers in Microsoft Word

Recent Microsoft Word Tutorials

Looking for more help with Microsoft Word? Browse all step-by-step Word tutorials covering formatting, layout, pages, and document setup.
👉 View all Microsoft Word tutorials: https://wordmadeeasy.org/microsoft-word/
👉 Need more support – check out the official guidance: https://support.microsoft.com/en-au

Prefer watching instead of reading? Many Word tutorials are also available as short, step-by-step videos on the Word Made Easy YouTube channel.


Leave a Reply