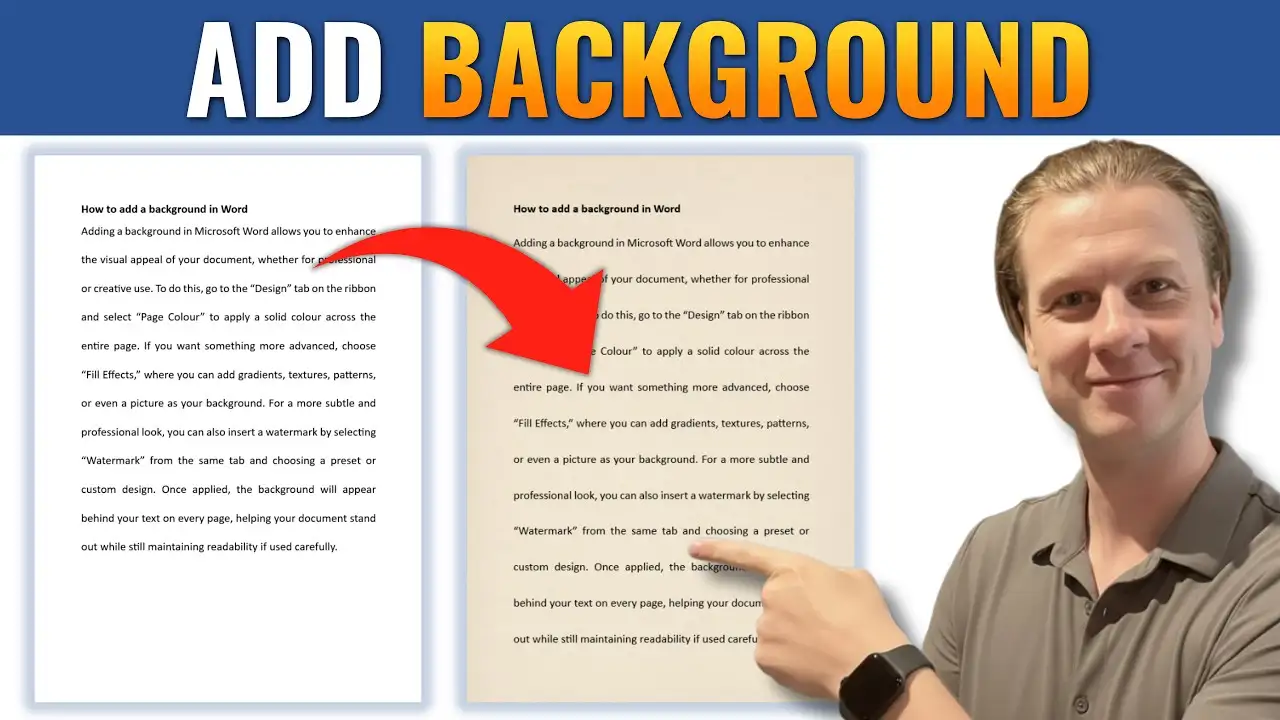
Adding a background in Microsoft Word is a great way to enhance the visual appeal of your document. Whether you want a simple color, a textured image, or a fully customizable design, Word provides multiple ways to achieve this.
In this guide, you’ll learn three effective methods to add a background in Word, along with their pros, limitations, and best use cases.
Why Add a Background in Word?
Using backgrounds in Word can help you:
- Create visually engaging documents
- Design certificates, flyers, or invitations
- Add branding elements like textures or colors
- Make your document stand out professionally
However, choosing the right method is important, especially if you want control over transparency and layout.
Watch the Video Tutorial
If you prefer to see this in action, the full video walkthrough is below, showing each method step by step.
Method 1: Use Page Color (Quick & Simple)
The easiest way to add a background is through the Page Color option.
Steps:
- Go to the Design tab
- Click Page Color
- Choose a color
- (Optional) Click More Colors for custom shades

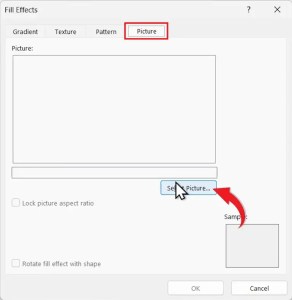
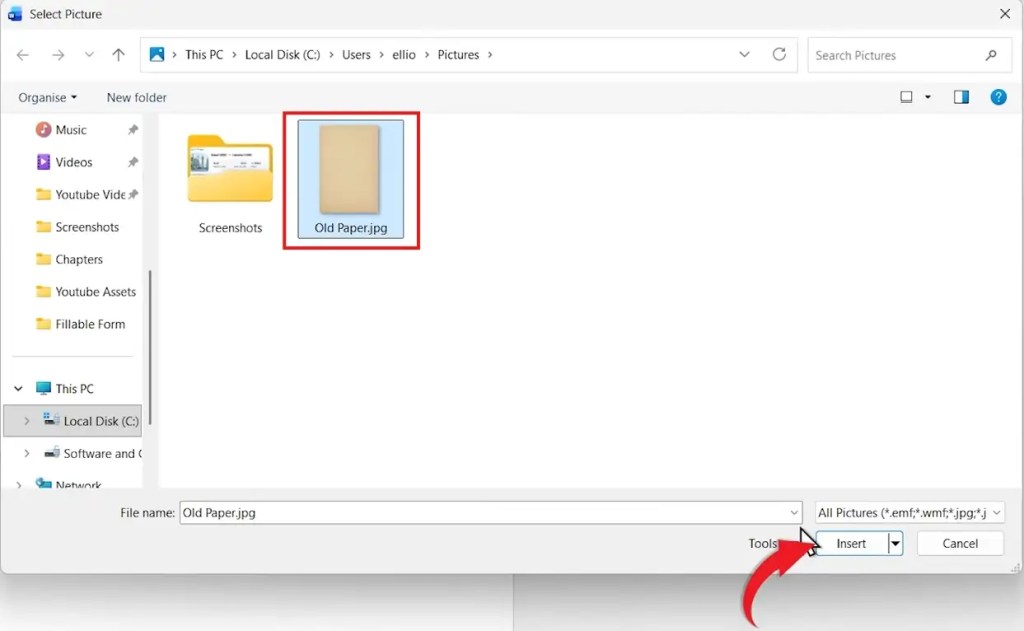
To use an image:
- Click Page Color
- Select Fill Effects

- Go to the Picture tab
- Click Select Picture
- Insert your image and press OK
Pros:
- Very quick and easy
- Works well for solid colors or simple textures
Cons:
- Limited customization
- No transparency control
- Can make text hard to read
Method 2: Add a Background Using Headers (Best for Subtle Designs)
This method gives you more flexibility and allows you to place an image behind your text with better control.
Steps:
- Double-click the top of the page to open the header
- Go to Insert > Pictures
- Choose your image and click Insert
- Click the image and select:
- Wrap Text → Behind Text
- Use Position → Center to align it
- Resize the image to fit the page
- Press Esc to exit the header

Pros:
- Better control over positioning
- Cleaner and more professional look
- Works well for full-page backgrounds
Cons:
- Slightly more setup required
- Transparency control is still limited
Method 3: Use Shapes for Full Customization (Best Method)
This is the most powerful method because it allows you to control transparency and design precisely.
Steps:
- Go to Insert > Shapes
- Select a Rectangle
- Draw it across the page
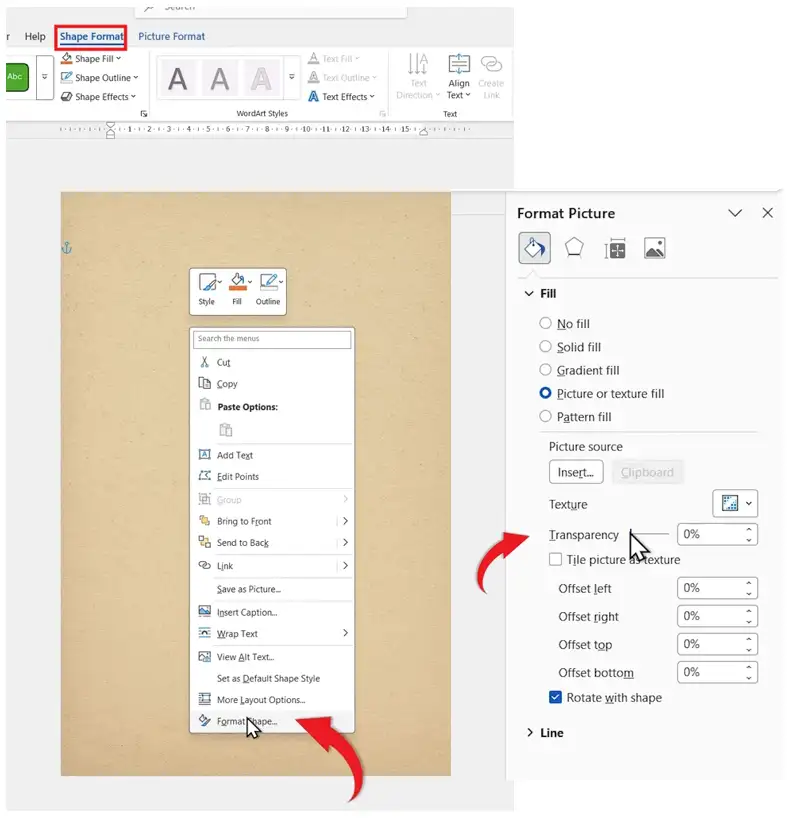
- Go to Shape Format
- Click:
- Shape Outline → No Outline
- Shape Fill → Picture
- Insert your image
- Right-click the shape → Format Shape
- Adjust Transparency
- Set Wrap Text → Behind Text

Pros:
- Full control over transparency
- Best readability for text
- Highly customizable
Cons:
- Takes slightly longer to set up
Which Method Should You Use?
- Quick color or texture? → Use Page Color
- Simple image background? → Use Header method
- Full control & professional look? → Use Shapes
Pro Tips for Better Backgrounds
- Use light or faded images to keep text readable — and if you want to place text directly on top of an image, see the guide on how to add text over an image in Microsoft Word for both text box and WordArt methods.
- Adjust transparency (especially with shapes)
- Avoid overly busy backgrounds
- Always preview before printing
FAQs
Can I add a background image in Microsoft Word?
Yes, you can use Fill Effects, headers, or shapes to insert an image as a background.
Why is my background image hard to read over?
Because Word’s default method doesn’t allow transparency. Use shapes to adjust it — and for a full step-by-step guide to this technique, see how to make an image transparent in Word.
Do Word backgrounds print?
Yes, but you must enable Print Background Colors and Images in settings.
Which method is best for transparency?
Using shapes is the best option because it allows full transparency control.
Can I use different backgrounds on each page?
Yes, but this usually requires using headers with section breaks — and if you need a full guide to working with sections, see different footers on different pages which covers the same section break technique.
Conclusion
Adding a background in Microsoft Word can transform a plain document into something visually engaging and professional.
While the Page Color option is quick, using shapes gives you the most control and best results. Once you understand these three methods, you’ll be able to create clean, stylish documents tailored to any purpose.
Related Tutorials
- How to Make an Image Transparent in Word
- How to Add Text Over an Image in Microsoft Word
- Different Footers on Different Pages

Recent Microsoft Word Tutorials

Looking for more help with Microsoft Word? Browse all step-by-step Word tutorials covering formatting, layout, pages, and document setup.
👉 View all Microsoft Word tutorials: https://wordmadeeasy.org/microsoft-word/
👉 Need more support – check out the official guidance: https://support.microsoft.com/en-au

Prefer watching instead of reading? Many Word tutorials are also available as short, step-by-step videos on the Word Made Easy YouTube channel.


Leave a Reply