Recording audio and your screen directly inside Microsoft PowerPoint is easier than most people realize. Whether you’re creating a presentation, a tutorial, or an online lesson, PowerPoint offers built-in tools. These tools help you record narration, capture your screen, and even export your recordings for use elsewhere.
In this guide, I’ll walk you through how to record audio only. I’ll also show you how to record your screen with audio. You will learn how to edit those recordings, and how to save them to your computer.
Let’s get started.
Watch the Video Tutorial
If you prefer to see this in action, the full video walkthrough is below, showing each method step by step.
How to Record Audio in Microsoft PowerPoint
If you only want to record your voice and add narration to a slide, PowerPoint makes this very straightforward. If you also work in Word, you may find it useful to add audio files to Microsoft Word for documents that accompany your presentations.
Step-by-Step Audio Recording
- Open your PowerPoint presentation.
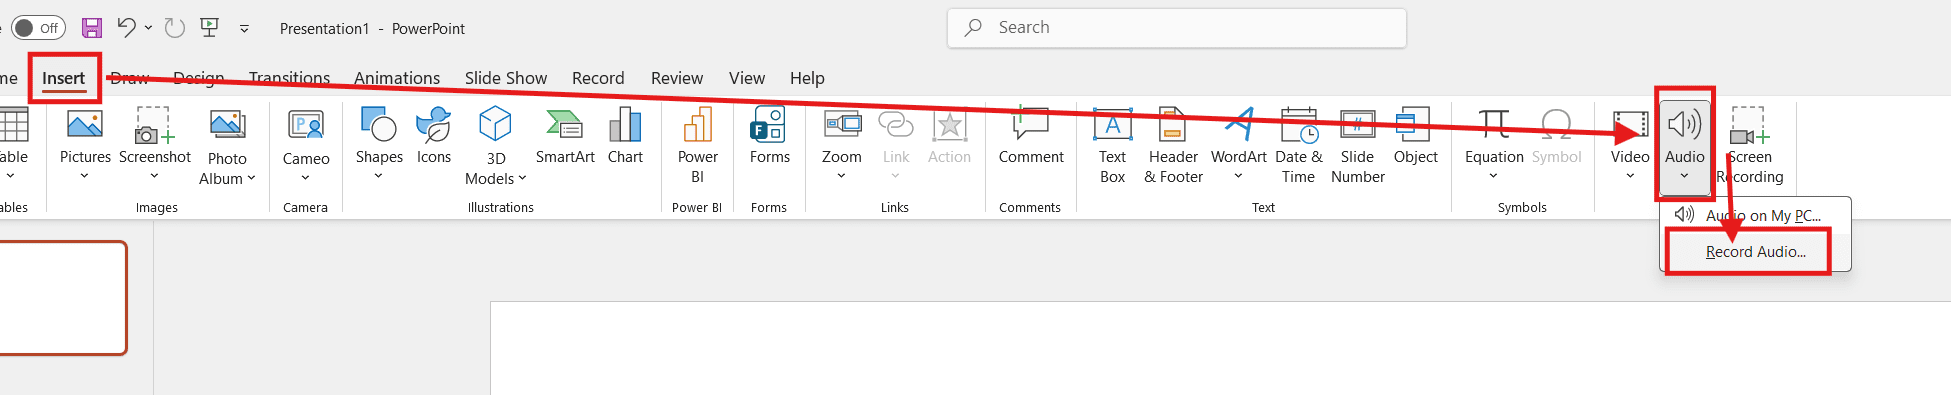
- Click on the Insert tab at the top.
- Navigate to Audio, then click the downward arrow.
- Select Record Audio.
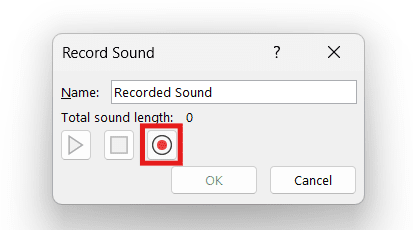
A small recording window will appear. Here, you can rename the audio file (for example, “Slide 1 Narration”).
- Click the Record button to begin speaking.
- When you’re finished, click OK.
Your audio will now appear on the slide as a speaker icon.
Customizing the Audio Icon
- Click the Play button to listen to your recording.
- Adjust the volume directly from the playback controls.
- Resize the speaker icon by clicking and dragging its corners.
- Right-click the icon and choose Format Picture to change the color, style, or outline.
This is useful if you want your presentation to look more polished or match your slide design.
How to Record Your Screen and Audio in PowerPoint
PowerPoint also lets you record your screen while capturing your voice at the same time—perfect for tutorials or walkthroughs.
Starting a Screen Recording
- Go back to the Insert tab.
- Click Screen Recording.

PowerPoint will minimize, and you’ll see a control bar at the top of your screen.
Understanding the Screen Recording Controls
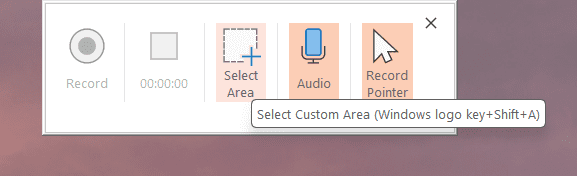
- Record Pointer: Records your mouse cursor movements (recommended).
- Audio: Captures your microphone audio.
- Select Area: Anything inside the red border will be recorded.
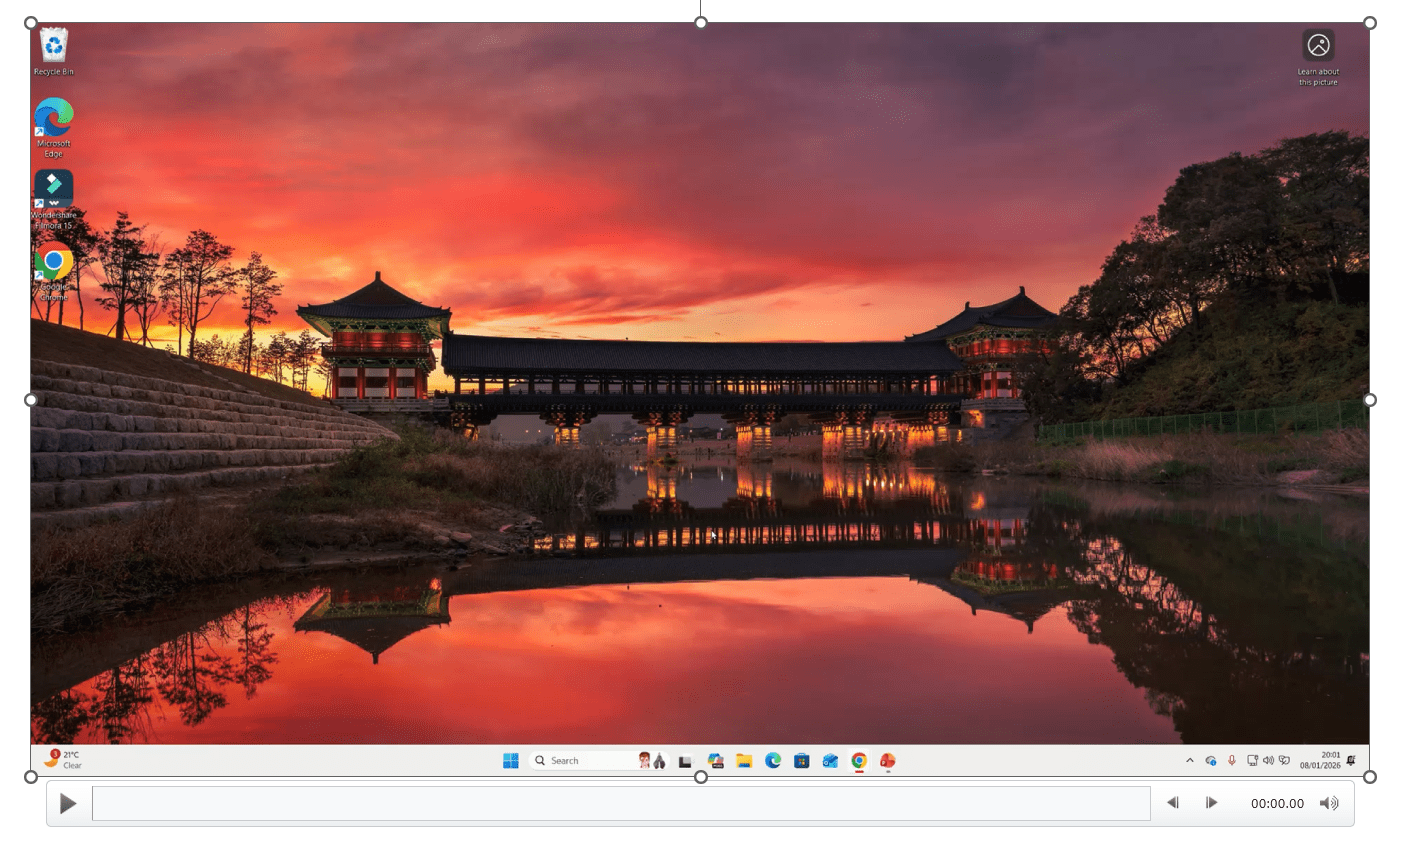
To record the entire screen, drag the selection box to cover the full display.
Recording the Screen
- Once your area is selected, click Record.
- You’ll see a countdown: 3, 2, 1.
- Start presenting or demonstrating your content.
When finished, click Stop on the control bar.

PowerPoint will automatically insert the video recording onto your slide.
Playing Back Your Screen Recording
- Click the video once to select it.
- Press the Play button to review your recording.
- You’ll notice that both your screen activity and audio were captured together.
This makes it easy to confirm everything recorded correctly.
How to Trim and Edit Your Video Recording
If your recording is too long or includes parts you don’t need, PowerPoint allows basic trimming.
Trimming a Screen Recording
- Left-click the video to select it.
- Right-click and choose Trim.
- A timeline will appear with green and red handles.
- Everything outside these handles will be removed.
- Drag the handles to shorten the clip.
- Click OK to save the changes.
Now your video will play only the trimmed portion.
How to Save Audio and Screen Recordings to Your Computer
Once you’ve recorded and edited your media, you may want to use it outside of PowerPoint.
Saving a Screen Recording
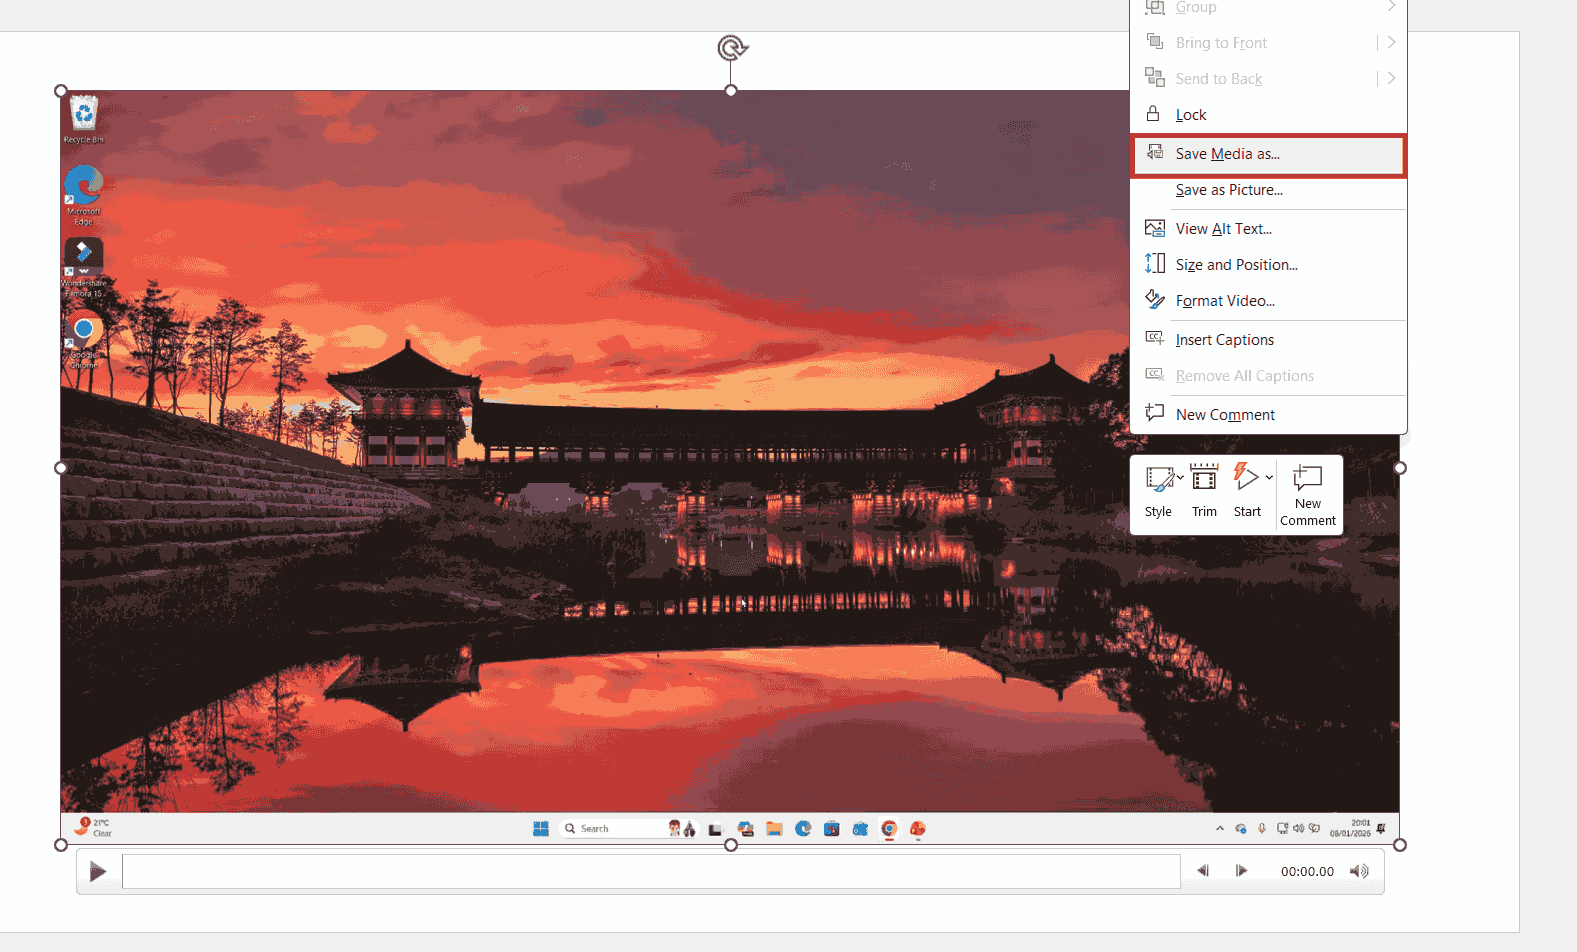
- Right-click the video on the slide.
- Click Save Media As.
- Choose a folder and name the file (for example, “PowerPoint Screen Recording”).
- Click Save.
Saving an Audio Recording
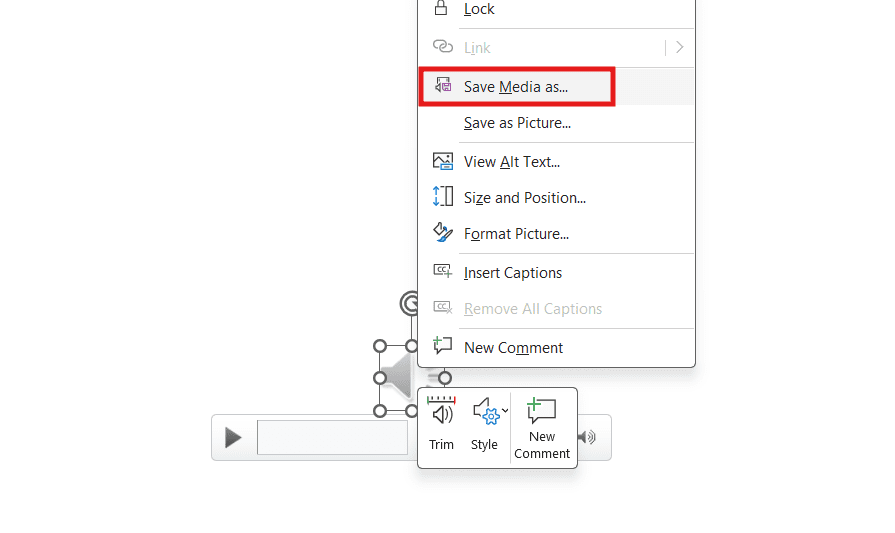
- Right-click the audio icon.
- Select Save Media As.
- Choose a location and filename.
- Click Save.
Both files will be saved as standard media formats. These formats can be played on most computers using default video or audio players.
Final Thoughts
Recording audio and screen content in Microsoft PowerPoint is simple, powerful, and requires no extra software. You can narrate slides, create tutorials, edit recordings, and export everything for use beyond PowerPoint—all in just a few clicks. If you use Microsoft Word alongside PowerPoint, you might also find it helpful to use dictation in Word to speed up your written content creation in the same way.
Once you’ve tried it a couple of times, the process becomes second nature.
Related Tutorials
- How to Add Audio Files to Microsoft Word
- How to Create a Word Scramble Game in PowerPoint
- How to Use Dictation in Microsoft Word
More Microsoft PowerPoint Tutorials
Looking for More?
Browse step-by-step PowerPoint tutorials covering formatting, slide layout, presentation setup, and creating interactive PowerPoint games.
👉 View all Microsoft Word tutorials: https://wordmadeeasy.org/powerpoint-tutorials/
Watch the Video Version
Prefer watching instead of reading? Many PowerPoint tutorials are also available as short, step-by-step videos on the Word Made Easy YouTube channel.


Leave a Reply