Applying 1.5 line spacing in Word is one of the fastest ways to make academic papers, reports, and professional documents easier to read — and once you know the right shortcut, it takes less than two seconds. For the full overview of every spacing option, see the guide on how to change line spacing in Microsoft Word.
In this guide, you’ll learn three reliable methods to set 1.5 spacing — using the Home tab, the keyboard shortcut, and the Paragraph dialog box — plus how to fix the most common problems that stop spacing from changing properly.
Why Use 1.5 Line Spacing in Word
1.5 line spacing sits between single and double spacing, giving readers enough breathing room without wasting page space. It’s the go-to option when you need readability and a tidy page count at the same time.
- Academic assignments and dissertations
- Business reports, proposals, and essays
- Professional documents where margins are tight
- Improving readability without switching to double line spacing
Watch the Video Tutorial
If you prefer to see this in action, the full video walkthrough is below, showing each method step by step.
How to Set 1.5 Line Spacing in Word: Step-by-Step
There are three ways to apply 1.5 line spacing in Word. Use the Home tab when you want a visual click, the shortcut when you want speed, and the Paragraph dialog box when you need precise control.
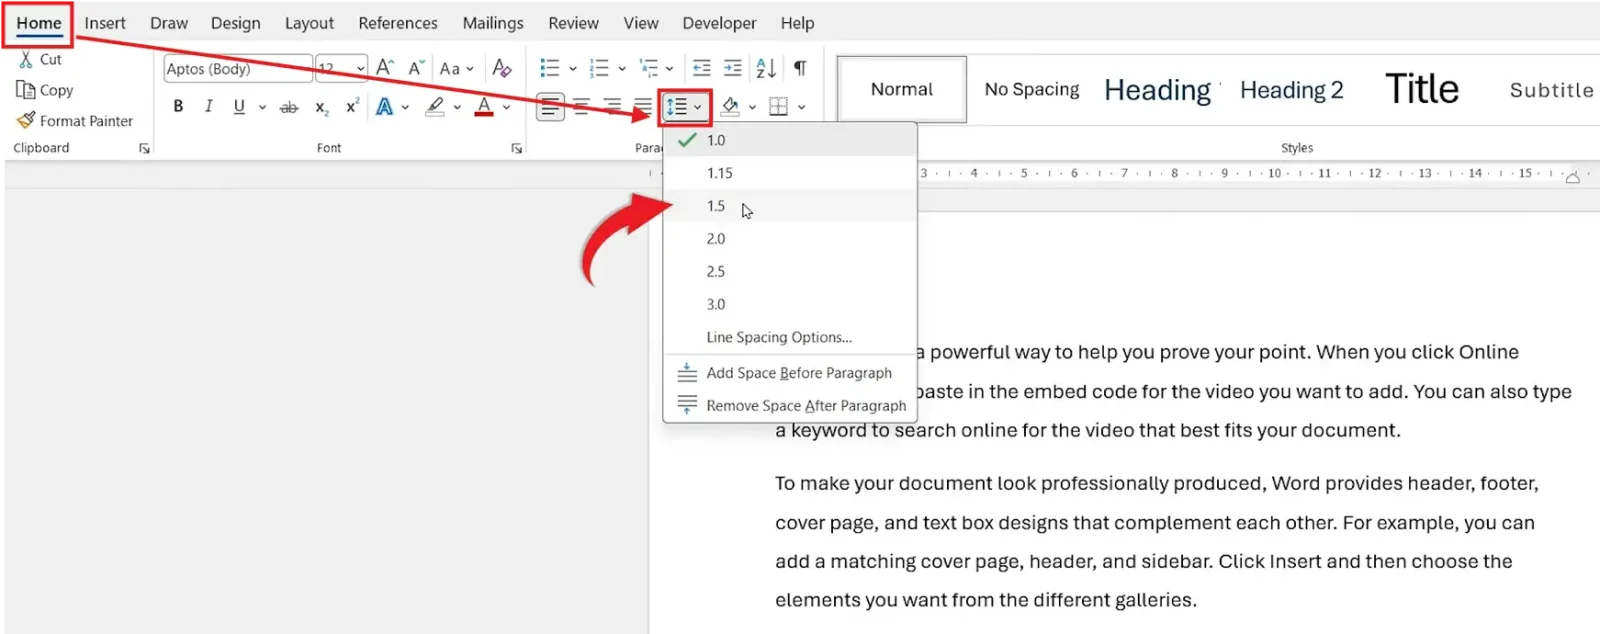
Method 1: How to Set 1.5 Line Spacing in Word from the Home Tab
This is the most beginner-friendly route — everything happens from the Home tab where you already format your text.
Steps:
- Select your text by clicking and dragging, or press Ctrl + A to select everything
- Go to the Home tab
- Click the Line and Paragraph Spacing icon in the Paragraph group
- Select 1.5 from the dropdown
👉 Your document instantly updates to 1.5 line spacing.
Method 2: How to Apply 1.5 Line Spacing in Word Using the Keyboard Shortcut
If you format documents every day, the shortcut method is the fastest — see the full Microsoft Word keyboard shortcuts cheat sheet for more two-key time-savers.
Steps:
- Press Ctrl + A to select all text
- Press Ctrl + 5
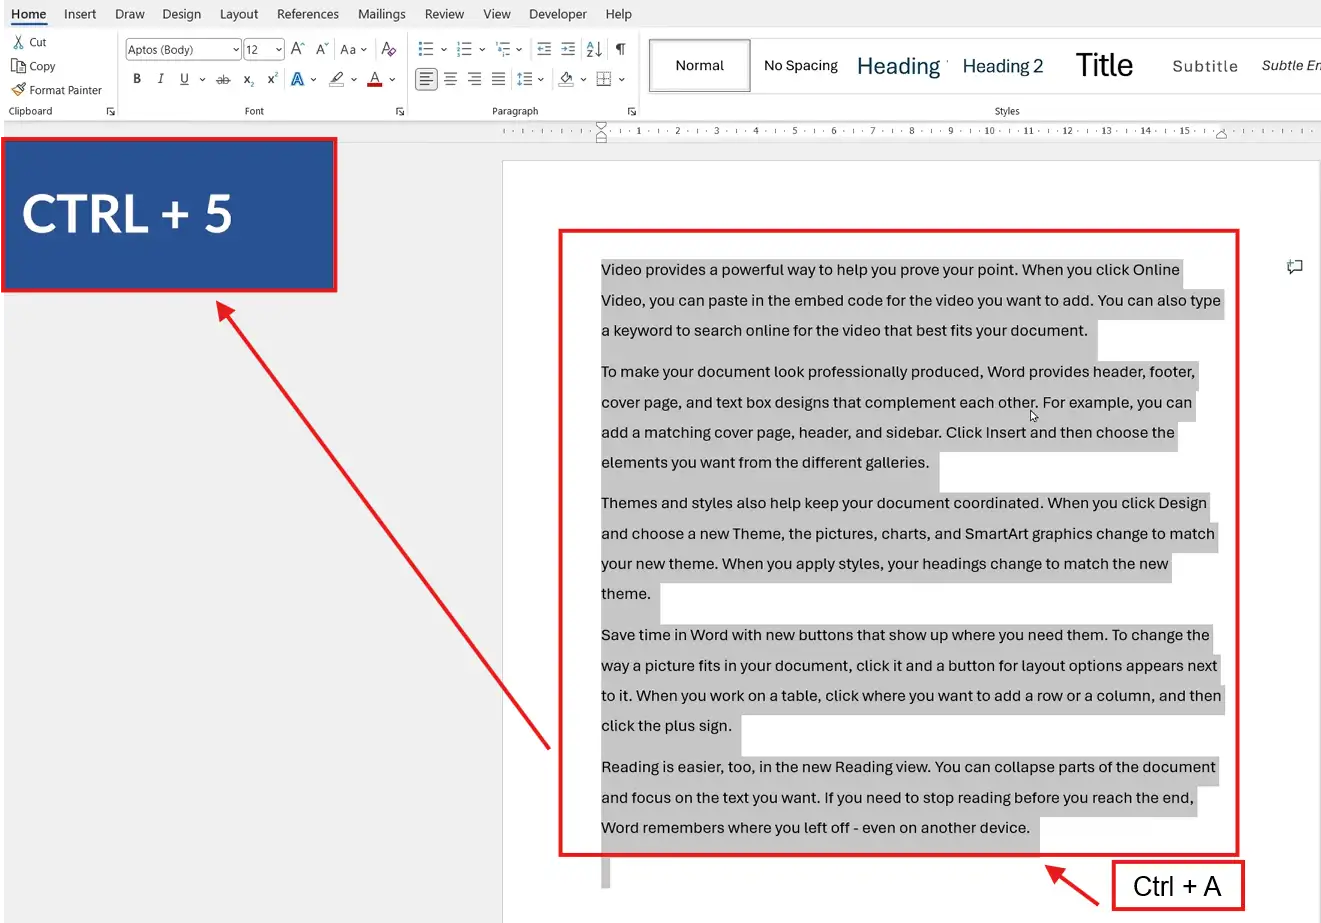
👉 1.5 spacing is applied instantly across the selected text.
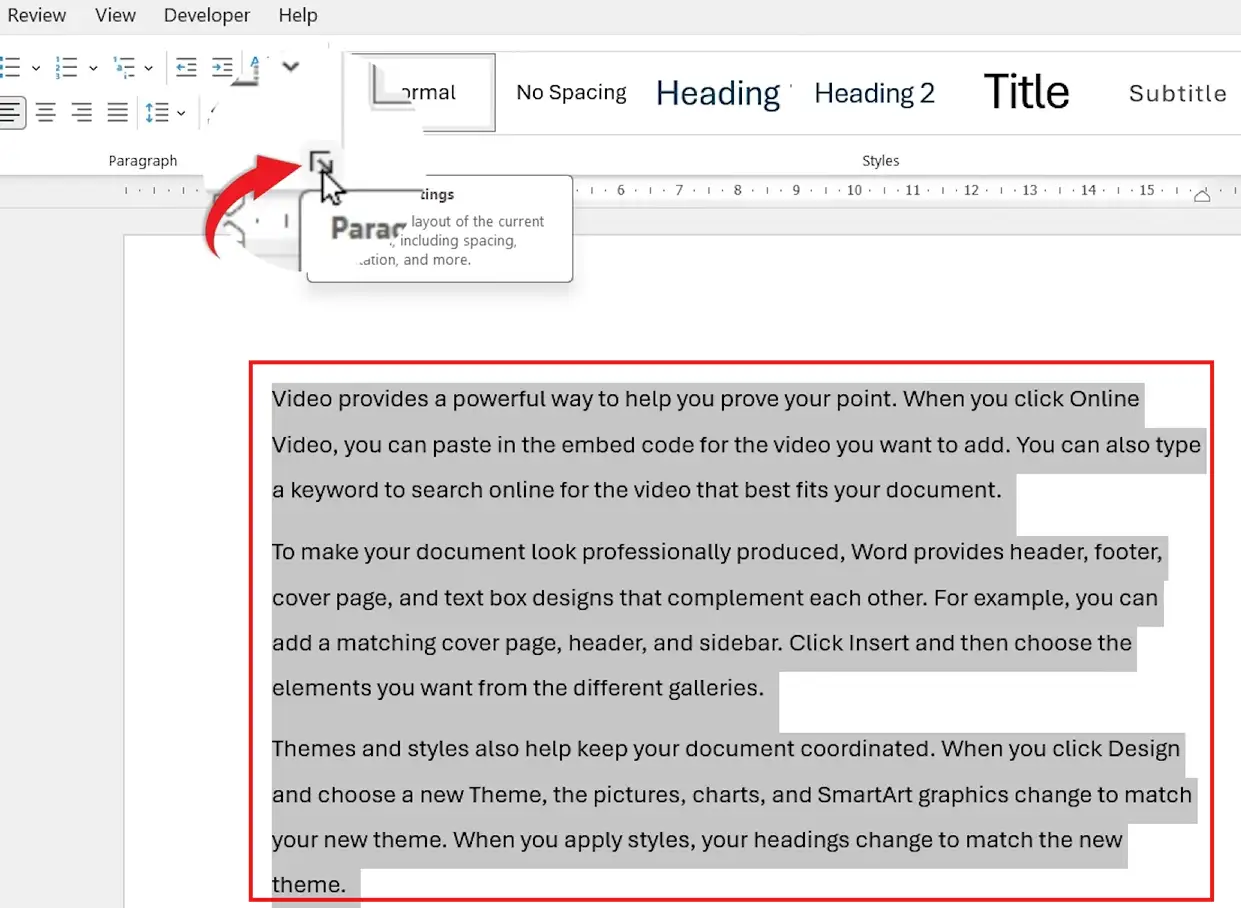
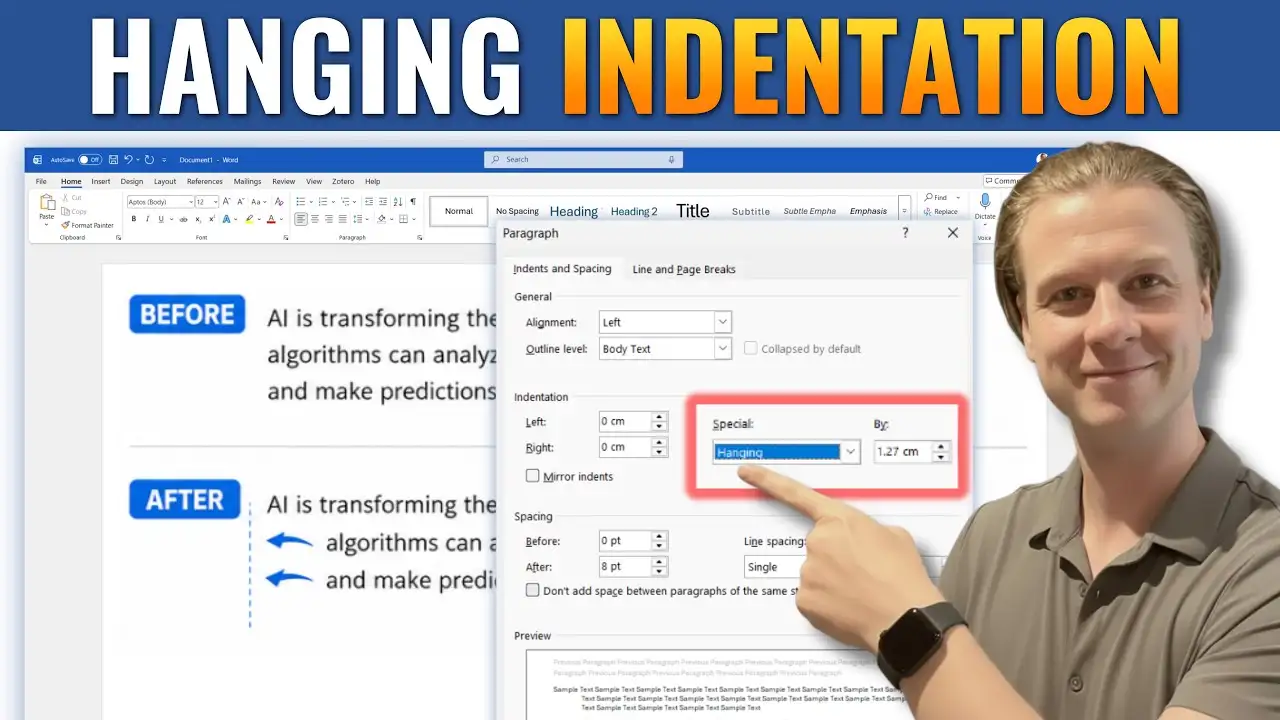
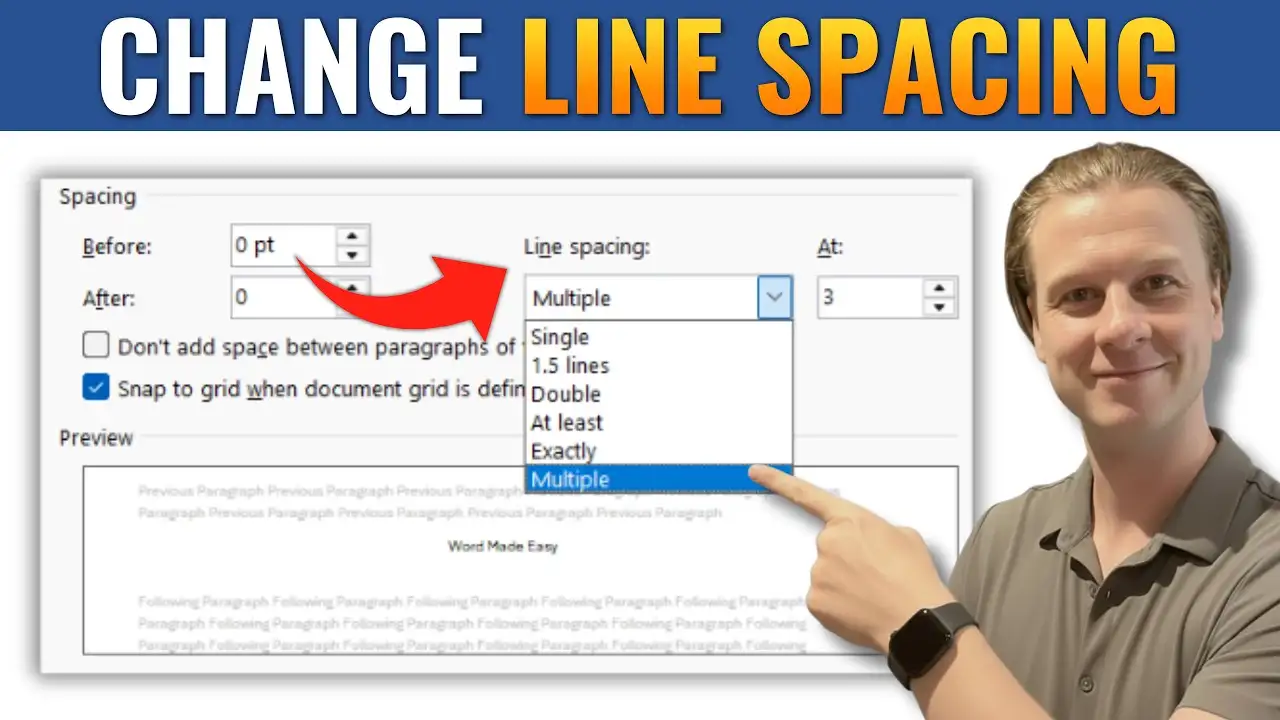
Method 3: How to Set 1.5 Line Spacing in Word Using Paragraph Settings
The Paragraph dialog box gives you precise control — useful when you need to confirm the exact value or apply spacing to one section while leaving the rest alone.
Steps:
- Select the text you want to format
- On the Home tab, click the small arrow in the bottom-right corner of the Paragraph group to open the Paragraph dialog box launcher
- Under Spacing, find the Line spacing dropdown
- Choose 1.5 lines
- Click OK to apply
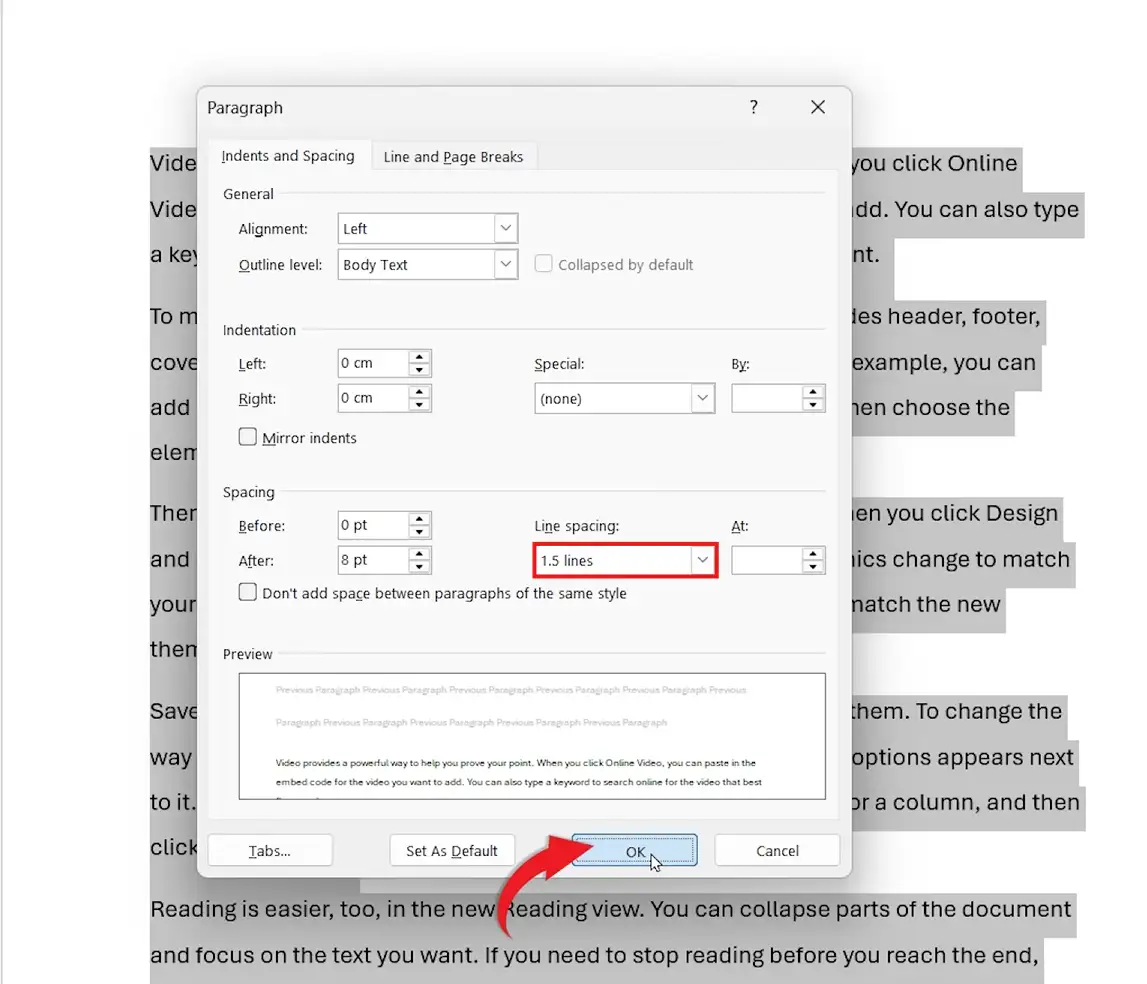
👉 Use this method when you need precise formatting control or need to confirm the existing setting.
Which Method Should You Use?
Each method gets you to 1.5 line spacing — pick the one that matches how you work.
| Method | Best For | Speed |
|---|---|---|
| Home tab dropdown | Beginners and visual users | Fast |
| Ctrl + 5 shortcut | Daily Word users who want speed | Fastest |
| Paragraph dialog box | Precise control and confirmation | Slower but accurate |
Common Problems When Setting 1.5 Line Spacing in Word
If your spacing isn’t changing the way you expect, one of these four issues is usually the cause.
Spacing won’t change after pressing Ctrl + 5
You haven’t selected the text first. Press Ctrl + A to select the whole document, then press Ctrl + 5 again.
Only one paragraph changes when I want the whole document
Line spacing only applies to selected text. Select the whole document with Ctrl + A before applying the spacing.
The style keeps resetting my spacing
Your paragraph style (Normal, Heading 1, etc.) has its own built-in spacing. Modify the style directly under Home → Styles → Modify so 1.5 line spacing becomes the default for that style.
The spacing looks wider than 1.5 even after applying it
Word is adding extra space before or after the paragraph. Open Paragraph settings and set Before and After to 0 pt so only the 1.5 line spacing controls the layout.
Pro Tips
- Set 1.5 line spacing as the default for new documents by modifying the Normal style — it saves repeating the same step every time.
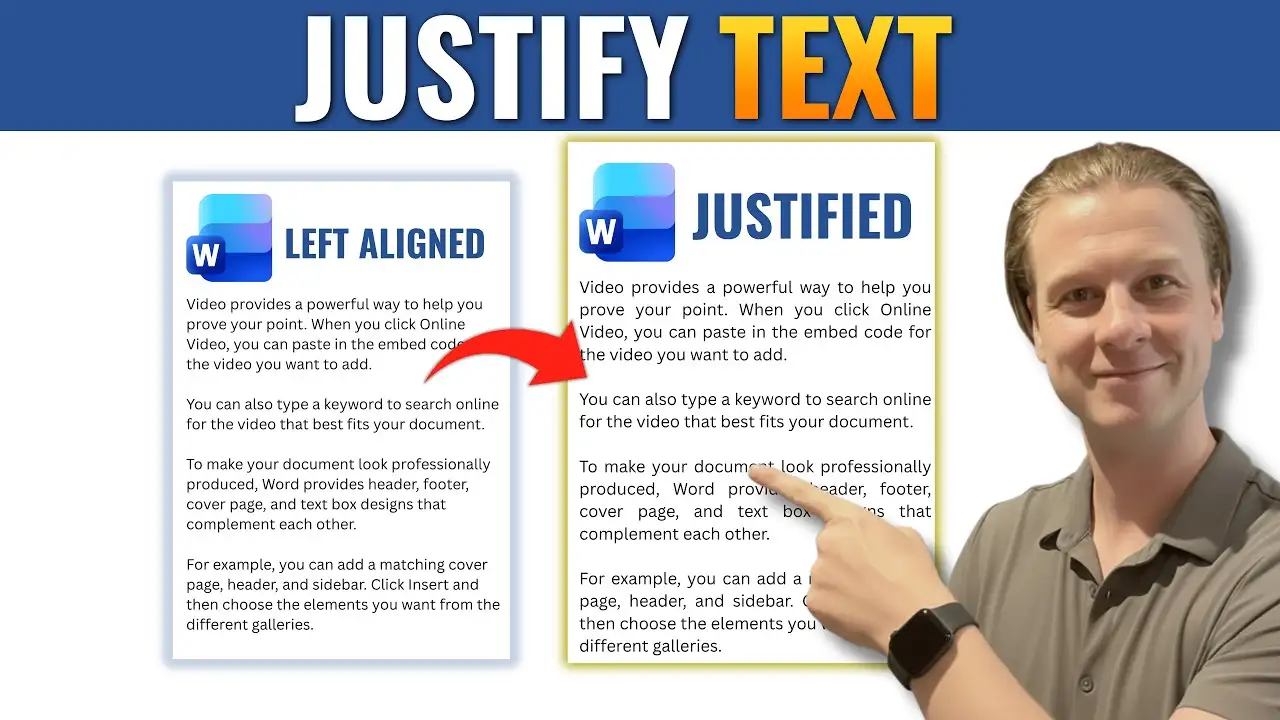
- Pair 1.5 spacing with justified alignment for the cleanest academic look — see how to justify text in Microsoft Word for the full setup.
- If you’re submitting an academic paper, check the brief — many universities now specify 1.5 spacing instead of double, so this is often the safer default.
- For mixed spacing (cover page single-spaced, body 1.5), apply spacing section by section rather than to the whole document.
FAQs
What is 1.5 line spacing in Word?
1.5 line spacing in Word means there is one-and-a-half lines of vertical space between each line of text — wider than single spacing but tighter than double spacing.
What is the shortcut for 1.5 line spacing in Word?
Select the text first, then press Ctrl + 5. This shortcut works on every modern version of Word, including Word 2016, 2019, 2021, and Microsoft 365.
Why is my line spacing not changing in Word?
Either no text is selected, or your paragraph style is overriding the setting. Select the text with Ctrl + A, or modify the underlying style directly to lock the new spacing in.
Is 1.5 line spacing better than double spacing?
It depends on the requirement. 1.5 spacing is more compact and reads cleanly on screen, while double spacing is still required for some academic submissions and editorial review processes. Always check the style guide first.
Can I apply 1.5 spacing to only part of a document?
Yes. Select only the paragraphs you want to format, then apply 1.5 spacing using any of the three methods. The rest of the document keeps its original spacing.
How do I make 1.5 line spacing the default in Word?
On the Home tab, right-click the Normal style and choose Modify. Set line spacing to 1.5 lines, then tick New documents based on this template and click OK.
Does 1.5 line spacing work the same way in Word for Mac?
Yes. The Home tab dropdown and the Paragraph dialog box work identically on Mac. The keyboard shortcut on Mac is ⌘ + 5 instead of Ctrl + 5.
Should I use 1.5 line spacing or single spacing for a CV?
Single spacing is the standard for CVs because it keeps everything on one page. Use 1.5 line spacing for cover letters and supporting documents where readability matters more than page count.
Conclusion
Setting 1.5 line spacing in Word takes seconds once you know where to look — the Home tab dropdown for visual control, Ctrl + 5 for speed, or the Paragraph dialog box for precision.
If you want to take this further, learn how every spacing option works in the full guide on how to change line spacing in Microsoft Word — it covers single, 1.5, double, and custom values in one place.
Related Tutorials
- How to Single Space in Microsoft Word
- How to Use Double Line Spacing in Microsoft Word
- Microsoft Word Keyboard Shortcuts Cheat Sheet

Recent Microsoft Word Tutorials

Looking for more help with Microsoft Word? Browse all step-by-step Word tutorials covering formatting, layout, pages, and document setup.
👉 View all Microsoft Word tutorials: https://wordmadeeasy.org/microsoft-word/
👉 Need more support – check out the official guidance: https://support.microsoft.com/en-au

Prefer watching instead of reading? Many Word tutorials are also available as short, step-by-step videos on the Word Made Easy YouTube channel.


Leave a Reply