Tables are one of the most powerful tools in Microsoft Word. Knowing the right way to insert a table can save time. It can improve document quality. Whether you’re organizing data, building reports, or creating clean layouts, you need to understand table insertion techniques. In this guide, you’ll learn three easy to insert a table in Word. You will also learn how to edit, resize, and distribute rows and columns evenly.
Why Tables Are Essential in Word Documents
Tables help transform cluttered text into structured, readable information. They are ideal for schedules, comparisons, reports, invoices, and academic work. Mastering Three Ways to Insert a Table in Word gives you flexibility, precision, and control—no matter your document type.
Watch the Video Tutorial
If you prefer to see this in action, the full video walkthrough is below, showing each method step by step.
Method 1: Insert a Table Using the Grid Selector
This is the fastest and most beginner-friendly method.
Step-by-Step Instructions
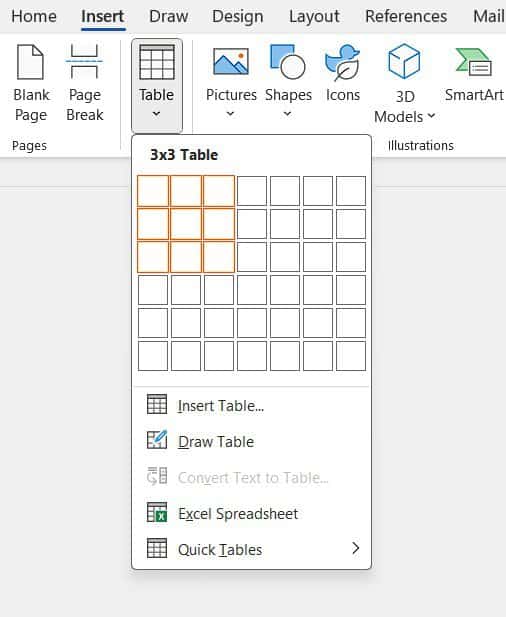
- Go to the Insert tab on the ribbon.
- Click Table.
- Hover over the grid.
- Select the number of rows and columns you want (for example, 3×3).
- Click once to insert the table.
When to Use the Grid Method
- You need a small or medium-sized table
- Speed matters more than precision
- You want a clean, instant layout
Best for quick notes and simple data tables.
Method 2: Insert Table with Custom Rows and Columns
This method gives you greater control over table size and formatting.
How It Works
- Click Insert → Table → Insert Table.

- Enter:
- Number of columns
- Number of rows
- Choose an AutoFit behavior:
- AutoFit to Content – adjusts to text
- AutoFit to Window – stretches to page width
- Fixed Column Width – precise sizing
- Click OK.

Understanding AutoFit Options
AutoFit is perfect for professional documents where layout consistency matters. If you’re creating reports or forms, this is often the best choice — and if you need users to fill in specific fields, you can take it further by learning how to create a fillable form in Microsoft Word.
Ideal for structured documents and large tables.
Method 3: Draw a Table Manually
This is the most flexible method, perfect for custom designs.
Steps to Draw a Table
- Select Insert → Table → Draw Table.
- Hold down the left mouse button.
- Draw rows and columns freely.
- Add or remove sections as needed.

Creating Custom Layouts
You can:
- Draw uneven columns
- Create merged or split cells
- Add columns or rows later
Tables may look uneven at first—but don’t worry.
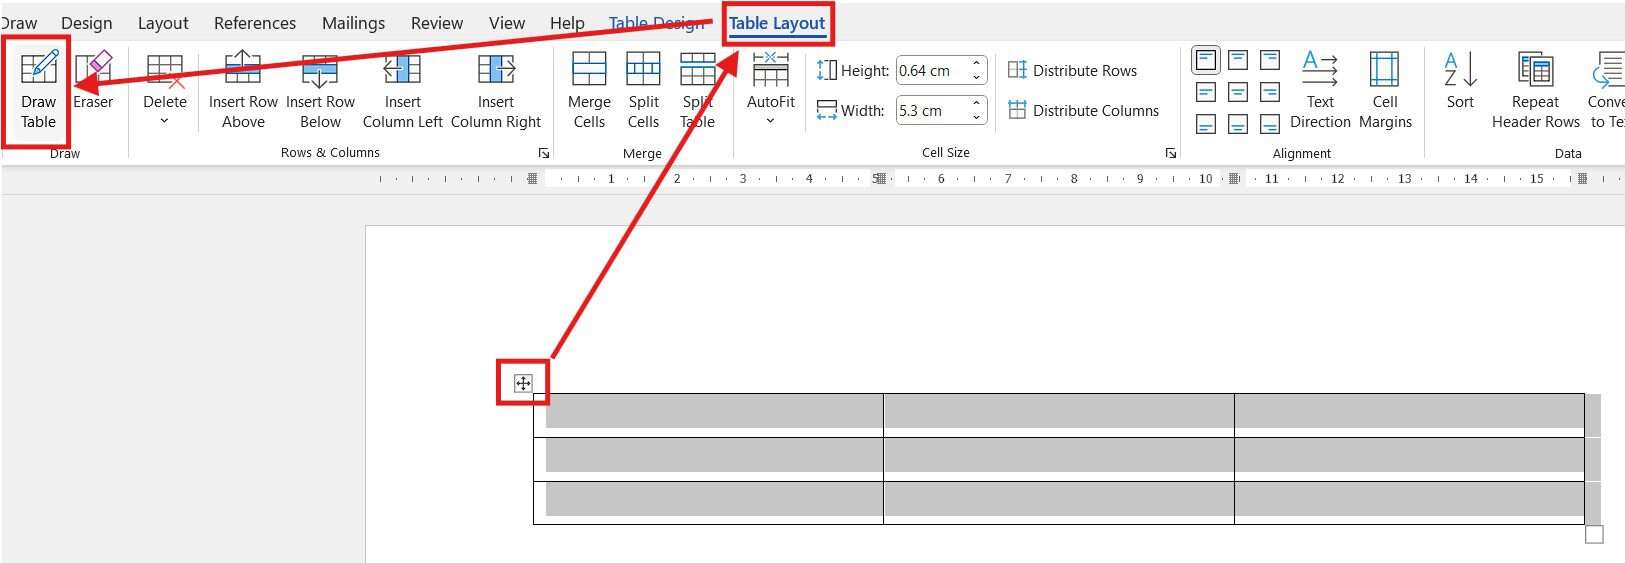
How to Distribute Rows and Columns Evenly
To clean up uneven tables:
- Click the table handle (dial icon) at the top-left.
- Go to Table Layout.
- Select Distribute Rows.
- Select Distribute Columns.
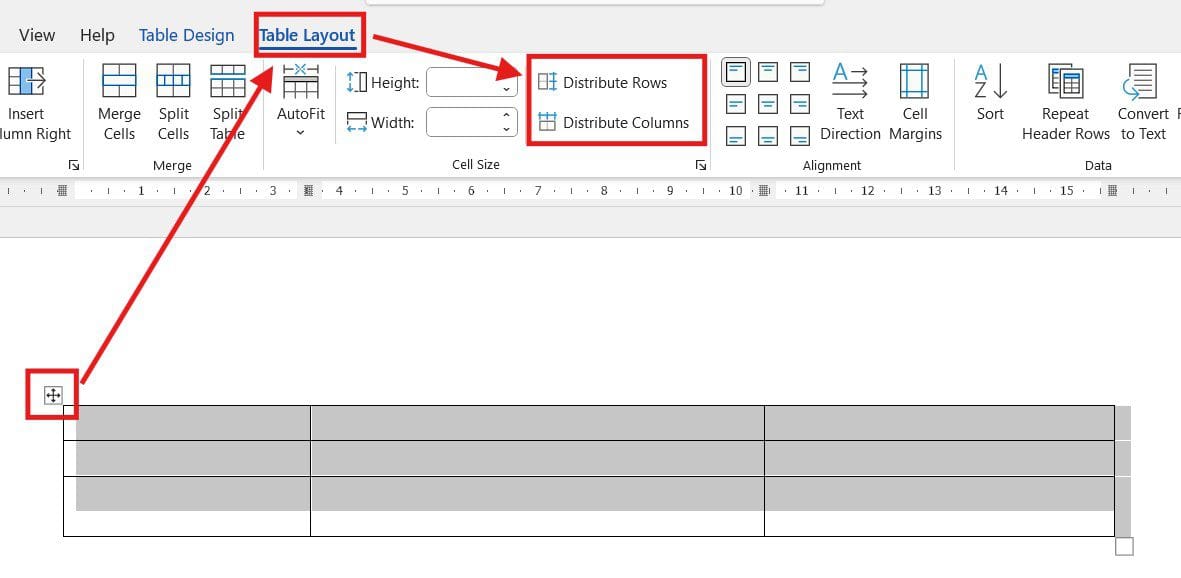
Instantly creates a clean, professional layout.
How to Insert Rows and Columns After Creating a Table
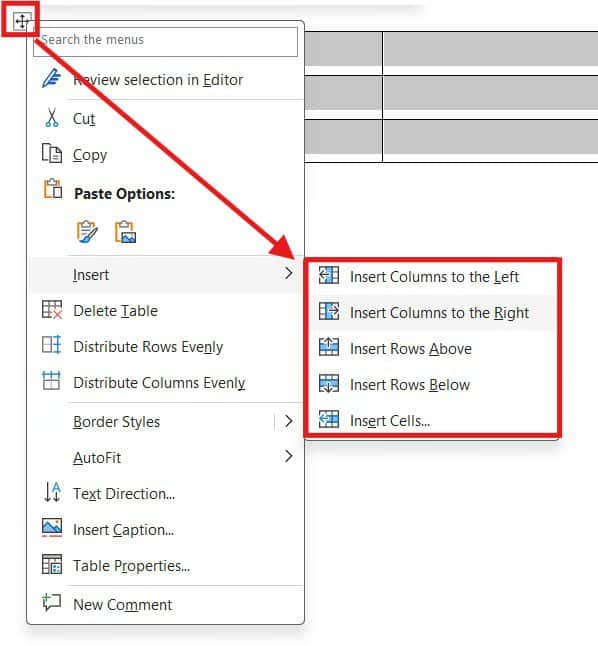
Right-Click Menu Options
- Insert columns left or right
- Insert rows above or below
Using the Table Layout Ribbon
- Select the table.
- Go to Table Layout.
- Choose insert options from Rows and Columns
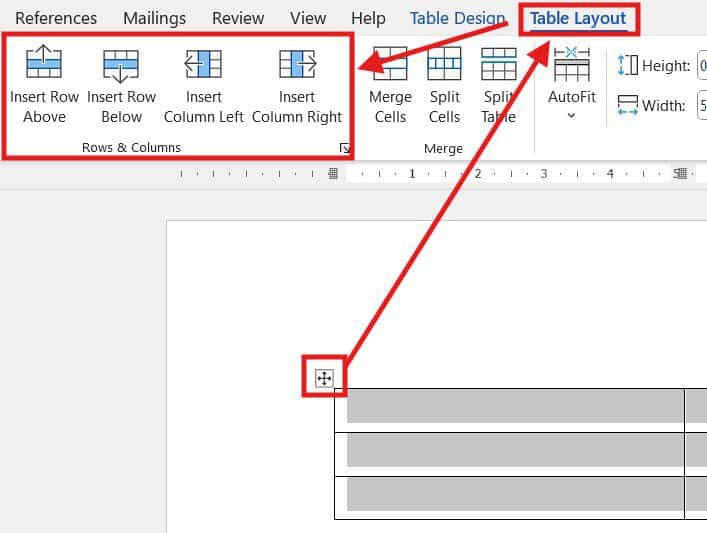
You can also use the plus (+) icon that appears when hovering between rows or columns.

Editing Tables with the Draw Tool
You can return to Draw Table anytime:
- Add new rows or columns
- Modify existing cell boundaries
- Redesign table structure
Once done, redistribute rows and columns again for balance.
Common Table Formatting Tips
- Keep tables simple and readable — and make sure the text inside your cells is properly formatted too. If you need help with text positioning, see the guide on how to align text in Microsoft Word.
- Avoid overcrowding cells — if your table feels cramped, it may also help to adjust your margins to give the layout more breathing room.
- Use consistent column widths
- Align text properly
- Distribute rows and columns evenly
Mistakes to Avoid When Creating Tables
❌ Using too many columns
❌ Forgetting to align data
❌ Ignoring AutoFit settings
❌ Leaving uneven spacing
Avoiding these improves readability and professionalism.
FAQs
What is the easiest way to insert a table in Word?
The grid selector method is the fastest and easiest.
Can I resize a table after inserting it?
Yes, use AutoFit or manually drag borders.
How do I evenly space table rows?
Use Table Layout → Distribute Rows.
Can I add rows later?
Absolutely. Right-click or use the layout ribbon.
What is AutoFit in Word tables?
It automatically adjusts column width based on content or page size.
Is drawing a table better than inserting one?
Only if you need custom layouts or irregular designs.
Conclusion
Mastering Three Ways to Insert a Table in Word gives you confidence, efficiency, and creative freedom. Whether you prefer speed, precision, or customization, Word offers a method that fits your workflow.
By using grid selection, custom insertion, or drawing tools—and knowing how to edit them—you’ll create clean, professional tables every time.
Related Tutorials
- How to Align Text in Microsoft Word
- How to Create a Fillable Form in Microsoft Word
- How to Adjust Margins in Word

Recent Microsoft Word Tutorials

Looking for more help with Microsoft Word? Browse all step-by-step Word tutorials covering formatting, layout, pages, and document setup.
👉 View all Microsoft Word tutorials: https://wordmadeeasy.org/microsoft-word/
👉 Need more support – check out the official guidance: https://support.microsoft.com/en-au

Prefer watching instead of reading? Many Word tutorials are also available as short, step-by-step videos on the Word Made Easy YouTube channel.


Leave a Reply