
To make a table smaller in Word, click in the table, select Table Layout > AutoFit > AutoFit Contents. Every column shrinks to fit its text. You can also drag the resize handle at the table’s bottom-right corner, or drag the column borders. New to tables? Start with how to make a table in Word.
In this guide, you’ll learn three ways to make a table smaller and when to use each. The steps are for Word in Microsoft 365, Word 2021, Word 2019 and Word 2016 for Windows.
Why Tables End Up Too Big
Word stretches a new table across the full width of the page, however little text it holds. A table of short words then wastes space and looks unbalanced. Shrinking it keeps the page tidy and leaves room for text or a picture beside it.
Watch the Video Tutorial
If you prefer to see this in action, the full video walkthrough is below, showing each method step by step.
Method 1: Make a Table Smaller With AutoFit Contents
Use this method to shrink every column to its longest entry in one click.
Steps
- Click in the table, then select the move handle at the top-left corner to select the whole table.
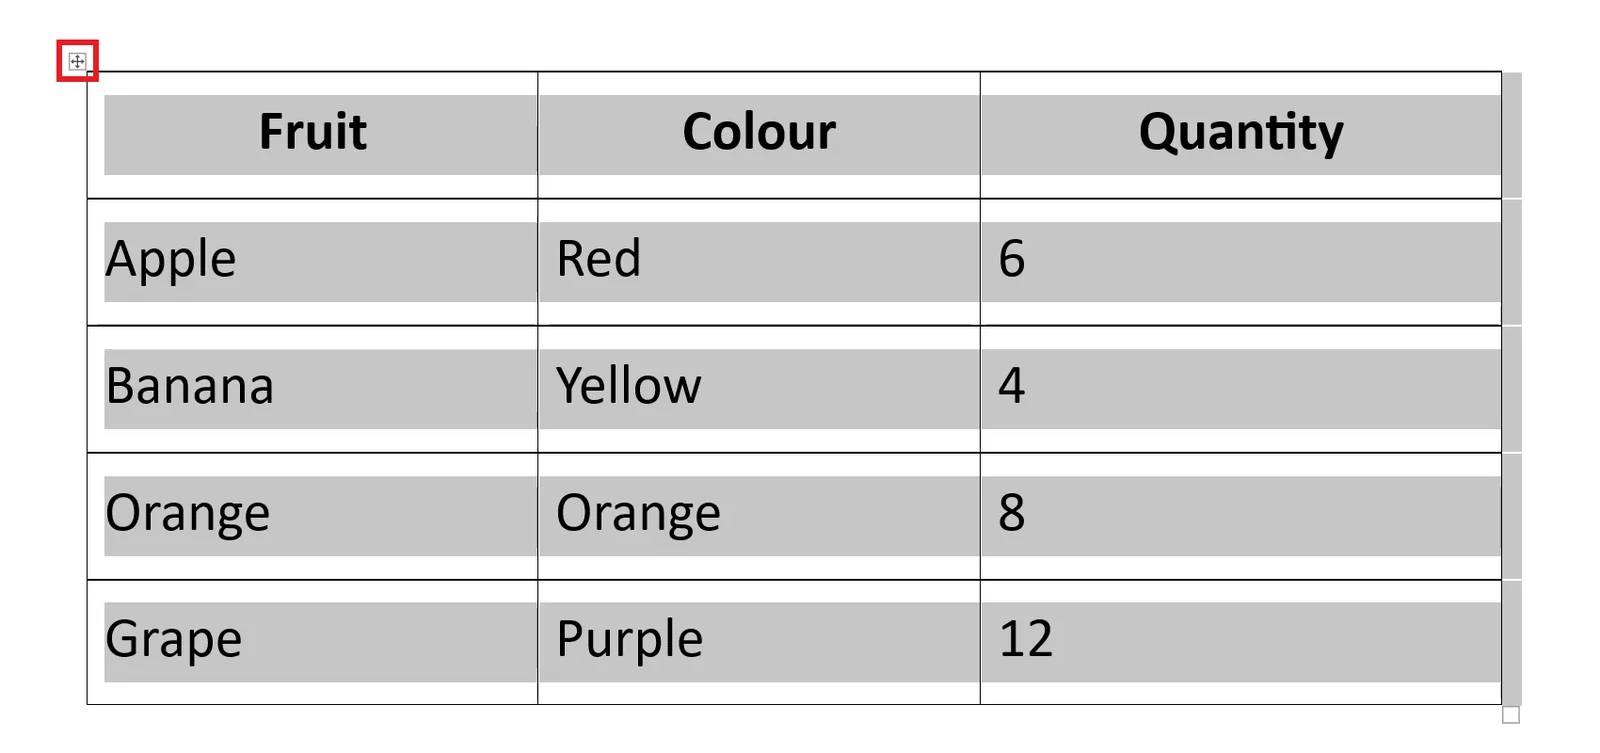
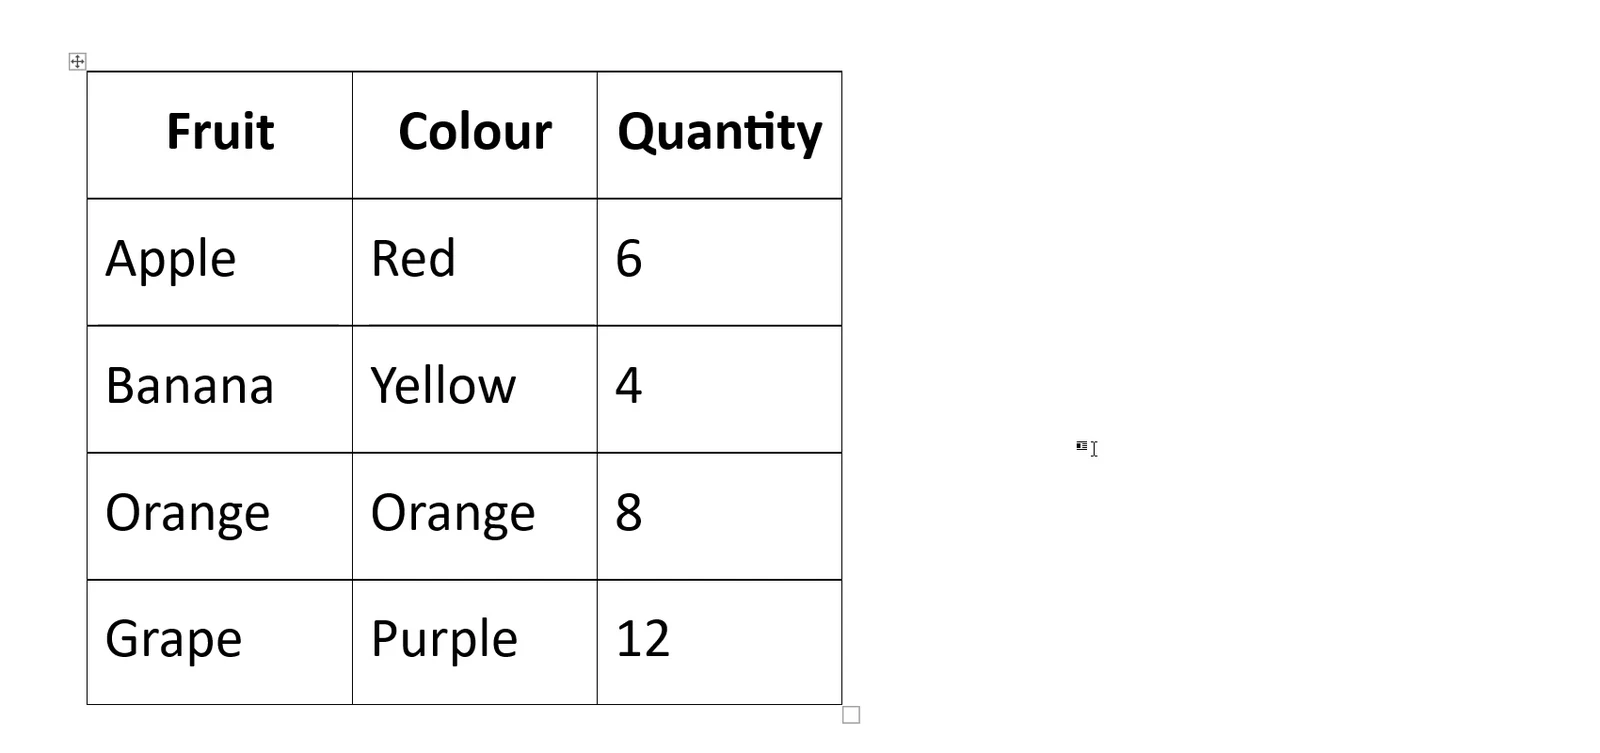
- Select the Table Layout tab, then AutoFit > AutoFit Contents.

👉 Each column now fits its text.

Method 2: Drag the Table Resize Handle
Use this method to shrink the whole table to any size by eye, keeping the columns in proportion.
Steps
- Point at the table until the small square resize handle appears at the bottom-right corner.
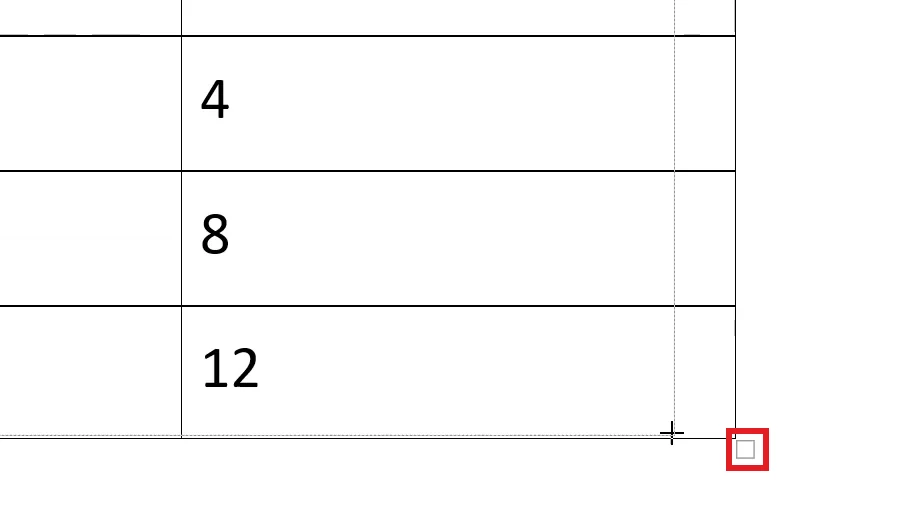
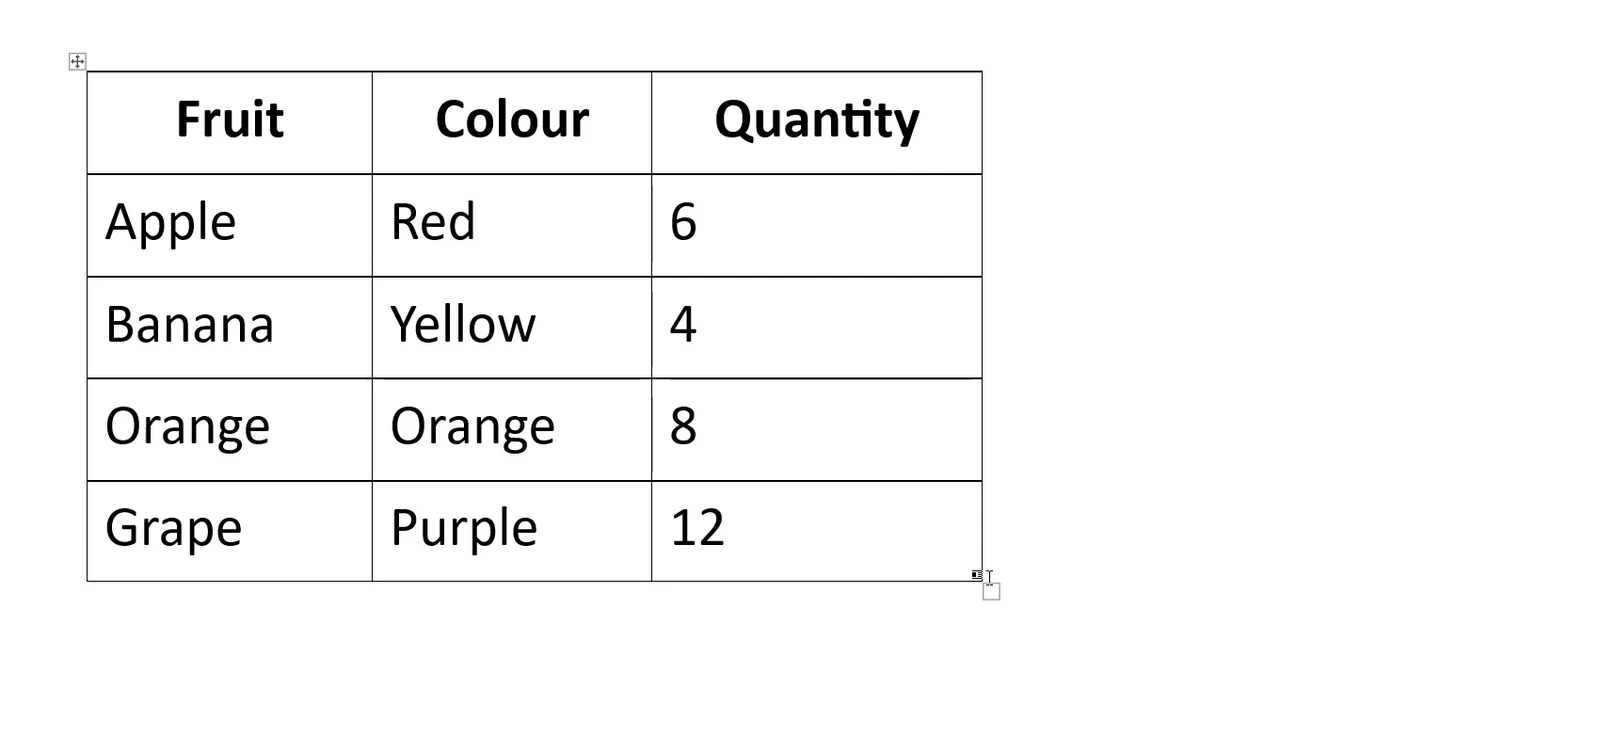
- Drag the handle up and to the left.

- Let go when the table is the size you want.
Method 3: Drag the Column Borders
Use this method when some columns need to stay wider than others.
Steps
- Point at the border between two columns until the pointer becomes a double line with arrows.
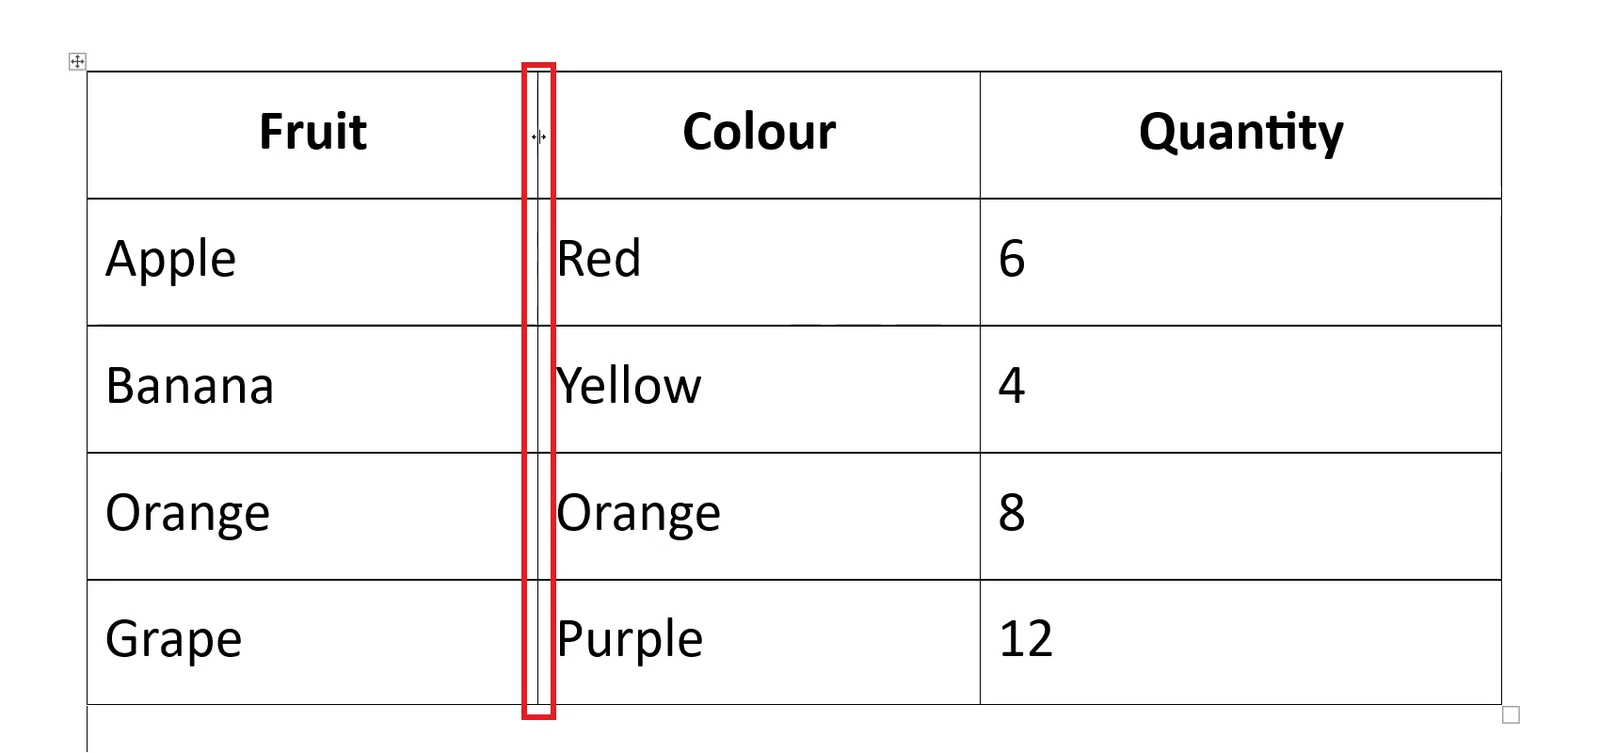
- Drag the border left to narrow the column.
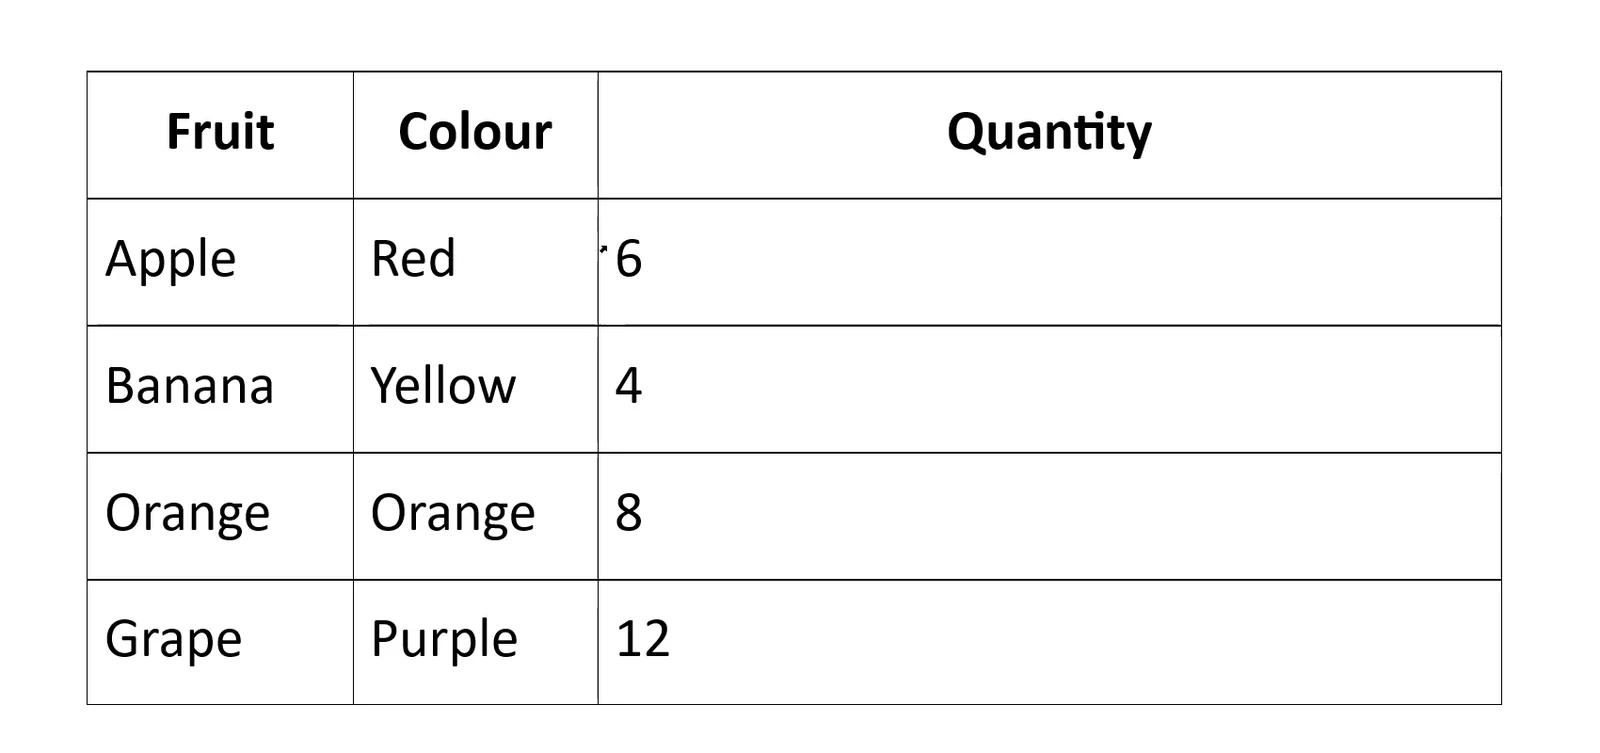
- Repeat for the other columns, then drag the table’s right edge in.
Which Method Should You Use?
AutoFit Contents
Quickest and neatest when the columns hold short text.
Resize Handle
Best for shrinking the whole table to fit a space by eye.
Column Borders
Best when each column needs its own width.
Quick Tips
Exact Widths
Type a value in the Width box in the Cell Size group to set a column precisely.
Hold Alt
Hold Alt while dragging a border to see exact measurements on the ruler.
Less Padding
Reduce the space inside cells: see how to remove margins inside table cells.
Smaller Text
Select the table and lower the font size to shrink rows as well as columns.
FAQs
How do I make a table smaller in Word?
Click in the table, then select Table Layout > AutoFit > AutoFit Contents, or drag the resize handle at the bottom-right corner.
How do I make a table fit the text in Word?
Use AutoFit Contents on the Table Layout tab. Each column shrinks to its longest entry.
Why can’t I make my table smaller?
The text may be too long or large, or the cells may have wide margins. Reduce the font size or the cell margins, then try again.
How do I make table rows shorter?
Drag the bottom border of a row up, or reduce the font size and the space before and after paragraphs.
How do I set an exact table width?
Right-click the table, choose Table Properties, tick Preferred width on the Table tab and enter a value.
How do I undo AutoFit?
Press Ctrl + Z straight away, or choose AutoFit > AutoFit Window to stretch the table back across the page.
Conclusion
To make a table smaller in Word, use AutoFit Contents for an instant fit, the resize handle for the whole table, or the column borders for full control. Microsoft lists every option in resize a table, column or row.
Joining tables after resizing? See how to merge tables in Word.
Related Tutorials
- How to Remove Margins Inside Table Cells in Word: 3 Methods
- How to Merge Tables in Word: 3 Easy Methods
- How to Make a Table in Word: 3 Easy Methods
Word Tutorials
Recently Added on Word Made Easy
Browse the complete collection for help with formatting, layout, pages, tables, images, and document setup.
For Microsoft support documentation, visit the official Microsoft guidance.


Leave a comment
Stuck on a step, or know a quicker way? Ask or share it below.